In this guide, I have explained some tips to fix the issue of auto-lock not working on iPhone. It is a feature on iOS that automatically locks your iPhone when the device stays unused for a while. With this feature, no one apart from you can access the iPhone.
If auto-lock is not working, it can pose a threat to your sensitive data present on the iPhone. Most users disable the auto-lock feature and then it doesn’t work. Also, having bugs on the iOS or low power mode can restrict the feature.
1. Enable Auto-Lock on iPhone
Start by checking whether you have enabled auto-lock or not.
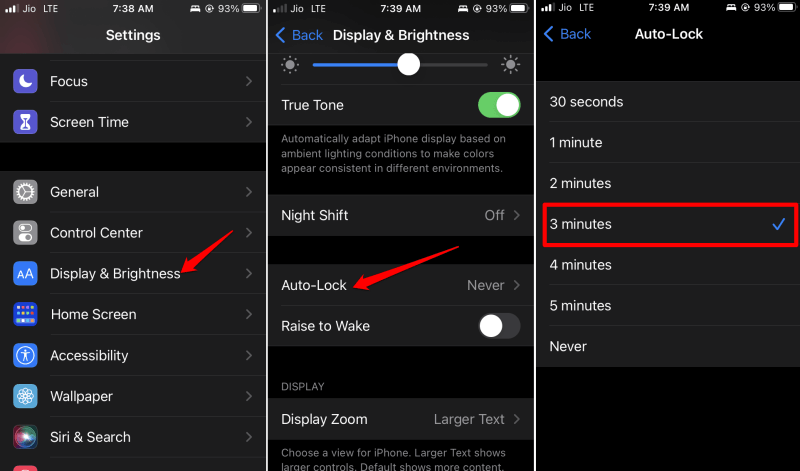
- Go to the iPhone Settings app.
- Scroll to Display & Brightness and tap on it.
- Go to Auto-Lock and tap on it.
- Select a duration after which iPhone will be locked automatically.
2. Install the Pending iOS Update
To manage bug issues on the current version of iOS installed on your iPhone, upgrade to a newer iOS build. To look for updates,
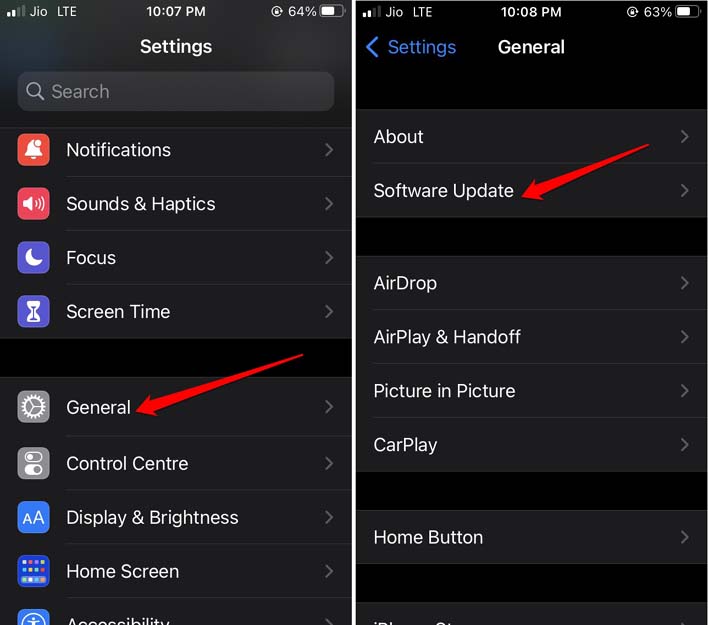
- Go to Settings > scroll down and tap on General.
- Tap on Software Update.
- If an update is available, tap on Download and Install.
Follow the instructions on the screen to complete the update.
3. Disable the Attention Aware Features on iPhone
When you look at your iPhone, the sensor near the front camera will block the auto-locking feature. Even though the feature is enabled, it won’t work. So, disable the attention-aware feature responsible for this.
- Go to Settings app > scroll to Face ID & Passcode. Tap on it.
- Navigate to Attention-Aware Features and tap the toggle beside it to turn it off.
4. Turn Off Assistive Touch in the iOS Settings
It has been seen that at times, the Assistive Touch feature under accessibility settings can create problems in the functioning of auto-lock on iPhone. Here is how you can turn off Assistive Touch on iOS.
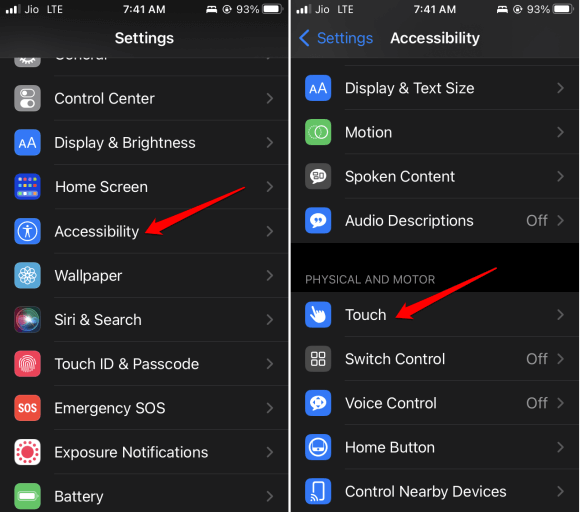
- Go to Settings app > scroll to Accessibility and tap on it.
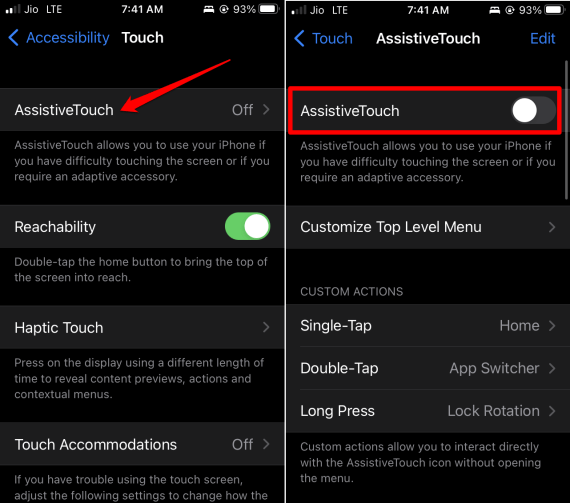
- Next, tap on Touch > Assistive Touch.
- Tap the toggle beside Assistive Touch to disable it.
5. Reset the Passcode of Your iPhone
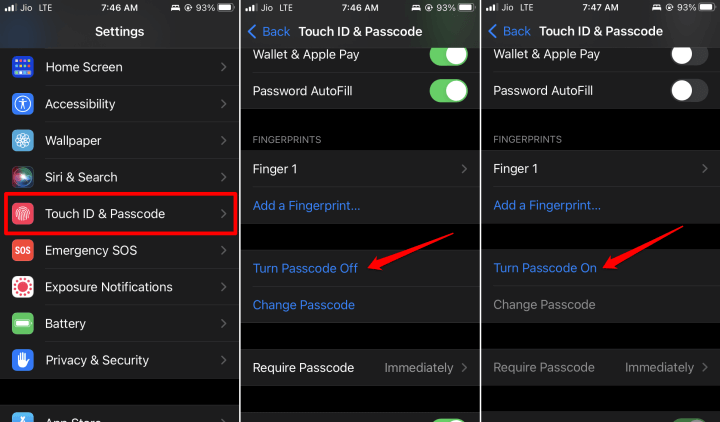
A few Apple users have stated that disabling and enabling the passcode has helped them make the auto-lock feature work on their iPhones. So, you should try this fix as well.
- Go to Settings app > tap on Face ID & Passcode.
- Enter your passcode to authenticate.
- Tap on Turn Passcode Off and enter the current passcode to confirm the move.
- Restart the iPhone.
- Go to Settings app > tap on Face ID & Passcode
- Tap on Turn Passcode On to enable it again on your device.
6. Turn Off Low Power Mode on iPhone
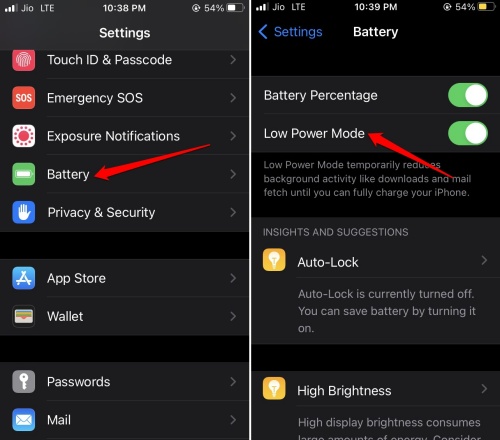
When low power mode is enabled to save battery power, certain features on iOS are restricted. This may cause the auto-lock feature to become unresponsive. Here are the steps to turn off Low power mode on your iPhone.
- Open the Settings app > go to Battery and tap on it.
- Under the battery settings, disable Low Power Mode by tapping the toggle beside it.
7. Restart the iPhone
Often, restarting the phone can solve the random snags on your iPhone.
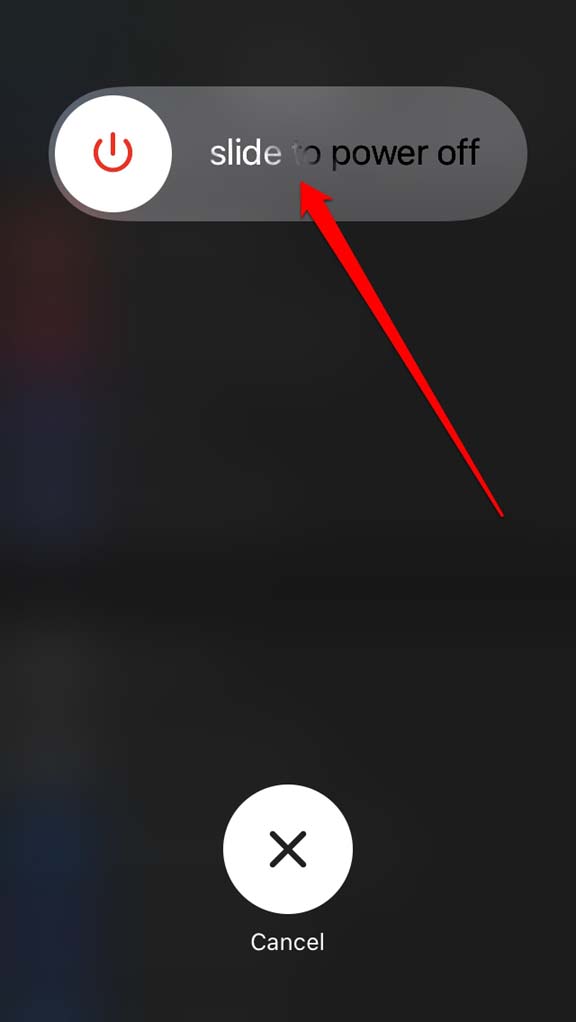
- If you are using a newer model of iPhone with Face ID ( iPhone X or later models), press and hold the Sleep/Wake button and the Volume Up button.
- Drag the slider to power off your iPhone.
- On older iPhone models, long press the Sleep/Wake button until you see the power off slider.
- Move the slider forward to turn off your iPhone.
Once your iPhone is switched off, turn it on by pressing and holding the Sleep/Wake button. Observe if the auto-lock is working. If not, try to reset the device settings, which I have explained in the next section.
8. Reset All Settings of the iPhone
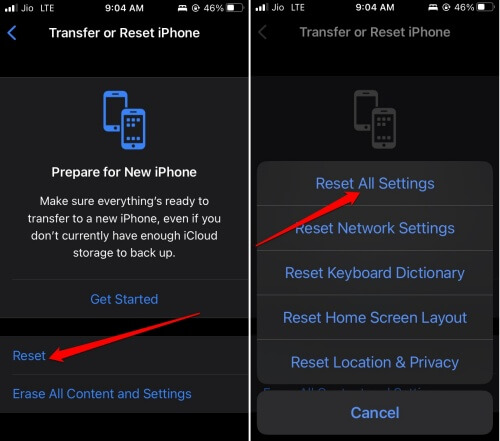
When no other fix is working and you continue to face problems with auto-lock, reset the iPhone settings.
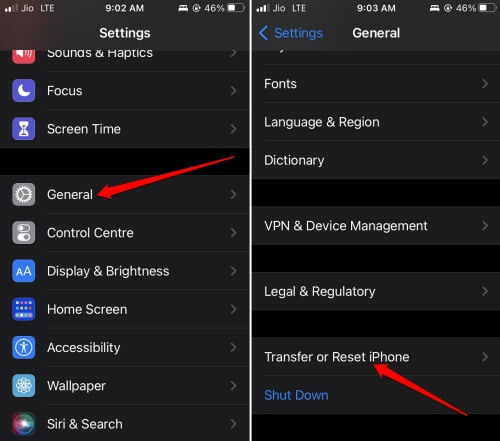
- Launch the Settings app > tap on General.
- Scroll to Transfer or Reset iPhone and tap on it.
- Then Tap on Reset > from the menu, select Reset All Settings.
- To confirm the reset and proceed with it provide the iPhone passcode.
Wrapping Up
Let us wrap up this guide on “How to Fix Auto-Lock not Working on iPhone“. Auto-lock is an important feature to safeguard your iPhone data from falling into unauthorized users. So, use the troubleshooting tips from the guide and resolve the issue now.

