In this guide, I will show you how to save a slideshow on iPhone. A slideshow is a collection of various photos stored on your iPhone. With a slideshow, you can bring together some images that may serve as a memory for any event.
Saving the slideshow of those photos allows you to play them whenever you want to relive your memories. I will also explain to you how to create a slideshow consisting of various photos.
How to Create Slideshow on iPhone?
Creating a slideshow with photos on iPhone is quite easy. If you want to save some images for slide shows, the steps are a bit different.
If you simply want to play the slideshow
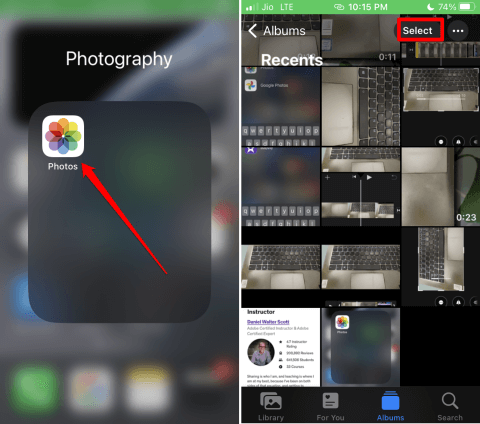
- Launch the Photos app. Tap on Select.
- From the repository of photos, select the photos you want to use in the slideshow.
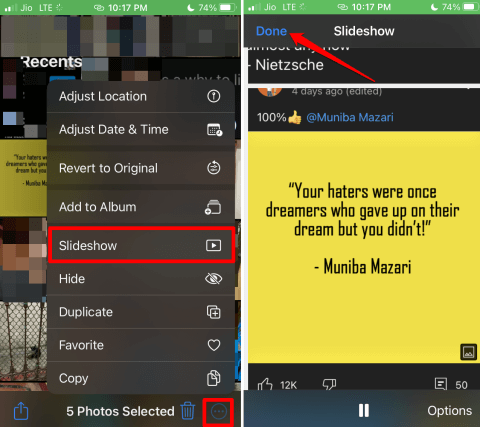
- Tap on the 3-dot icon.
- From the menu, select the option Slideshow.
- A preview of the selected photos slideshow will be generated.
- Tap on Done when you have finished previewing the slideshow.
How to Save a Slideshow?
To save the slideshow, follow these steps.
When you complete previewing the slideshow, the photos will remain selected.
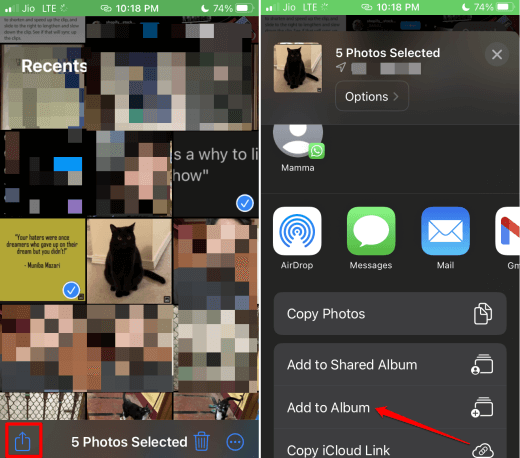
- Tap on the Share icon in the left corner.
- From the context menu, tap on Add to Album.
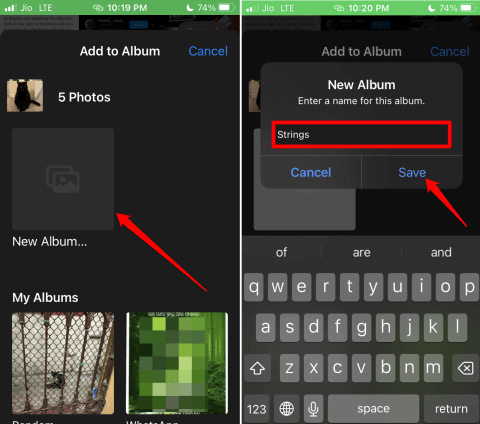
- Under Add to Album section, tap on New Album.
- Enter a name for the album and tap Save.
- At the bottom of the screen, tap on Albums.
- Tap on the album you created in the 3rd and 4th steps.
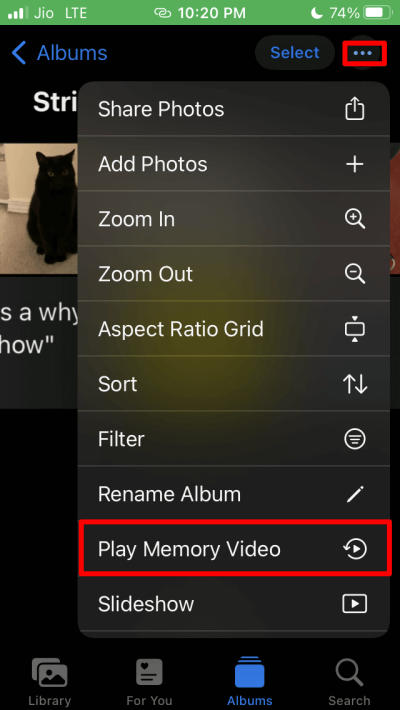
- Next, tap the 3-dot icon and from the menu, select Play Memory Video.
How to Customize Slideshow on iPhone?
Here are some additional customizations you may want to perform on the slideshow you created off the image collection.
1. Sort Photos within Slideshow
To sort the photos within the slideshow album in various order, follow these steps.
- Open the album.
- Tap the 3-dot icon at the right upper corner.
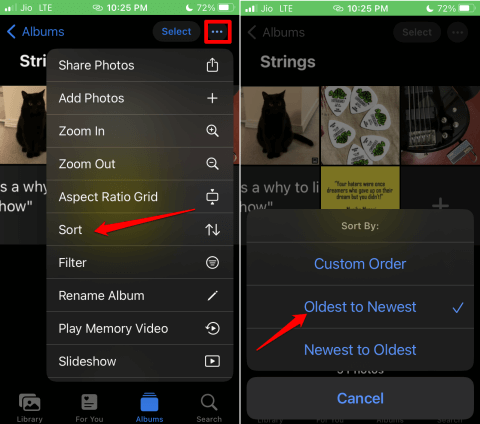
- From the menu, tap on Sort.
- Select the type of sorting you prefer.
2. Rename the Slideshow Album
If for convenience, you want to rename your slideshow album, follow these steps.
- Open the album.
- Tap the 3-dot icon at the right upper corner.
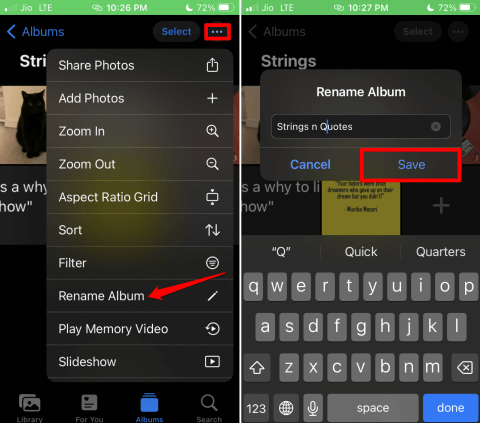
- From the menu, tap on Rename Album.
- Enter the new name and tap on Save.
3. Add More Photos to the Slideshow
Sometimes, you may miss out on a few photos that may be relatable to the slideshow album you have created. You can always add more photos to an existing slideshow album.
- Launch the Photos app > tap on Albums.
- Then open the slideshow album in which you want to add more photos.
- Tap the 3-dot icon.
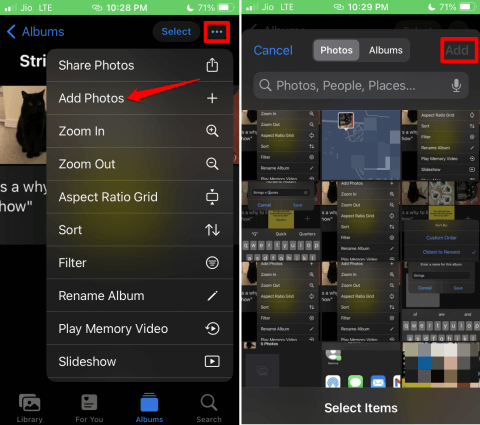
- From the menu, tap on Add Photos.
- Select the Photos from Photos or other Albums and tap on Add to integrate into the slideshow album.
4. Delete the Slideshow Album
If you want to delete the slideshow album, go for these steps.
- Inside the Photos app, tap on Albums.
- Open the designated slideshow album.
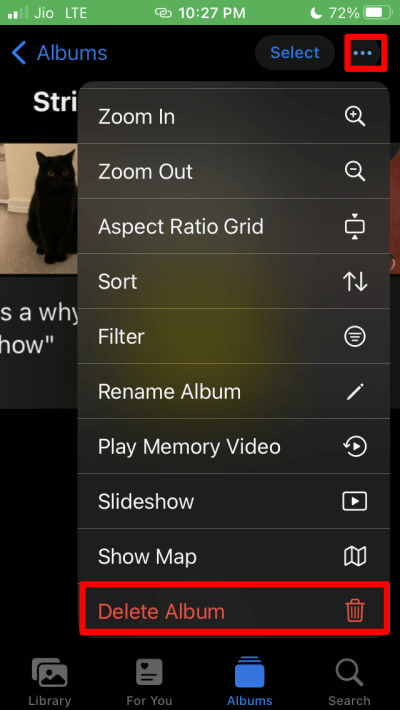
- Tap the 3-dot icon at the right upper corner.
- From the menu, tap on Delete Album.
For all the other slideshow albums that you may have created, follow these same steps to delete them.
5. See the Location Where the Images Were Taken
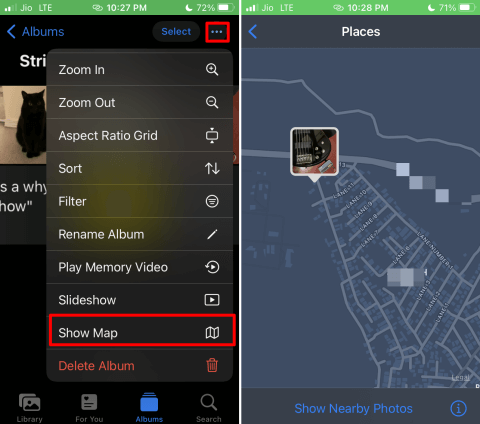
You can point out the precise location on the map where the photos you have collectively organized for a slideshow album have been captured. Here are the steps for that.
- Open the slideshow Album under Photos > Album.
- Tap the 3-dot icon.
- From the menu, tap on Show Map.
The precise location of each photo in the slideshow album will appear on the map.
Also Read- Best Apps to Add Music to Video
Wrapping Up
Now, you know how to organize some of the photos important to you on your Apple iPhone and create a slideshow using them. Also, you can save them separately in an album. Later, at your convenience, you can play the slideshow of those images.

