Are you not getting emails on iPhone Mail app? Then you need to check this guide and know the various troubleshooting tips that you can use to fix this issue. Although instant messaging apps have taken the forefront of communication, emails are still considered important.
For professional interactions, emails are always the first choice. Emails make communication far more organized. Now, there are a few reasons that commonly lead to you not getting emails on the iPhone mail app. Let’s check them out first.
Why You Are Not Getting Emails on iPhone Mail App?
One of the possible reasons can be not having the iCloud Mail option enabled in iOS settings. If you are using mobile data, then check that the iPhone mail app has been granted to utilize the mobile data. You must check that pushing new updates such as emails via Push service is active. Otherwise, you will miss the mails.
Have you turned off notifications for the iPhone mail app? Then, you will surely not receive any updates when a new email arrives in the mail app inbox. If you are not getting emails on the iPhone Mail app, other reasons can be bugged iOS versions installed on your iPhone. It may be the iCloud mail server that may be down for maintenance.
Also Read- Fix LTE/4G Not Working on iPhone
Troubleshooting Tips to Fix Not Getting Emails on iPhone Mail App
Here are the various fixes that you can try out.
1. Restart the iPhone
It could be just a minor glitch that showed up out of the blues causing the issue with the iPhone Mail app. You can try to restart the iPhone to fix the issue.
- Press the side button of the iPhone.
- You will be redirected to a new screen with the option “Slide to Power Off“. tap and slide as instructed.

- After a few seconds, again press the side button to bring back the iPhone to life.
- Wait for internet connectivity to establish and check if you can get the unread messages.

2. Update the iOS to a Newer Build
To fix the bugs on the current build of iOS upgrade to the latest build. To search for a new iOS version,
- Launch the Settings app.
- Tap on General > Software Update.
- Let the device search for any available update.

- You will see an option Download and Install if a new iOS build is available for installation.
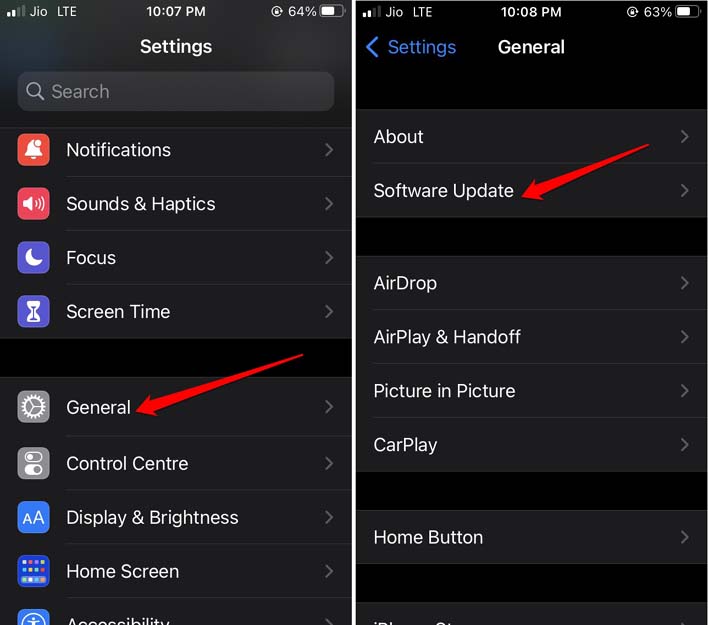
After installing the iOS update you should be able to fetch new emails on the iPhone mail app if it was the buggy iOS causing the problem.
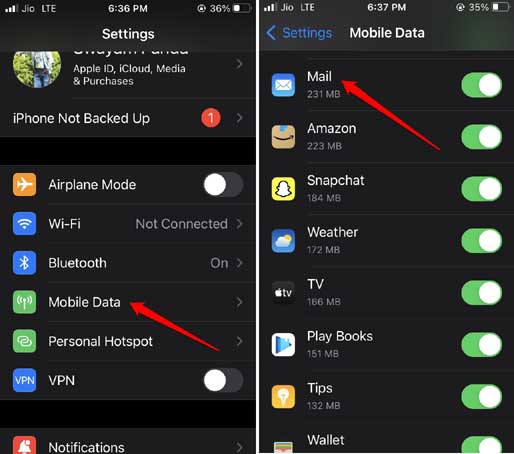
3. Allow Mobile Data Use for Mail App
You need to ensure that mobile data use has been granted to the iPhone mail app. To check that,
- Go to the Settings app.
- Tap on Mobile Data.
- Scroll to the app listing and navigate to Mail.
- Tap on the switch beside Mail to enable mobile data.

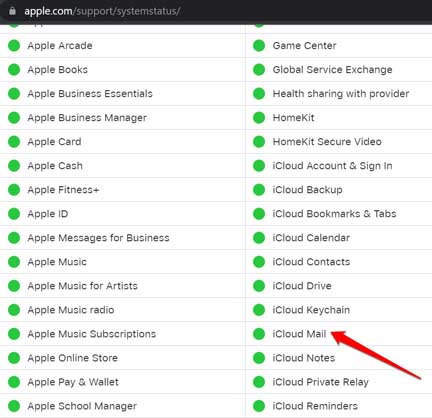
4. Check if the iCloud Mail Server is Down
You can visit the Apple System Status page to check if the iCloud mail server is down. Normally, the Apple services are quite robust and there are very rare instances of servers going down. Still, visit the page linked above and check.
As of this writing, the iCloud Mail is working just fine. Check the screenshot below.
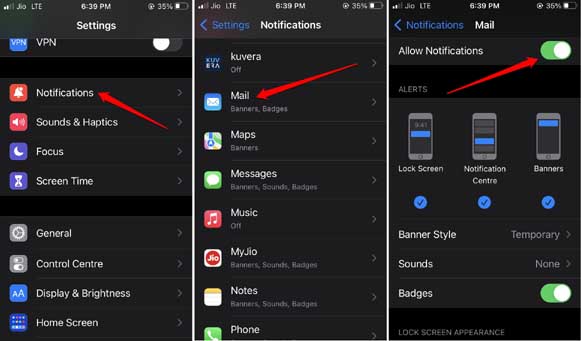
5. Allow All Notifications for iPhone Mail App
Make sure that all types of notifications are enabled for the iPhone mail app. otherwise, you will miss out on your emails.
- Open the Settings app.
- Navigate to Notifications and tap on it.
- Go to Mail and tap on it.
- Tap the switch beside Allow Notifications and enable it.
- Under the Alerts section, tick mark all the options, Lock Screen. notification Centre and Banners.

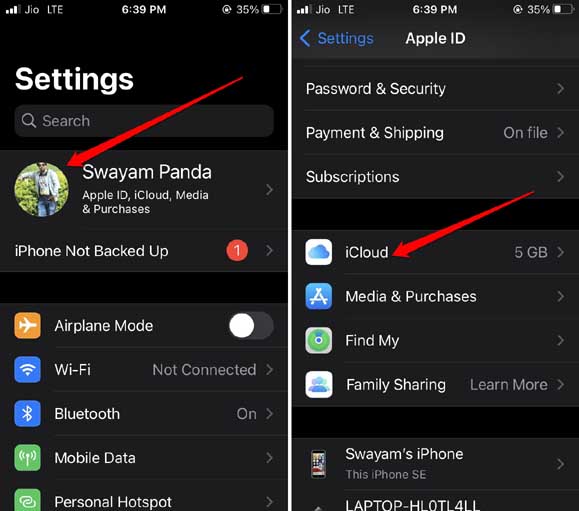
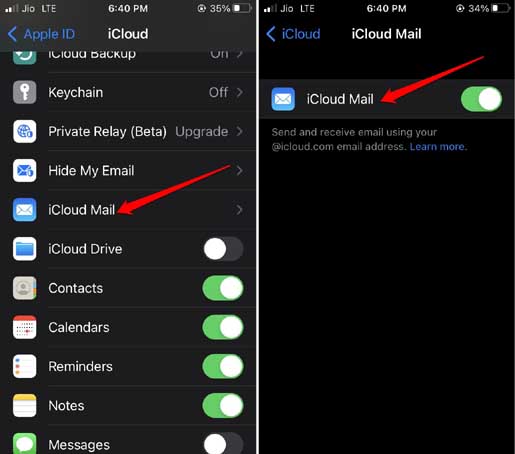
6. Enable iCloud Mail App on iOS
It is very important to enable the Mail app under iCloud settings to receive all the latest emails.
- Open the Settings app.
- Then tap on the Apple ID.
- Tap on iCloud.

- Scroll to iCloud Mail and tap on the switch beside it to enable the feature.

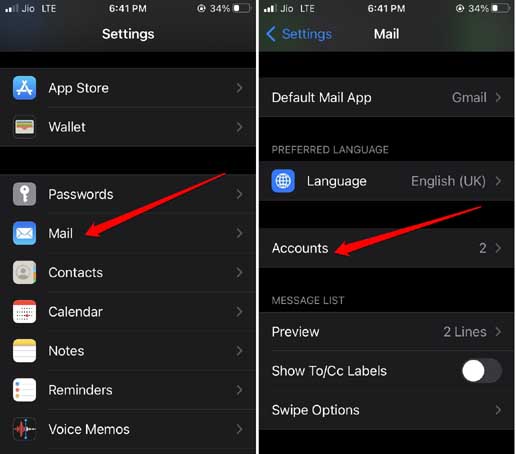
7. Enable Email Fetch for iPhone Mail App
With Fetch enabled all the latest emails will be available on your mail app inbox.
- Go to the Settings app.
- Under that, scroll to Mail and tap on it.
- Then tap on Accounts.

- Tap on Fetch New Data.
- Enable Push by tapping the switch beside it.
- Then navigate to the tab Fetch and set it to Automatically.

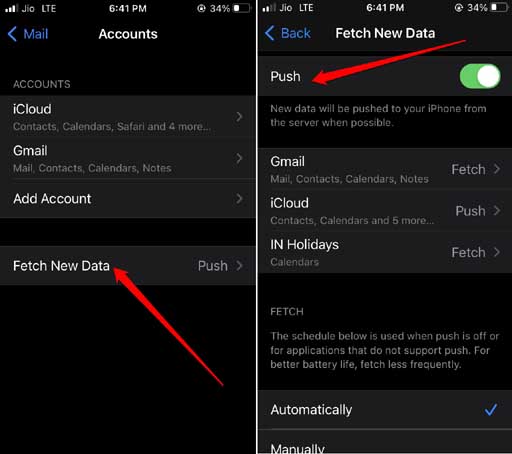
When an app doesn’t support the Push service, then Fetch comes into action though it will consume more battery of your iPhone.
Also Read- Fix iPhone Camera Black Screen Issue
8. Do You Have Sufficient Storage Space on iCloud?
You need to understand that Apple only grants you a free iCloud storage of 5 GB. If that space is filled up with backups of all kinds, including emails, you may not receive updates about new emails on the iPhone mail app. You need to check the iPhone Storage and clear out space on the iCloud.
- Open the Settings app.
- Tap on your Apple ID.
- Then tap on iCloud. Under iCloud settings, You will see the storage distribution on your iCloud connected to your Apple ID.
- Tap on Manage Storage to delete unnecessary files or offload/delete apps to create more storage for sending emails from the iCloud account.


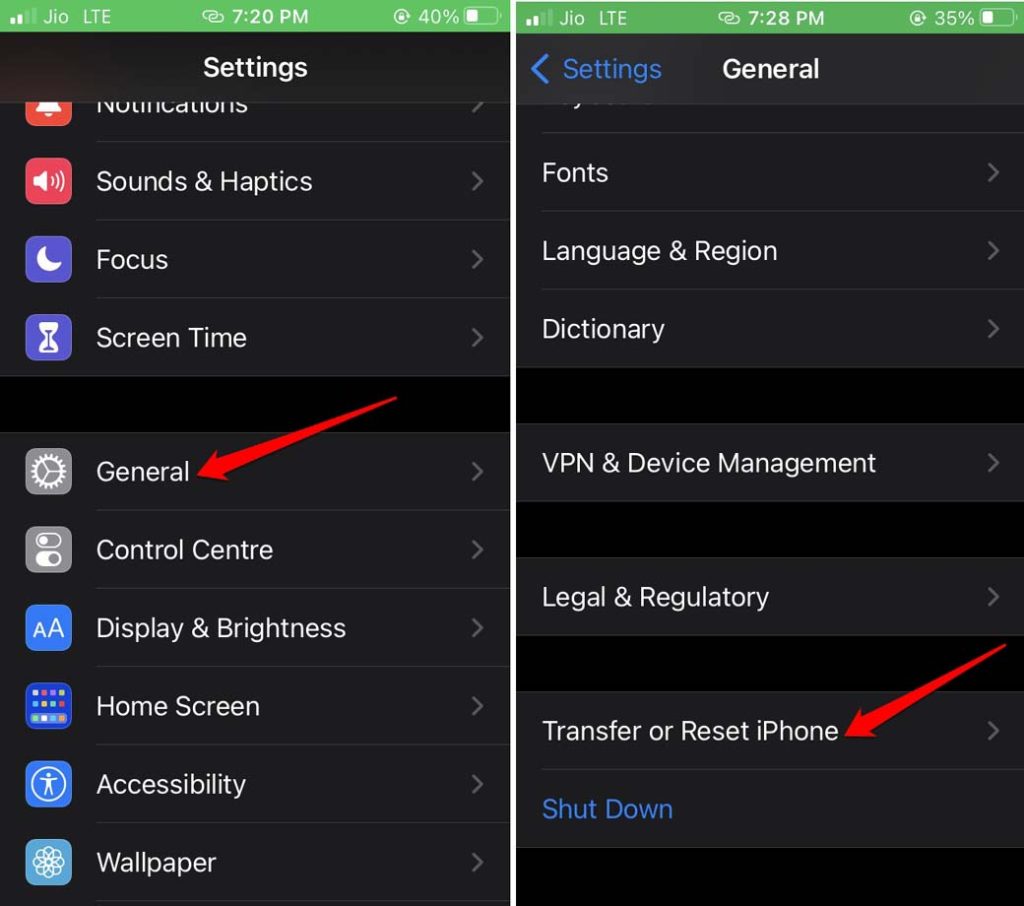
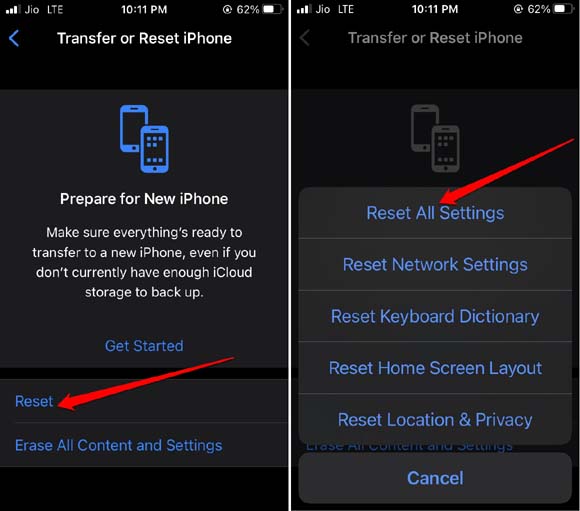
9. Reset All Settings of iPhone
If most of the troubleshooting tips are not working, then try to reset the iPhone. Here are the steps to take the iPhone back to its factory state. Mind you that doing so will erase all the data on the iPhone. So, before resetting the iPhone take a backup of your data.
To reset all the settings on iPhone,
- Open the Settings app.
- Tap on General.
- Scroll to Transfer and Reset iPhones. Tap on it.

- Tap on Reset > Reset All Settings.

- Enter the passcode when asked.
The iPhone mail app should showcase new emails once the iPhone reboots and is properly set up.
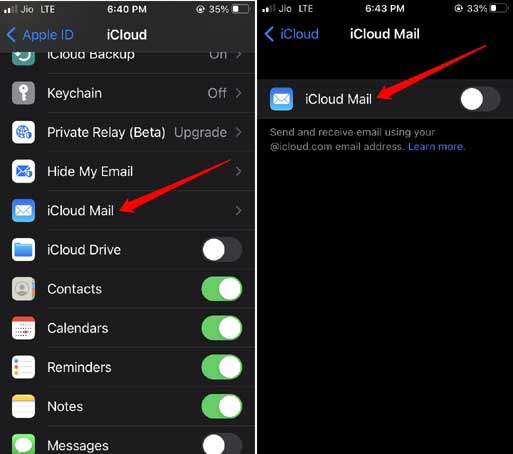
10. Disable and Re-enable iCloud Email
When you disable and re-enable the iCloud mail app, the server updates with the latest emails, and they are pushed out to the iPhone mail app. This trick always works when you are not getting emails on the iPhone mail app.
- Open the Settings app.
- Tap on your Apple ID.
- Next, tap on iCloud.
- Navigate to iCloud Mail and tap on it.
- Tap on the switch to disable it.

- Then restart your iPhone.
- Follow Steps 1 to 5 and tap on the switch beside iCloud Mail to enable it.
Wrapping Up
As users prefer email for making communication on a professional front, they must fix any issue with the mail application at the earliest. I hope the tips in this guide will help in troubleshooting the issue of not getting emails on the iPhone mail app.
 in 2024")

")