We often face errors on Android, and the “not registered on network” error is one of them that many Android users face on their phones. If you are getting this error, it means that you will not be able to make calls, send texts, or use internet connectivity.
If this happens during an important time, it can be a very frustrating situation. However, this error mostly occurs in Samsung phones. Don’t worry; it’s not a big issue that we can’t solve alone. There are some fixes that will surely solve this problem right away.
Below, we’ve mentioned the most useful and basic fixes that you can use instantly. We have also provided some important solutions which will be helpful if the basic methods don’t work. Overall, you will get the best ways to fix the “Not registered on network” error on Android.
What Does Not Registered on Network Mean?
The ‘Not registered on network’ error means a problem with the carrier network. This message will appear if your mobile phone cannot connect to the carrier network.
As a result, you will not be able to receive or make calls, use the Internet, or send texts. To learn more about the reasons and solutions behind this error, continue reading this article.
How To Fix Not Registered On Network On Android?
Here, we have compiled a list of the best ways to fix the “Not Registered On Network” error on Android while providing step-by-step guidance.
1. Turn Airplane Mode On and Off
The first step that you should take is to toggle Airplane Mode on and off. Doing this will refresh the carrier network and fix the issue.
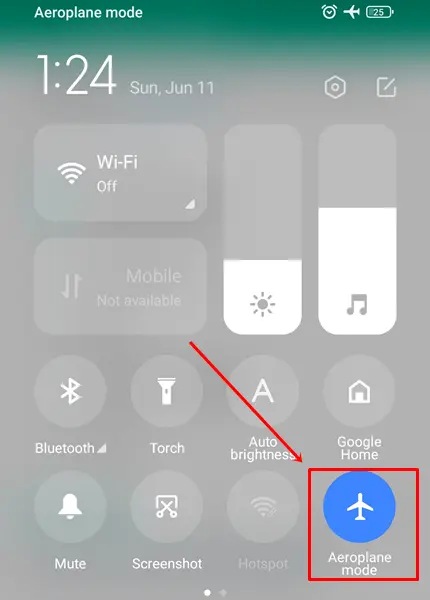
- Swipe down from the top of the screen to access quick settings.
- Tap on Airplane mode to turn it on and wait for a few seconds.
- Now tap again to turn it off and check if the issue is resolved or not.
2. Restart Your Phone
If toggling Airplane Mode on and off doesn’t work, then another step that you can take is to restart your device. Yes, if it is a glitch or bug, then restarting the phone will solve the problem. If you still experience this error, then move to the following method.
3. Remove and Reseat the SIM Card
Sometimes, the phone can’t read the SIM card and there can be various reasons for this. This could be because you haven’t inserted the SIM card properly or you’ve recently dropped the phone on the floor.
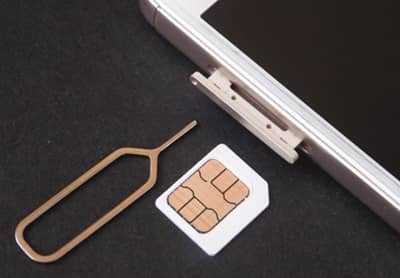
Use the SIM card ejector tool to eject the SIM card. Then, set the SIM card properly and put it back.
4. Manually Select Your Network
Due to weak signals, your phone can’t be able to select a network automatically. In such cases, you can manually select the network.
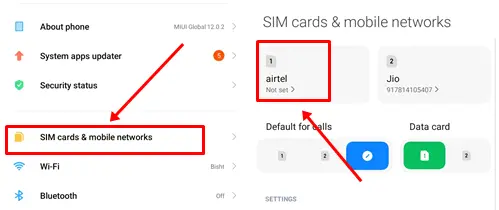
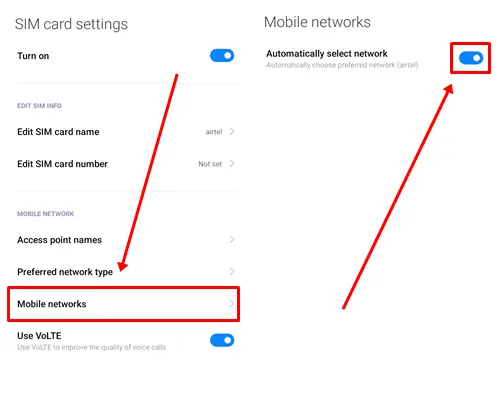
- Go to Settings > Sim Cards & Mobile Networks > Select Sim.
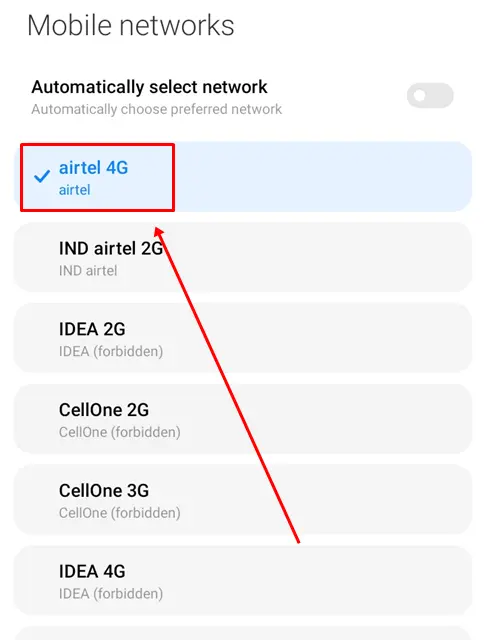
- Tap on Mobile Network > Turn Off Automatically Select Network.
- After this, click on Continue, and it will start searching for networks.
- Now Select the network according to your carrier provider.
5. Change the Network Mode
If the above method doesn’t work, you can try changing the network mode. It may help your device to connect to a stable connection.
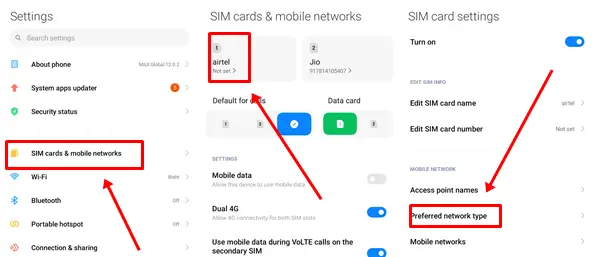
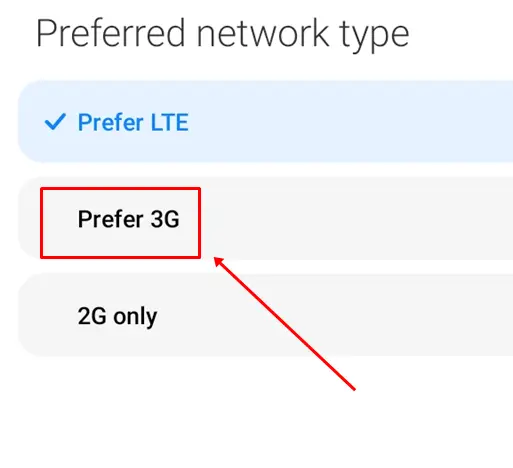
- Go to Sim Cards & Mobile Networks > Select Sim > Preferred network type Or you can type your preferred network type in the settings search bar.
- Tap on 3G Network and check if the error is fixed. If not, select 2G Network.
6. Update APN Settings
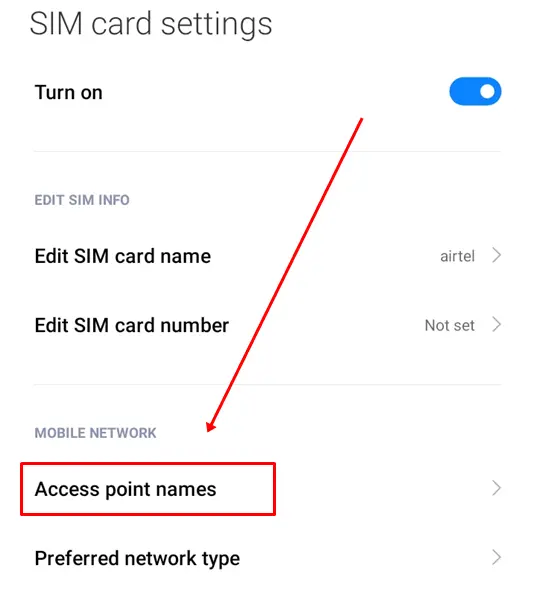
If you recently edited your APN (Access Point Name) settings or changed your network provider, updating the APN settings may solve the problem.
- Go to phone Settings > Sim Cards > Select Sim > Acess Point Name.
- Now, check if your APN settings are correct. Do the required changes if they are wrong. You can get the correct APN settings by calling your carrier provider or visiting their website.
7. Use Different SIM Card
It could be possible that your SIM card is damaged which could be the reason why it is not connecting to the phone. You can confirm this by inserting a different SIM card into your phone. If it works properly, you should go to your SIM provider’s store to get a new SIM.
8. Reset Network Settings
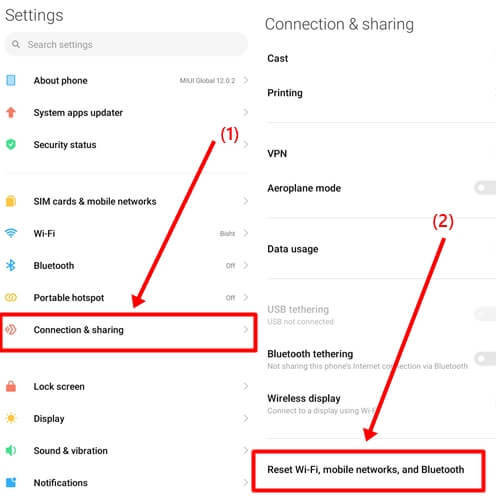
If none of the methods work, you’ll need to reset the network settings. This will reset all settings to default.
- Go to Settings > Connection & Sharing > Reset Wi-Fi, and mobile networks.
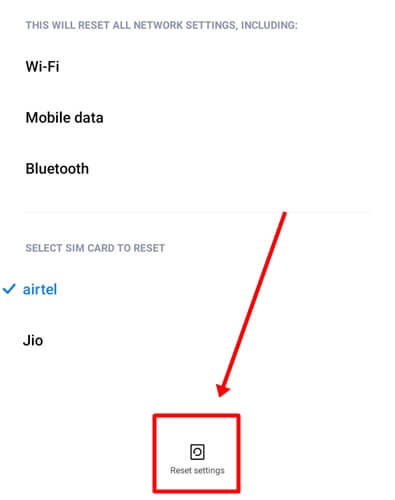
- Click on Reset Settings.
Enter your phone lock password and wait for the process to complete.
9. Update Your Android Phone’s Software
Check if there is an OS update available for your phone because sometimes an outdated OS version can cause a not registered-on network error.
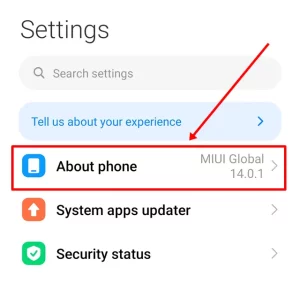
- Go to Settings > About phone.
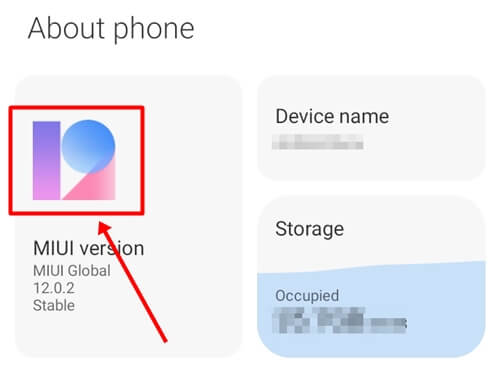
- Click on the MIUI version Option.
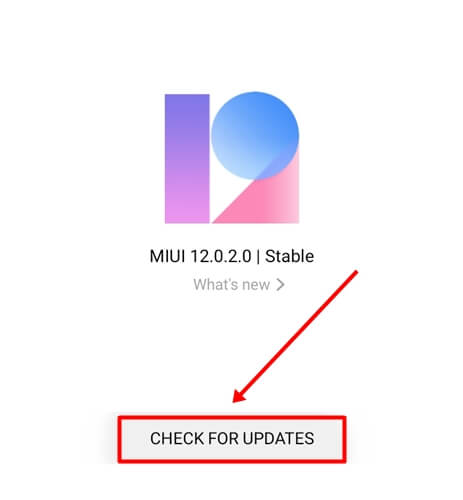
- Tap on the Check For Update Button.
- If it will show you the update option, then click on it and wait for your device to update.
10. Enter Service Mode (For Samsung Phone)
In Samsung devices, the radio signal is important for network connectivity. If, for some reason, it gets turned off or there is any other issue related to it, then you might be facing a Samsung is not registered on network error.
- Enter *#*#4636#*#* in dialer pad.
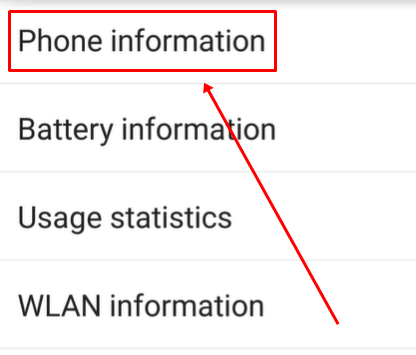
- Tap on Phone/Device Information.
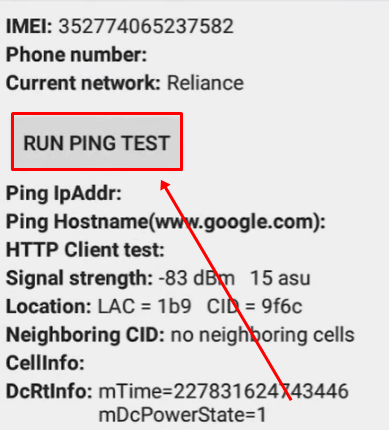
- Press the Run Ping Test button.
- Now, click on the Turn On Radio button.
Lastly, restart your Samsung phone and check if this solves the problem or not.
Also Read- Android Secret Codes
11. Contact Service Provider
If nothing works, you should contact your service provider. If there is a problem with your SIM card, they will definitely help you solve the problem.
You can also try inserting your SIM card into a different device to check if it is working or not. If your SIM card works on any other phone, you should visit a mobile service center.
Conclusion
That’s all for this article. I hope these methods helped you to resolve the Not Registered on Network error. We have tested all these methods and compiled them in this list as the best ways to solve this problem.
If you found this article informative, please do share it with others who may need it. Also, feel free to share your thoughts in the comment section below.

 Enter your phone lock password and wait for the process to complete.