It is essential to keep Windows updated for your PC to function smoothly and stay protected from viruses and other cyber threats.
Regular updates are important to keep up with cumulative Windows updates, driver updates, or security patches. But what if Windows 10 remain stuck on the Checking for Updates screen, and the process goes on forever?
You can encounter this issue while manually trying to update your PC. However, sometimes this issue might occur even when Windows tries to search for updates automatically in the background.
So why does Windows 10 get stuck on Checking for Updates and not move further? This might happen when your internet is slow, and Windows cannot connect to the servers to find the latest update available.
Other reasons may include incorrect date and time, antivirus on your PC, or an issue with Windows Update Service. Let’s discuss how you can fix this issue.
Ways to Fix Windows 10 Stuck on Checking for Updates
Though Windows is improving daily and Microsoft is working hard to make the experience smoother for the users, there might be instances when you encounter such issues. Below are the troubleshooting steps to fix Windows 10 stuck on checking for updates.
1. Restart the PC
Before you head on to any other troubleshooting step in this article, restart your PC. If any temporary glitch or bug were causing this issue, then a simple reboot would fix it, and you won’t have to go through the hassle of following other steps in this article.
2. Check Your Network
If your internet is slow, then that’s likely to cause this issue. You will have to check your internet speed and troubleshoot it. To check the speed of your network, visit SpeedTest or Fast.com.
 If your internet is slow, then you will have to fix it. Connect to a different network. If no other network is available, switch to the 5GHz band. If you use a router and your PC has an ethernet port, connect your PC to the router through the ethernet cable.
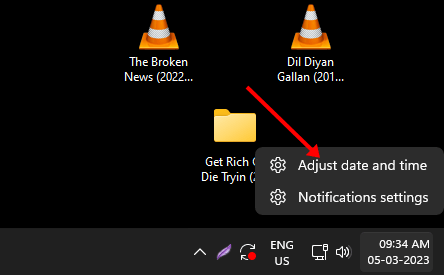
3. Change the Date and Time
If your PC’s date and time are incorrect, that might cause the issue. Set the correct date and time to fix the issue you have been facing.
- Right-click on the clock on the taskbar and then click on Adjust Date and Time.

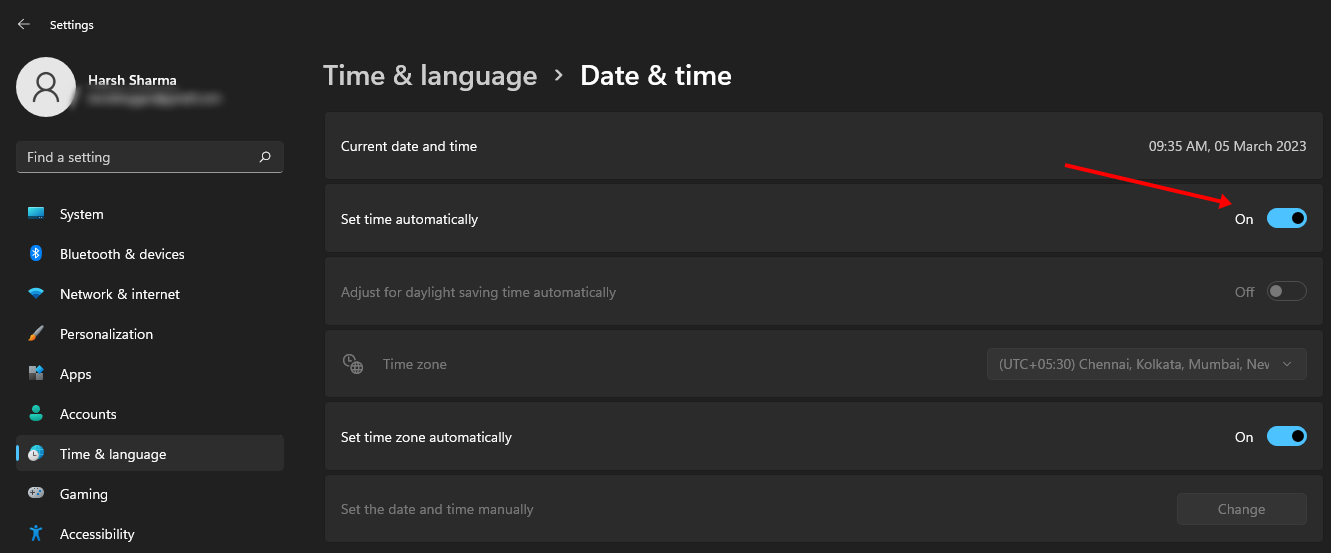
- Turn on the toggle for Set Time Automatically.

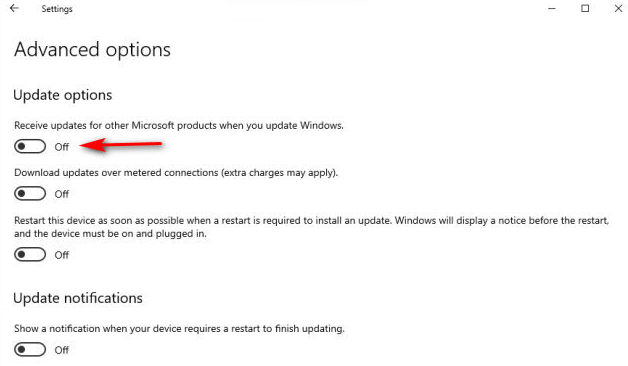
4. Turn Off Updates for Microsoft Products
If Windows 10 is stuck checking for updates, you can try turning off updates for Microsoft Products. To do so, follow the steps given below-
- Open Settings from the Start Menu.
- Here, click on Update & Security option, and then click on Advanced Options.

- Under the Update Options, turn off the toggle for Receive updates for other Microsoft products when you update Windows.

- Restart your PC to save the changes.

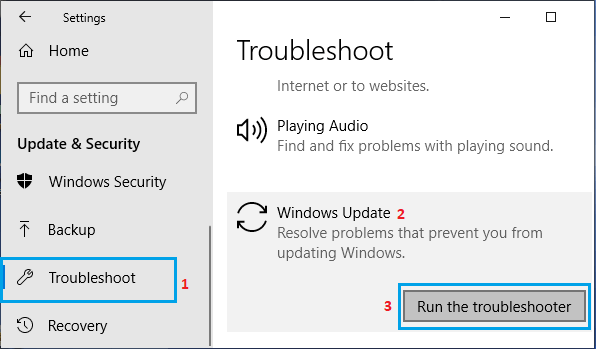
5. Run Windows Update Troubleshooter
Try running the Windows Update Troubleshooter if you are still facing this issue. To do so, follow the steps given below-
- Press Windows + I key combo to open Settings.
- Now, click on Update & Security.
- On the left sidebar, click on Troubleshoot.
- Click on Windows Update and then on Run the troubleshooter.

6. Restart Windows Update Service
If Windows Update Service is not working properly, that might cause the issue. Restart the Windows Update Service by following the steps given below-
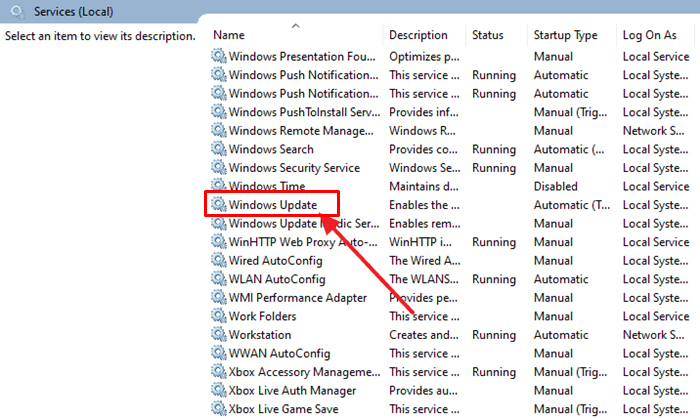
- Press the Windows key, type Services, and then press Enter.
- Search for Windows Update; right-click on it and then click on Restart.

7. Disable Antivirus
Try disabling Windows Security if Windows 10 is stuck on checking for updates. You can do so by following the steps given below-
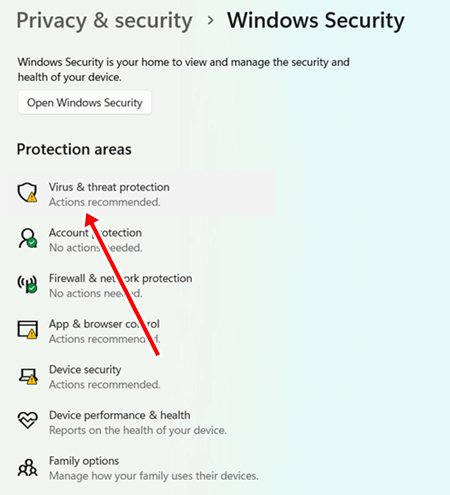
- Open Start Menu, search for Windows Security and open it.
- Now, click on Virus & threat protection and then on Manage Settings.

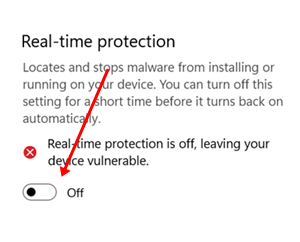
- From here, disable Real-time protection.

Note- If you have any third-party antivirus installed on your system, disable or uninstall it.
8. Update Windows 10 from the ISO
Lastly, if nothing helps, you can update your Windows 10 using the ISO. The steps given below will guide you on how you can update Windows 10 from the ISO-
- Click on this link, and you will be headed to the official download page of Windows 10 ISO.
- Here, click on the drop-down menu under Select Edition and select the edition of Windows 10 you want to download; click on Confirm.
- Next, you must select the product language; once done, click on Confirm to continue ahead.
- You will now see two download buttons, i.e., 64-bit Download and 32-bit Download. Choose any download option as per your system architecture.
- Once the ISO is downloaded, open File Explorer by pressing Windows + E keyboard shortcut and head to where the file is saved.
- Right-click on the ISO file and then click on Mount.
- Head back to the main screen of File Explorer and double-click on the mounted Windows 10 ISO to open it.
- Double-click the Setup.exe file to execute it; click Yes when the UAC prompt appears.
- In the Windows 10 installation wizard, check the checkbox for ‘I want to help make the installation of Windows better’ and click on Next.
- Now, click on Accept to accept the End User License Agreement.
- It will take some time to prepare the installation. When the Ready To Install window appears, click Change what to keep.
- Select Keep personal files and apps and then click on Next.
- Wait for the process to complete, and when your PC restarts, sign into your account.
Final Words
If Windows 10 is stuck on checking for updates, you can follow the abovementioned steps to fix the issue. This is a general issue that can be encountered on Windows, and if you aren’t able to update Windows, then this article should solve it. You can update Windows 10 through the ISO file if none of the steps help you.

")
")