Windows 11 preparing automatic repair is a standard Windows delusion that usually occurs when you start Windows Automatic Repair to fix some software-related issue. But, rather than repairing the problem, it makes the PC get stuck on the black screen.
So, in case you are also getting frustrated with this annoying error and stuck on the automatic repair loop in Windows 11 PC. Then, there are a few kinds of solutions that we can propose.
But, just as with every other problem that we are supposed to fix, let’s figure out what could be the root causes due to which this type of issue occurs. So, let’s start with the guide.
What Are The Causes of Automatic Repair Loop?
- The master boot record is responsible for being part of the file system and helping Windows to read whatever it needs to read. So, if that gets corrupted, the operating system apparently cannot work properly.
- Also, in case the hard disk drive for the SSD is not connected correctly, meaning a loose connector, then chances are high that you get this type of error.
- It is possible that sometimes changing BIOS settings causes this issue.
- It could be a software-related problem because the applications that you are using aren’t compatible with your PC.
However, since we can recognize the root cause or the potential originators of this kind of behavior. Therefore, let’s start with the troubleshooting guide and see one of the most common troubleshooting techniques that help you fix automatic repair loop issues in Windows 11 PC.
Ways to Fix Automatic Repair Loop in Windows 11
You can use various methods to fix this issue, but here we have only mentioned those fixes that our team has tested before. So, you can rely on these methods as these will not harm your PC.
1. Disable Antivirus Protection
Most of the time, the antivirus causes this kind of issue. So, in my opinion, disabling it will be the right option for you. However, in case you are not familiar with the steps that let you disable it, follow the guidelines we have mentioned below:
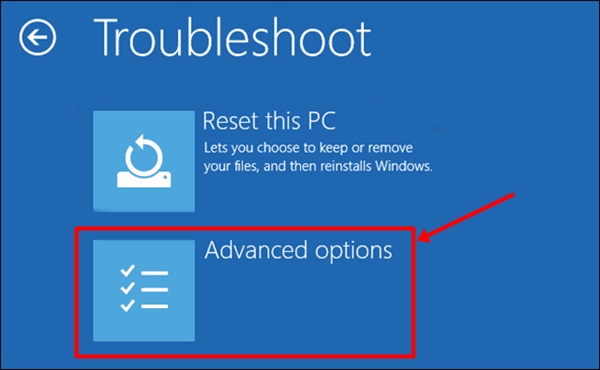
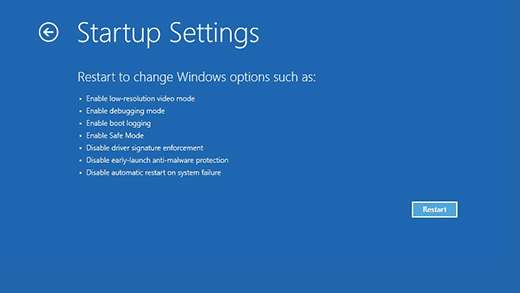
- First of all, when the Startup Automatic Repair gets pop-ups, you can simply hit the Advanced options.
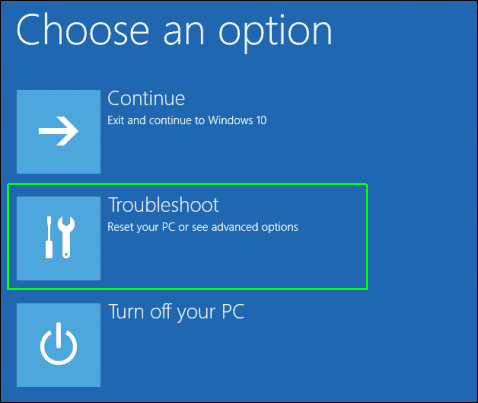
- After that, click on the Troubleshoot > Advanced Options.

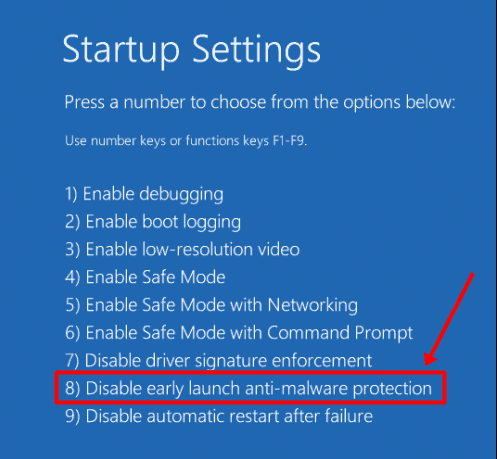
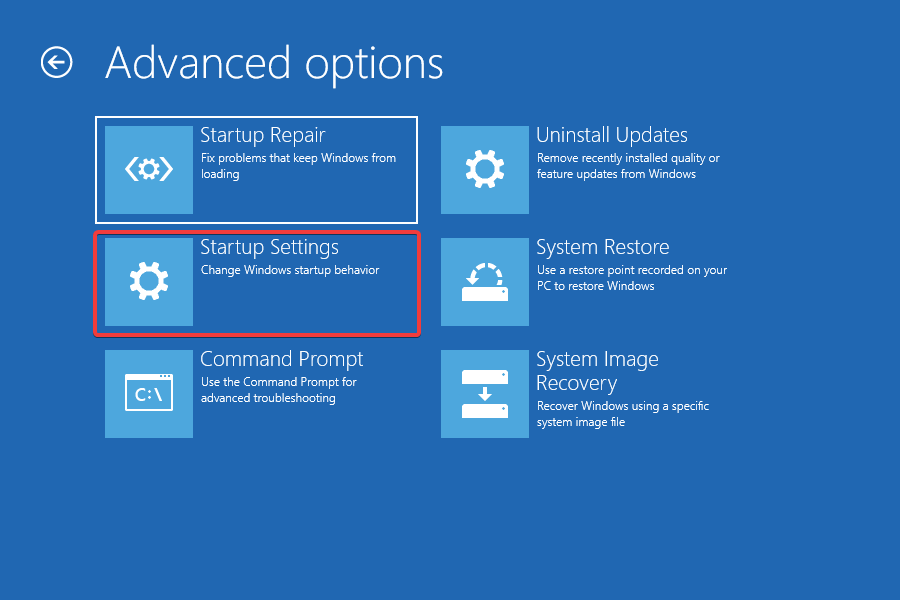
- Then, hover to the Startup Settings and select the Disable early launch anti-malware protection option. Now, reboot your Windows 11 PC and check if the issue gets resolved.

2. Delete Problematic Files
Sometimes, the files that become inexecutable might become the main culprit to this kind of error. So, in case that deleting them will be the right option for you. Therefore, to delete them, you need to follow the steps we have mentioned below:
- First of all, launch the Command Prompt and use the below command:
cd C:\Windows\System32\LogFiles\Srt
SrtTrail.txt
- Now, when you notice the “Boot critical file c:\windows\system32\drivers\tmel.sys is corrupt“, then enter the command:
cd c:windowssystem32drivers
delvsock.sys
- That’s it. Now, exit from the command prompt screen and restart your Windows 11 PC.
3. Try to Rebuild BCD
Many users previously reported rebuilding the BCD and gave positive reports regarding fixing this issue. So, we recommend you try this once by following the given steps:
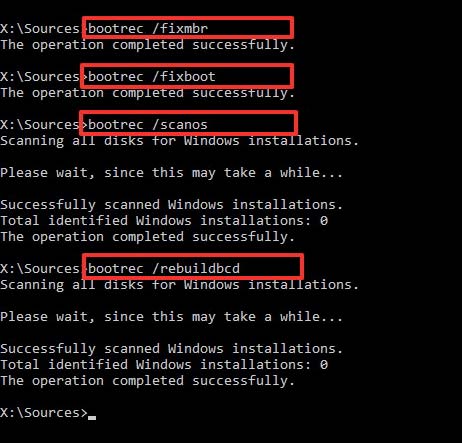
- Initially, after booting from the System Recovery options, you can simply launch the Command Prompt.
- After that, execute this command: “bootrec.exe/rebuildbcd, “bootrec.exe/fixmbr” and “bootrec.exe /fixboot“.

- That’s it. Now, you’ll see that the Automatic Repair Loop gets fixed.
4. Disable Automatic Startup Repair
If this feature is enabled on your Windows 11 PC, we recommend you disable this option as it is not always helpful and doesn’t always fix booting issues. So, disabling this option will be the right choice for you.
- First of all, you are required to access the Advanced Repair Options from the Automatic Repair blue screen.
- Then, select the Troubleshoot option and click on the Advanced Options.
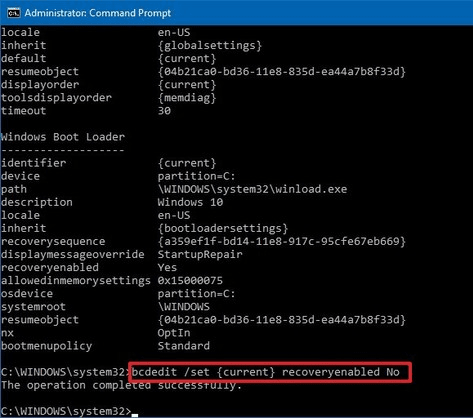
- Now, on the next page, open the Command Prompt. Then, execute this command: bcdedit /set {default} recoveryenabled No. Once this command gets executed successfully, it will disable automatic startup repair on your Windows 11 PC.

5. Restore Windows Registry
You can also try restoring the Windows Registry using the Command Prompt. So, here are the steps that you need to follow:
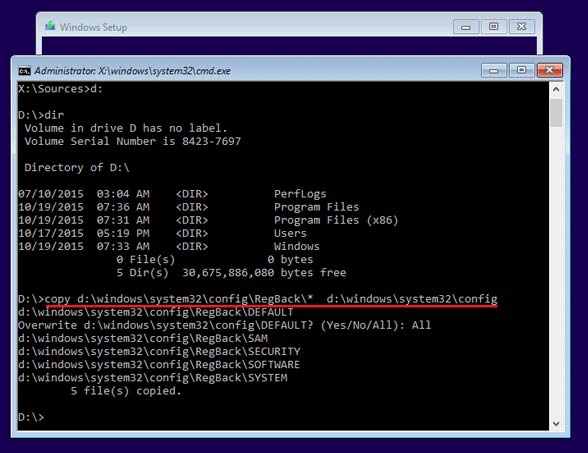
- Open the Command Prompt and execute the command “copy c:\windows\system32\config\RegBack* c:\windows\system32\config.”

- After that, select everything shown and hit the Enter key. Then, close the window and reboot your Windows 11 PC.
6. Hard Boot Windows
Did you try this before? If not, then we highly suggest you try this out, and it will surely help you fix the Automatic Repair Loop. Anyway, here are the necessary steps that you need to use in order to hard boot your Windows 11 PC:
- You can simply hold and press the power button for at least 5-10 seconds until the PC get shut down completely.
- Then, wait for 30-40 seconds and boot your PC. Once your PC get booted successfully, you’ll notice that the issue won’t appear anymore.
7. Reset Your Windows 11 PC
So, even after trying different methods, you’ve noticed that the issue still persists. So then, we recommend you to once reset your Windows 11 PC, and to do so, follow these steps:
- First of all, go to the Troubleshoot menu as we have mentioned above in this article.

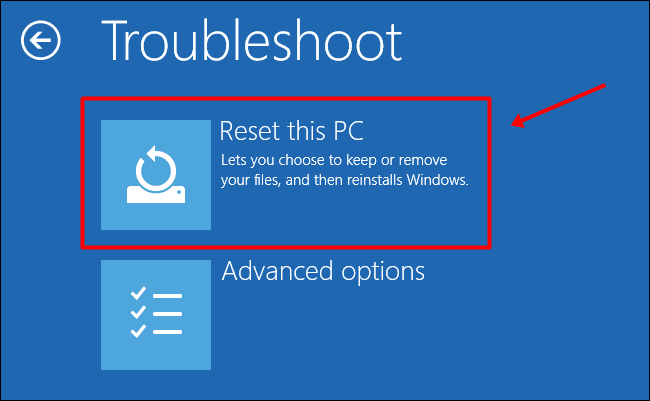
- Then, simply hit the Reset This PC. Now, wait for a few minutes until the process gets finished.

8. Boot Your Windows in Safe Mode
Safe Mode boots your system only the necessary drivers and programs to start the system. If your system tackles the automatic repair loop in Safe Mode, then third-party apps causing the problem. Therefore, you need to identify and remove the specific app from the system.
- Click on the Windows key > Power button.
- Then press and hold the Shift key and click on Restart together. This will start your system in Recover Mode.
- Then select Troubleshoot and after that, click on Advanced Options.

- From Advanced Options, click on Startup Settings.

- Here you have to click on the on-screen Restart button.
- Now Startup settings list will appear, select Enable Safe Mode using functional keys. Typically, this key is F4.


9. Use System Restore
System restore is a utility tool that can help to roll back to the last stable version of Windows. Since Windows is stuck in an automatic repair loop, you should try system restore to go back to the working Windows version.
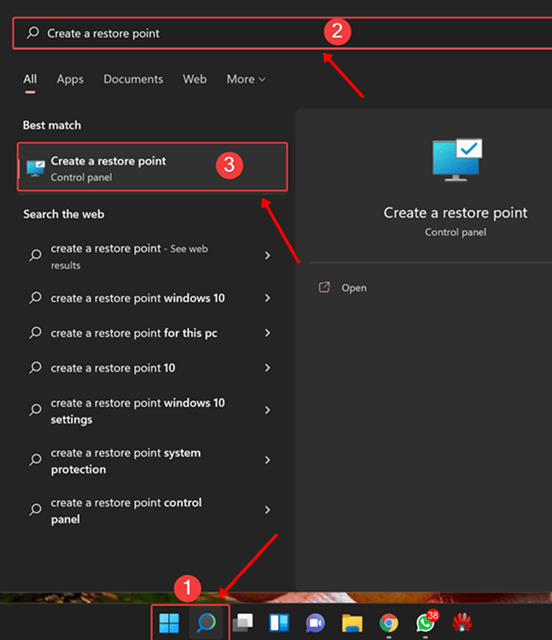
- Search for Create a restore point in Windows search, and then click Open.

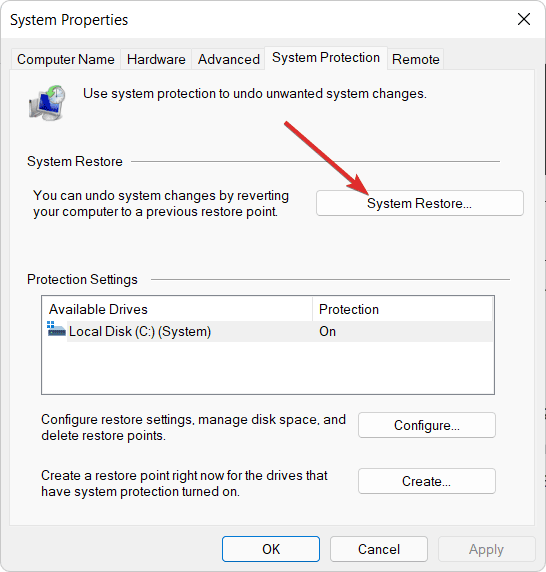
- On the System Protection tab, click on System Restore.

- Then click on Next; after that, select the restore point to use and click on Next.
- Lastly, click on the Finish to confirm the restore point.
10. Get the Latest Version of Windows
Windows released security patches and bug fixes in every update. So if you haven’t updated your system for long, then you could experience an automatic repair loop error. As a fix, you have to update your system to get the latest OS to run everything smoothly.
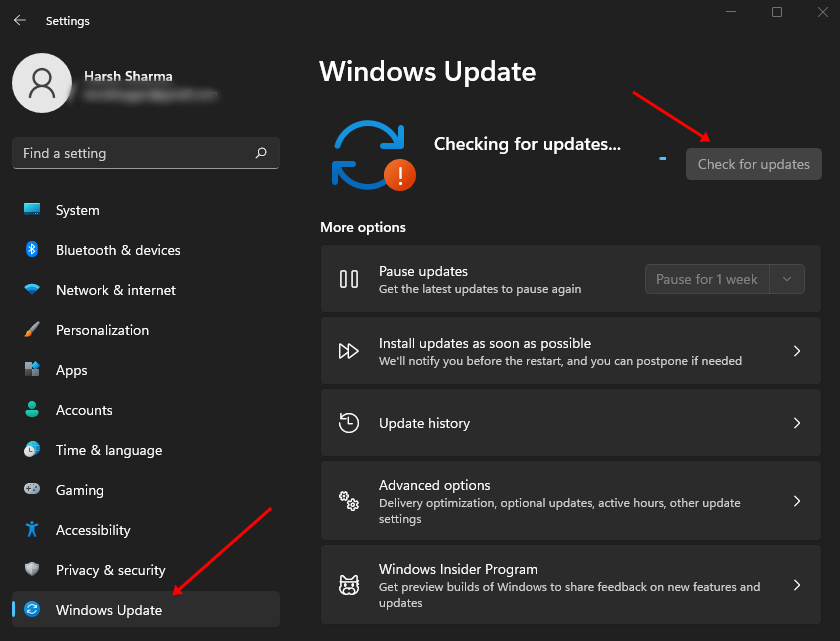
- Click on Windows Start and select Settings.
- Then click on Windows Update > Check for updates.

- You can use all pending updates; now, download and install those updates.
From Editor’s Desk
So, these are some methods that you can use to fix the Automatic Repair Loop in Windows 11. We hope you find these fixes helpful. However, if you still find any difficulty fixing this issue, let us know in the comment section.


