Are you seeing messages such as Android Connected to WiFi but no Internet Access? Even if your Android device is linked to WiFi, there is no connectivity.
In this guide, we will address this issue with various troubleshooting tips. Also, we will discuss why this network error happens on an Android phone.
Often the network gets disconnected due to server issues at the ISP’s end. If that’s the case, connecting any device on that WiFi network won’t work unless ISp resolves the issue at their end. Users sometimes try to use WiFi while keeping the Mobile Data active. This may interfere with linking with the WiFi.
If you are trying to use public WiFi such as Airport WiFi, then unless you sign in, you cannot use the internet. Your Android device may be connected to the WiFi, but no internet will be available.
Any bug on the WiFi router or in the network settings of your Android device can lead you to come across this network error on Android. Even having a messed-up clock showing the wrong time on the device can lead to network issues.
How to Fix Android Connected To WiFi But No Internet
Here are the various troubleshooting methods that you can implement.
1. Reset the WiFi Router
Here is a very effective solution that fixes the Android connected to WiFi but has no internet issue. Use the buttons on the router to turn it off and reboot it after pausing for a few seconds.
The WiFi router usually has a Hardware Reset button on it. You may also reset the router by asking for instructions from ISP support. Otherwise, refer to the user manual that accompanies the router and follow instructions to perform a reset. You can use that as well.
When you reset, all the IP address configurations and other settings you have saved on the router will be removed. If there are any necessary credentials for setting up the router from scratch, then note those down before resetting the router.
2. Consult Your ISP
It could be the ISP who is carrying out some maintenance work. The servers may be down not for you but for the whole area. You need to connect to ISP support via social media or their support hotline. If the issue lies at their end, wait until they reinstate the connectivity.
During that moment, you can use the mobile data of your Android device to browse the internet. Otherwise, if some alternative WiFi is available, connect your Android device to that.
3. Sign in to Your Android Device to Use WiFi
Are you at an Airport and connected to the Airport WiFi? However, you see the Android Connected to WiFi but No Internet message.
Then you probably have to register your phone number on the Wifi provider’s server. It’s like a sign-up; you cannot directly connect to enjoy the free WiFi.
You have to enter your phone number and you will revive an OTP. After providing the OTP, you will be granted a certain quota of free data to browse the internet.
Even if, after registering and providing the OTP, your Android device is unable to use the WiFi, you have to perform the reconnect process once again.
4. Reconnect to the WiFi
It’s an easy fix in which you have to disconnect from the WiFi network and reconnect to it. Here are the steps to do it.
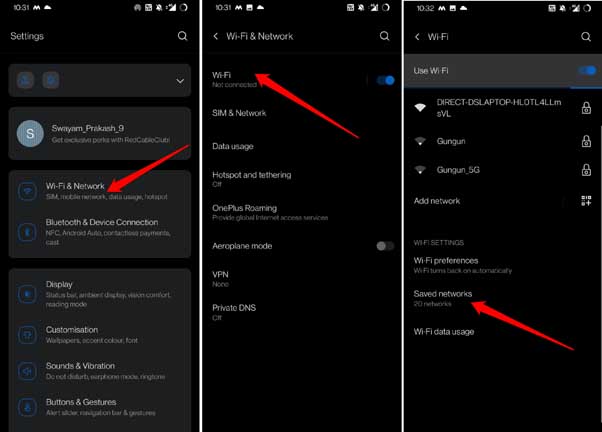
- Tap on Settings app > select WiFi & Network.
- Tap on WiFi.
- Scroll to Saved Networks and tap on it.

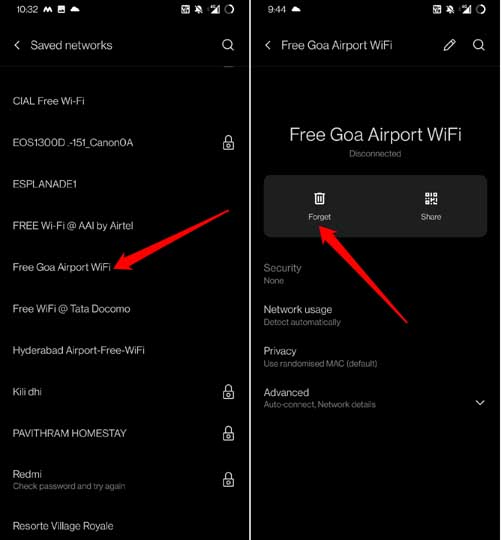
- Navigate to the WiFi that is unresponsive and tap on it.
- Now, tap on Forget.

- Make sure WiFi is enabled, and tap on it when the same WiFi shows up in the nearby WiFi networks.
- Provide the password or sign-up to reconnect to that WiFi network.
5. Set Automatic Time on Android
You have to set your Android device to fetch time automatically, depending on the present location. This will most probably fix the network issues with the WiFi. To set automatic time,
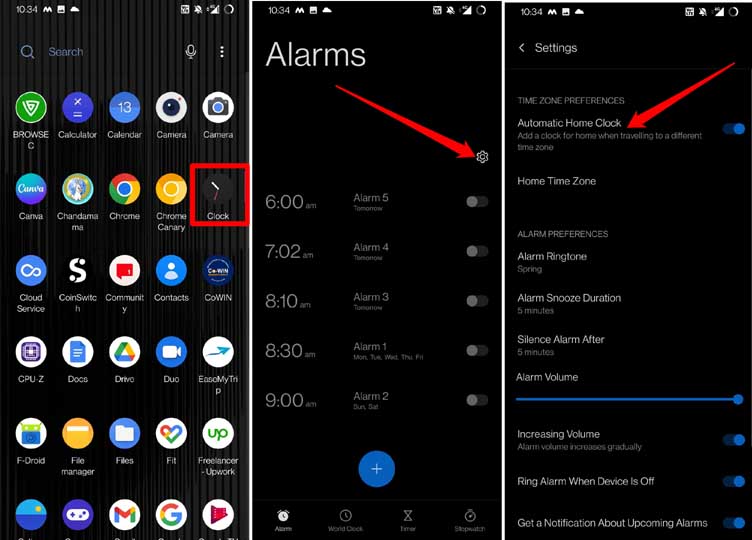
- Open the Clock app on your Android.
- Tap on the gear icon to get to the Clock app settings.
- Under Time Zone Preferences, tap on the switch beside Automatic Home Clock to enable fetching time automatically.

On some devices, these terms may vary a little, but you will easily find the automatic time option under the Clock Settings.
6. Turn off the Mobile Data on your Android Device
Another simple fix requires you to turn the mobile data off while your Android device is connected to the WiFi.
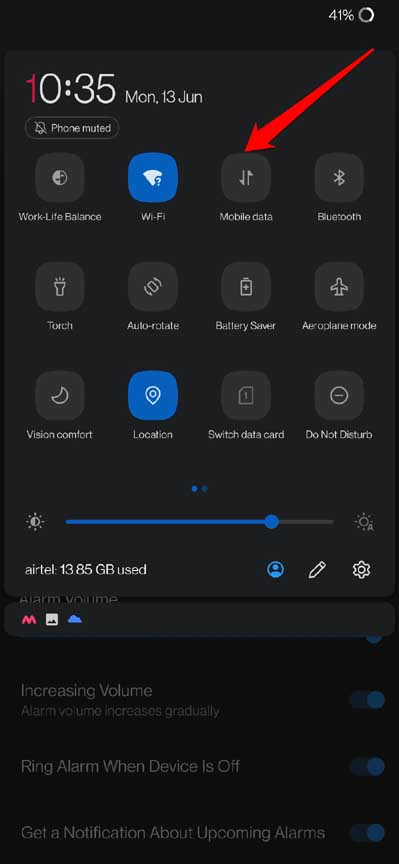
- Pull down the notification center to get to the quick-access Android services.
- Please tap on the Mobile Data icon to turn it off.

Android OS often gets confused when WiFi and mobile data are turned on. Even though the WiFi network is stable, connectivity error occurs because both networks are active.
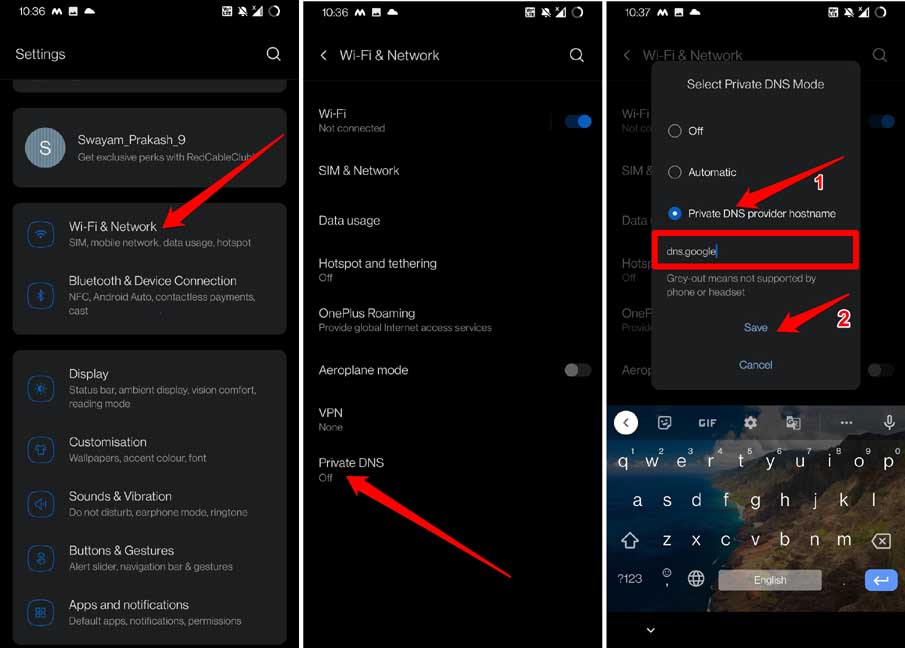
7. Change DNS of Android Device
When most of the fixes are not working, resolve the Android Connected to WiFi but No Internet issue and change the device’s DNS. You have to set the Google DNS on your Android device manually. It is quite easy to do. Here are the steps.
- Open the Settings app.
- Tap on WiFi & Network.
- Navigate to Private DNS and tap on it.
- Under Select Private DNS Mode, set the option to Private DNS Provider hostname.
- Enter the hostname as dns.google
- Then tap on Save.

The above steps apply to Android devices running Android 9 or any other higher version of Android OS.
8. Reset Android Network Settings
Try to reset the network settings of your Android device. Doing so often helps in solving the various issues with the internet.
- Go to the Settings app.
- Tap on System > then tap on Reset Options.
- Select Reset WiFi, Mobile, and Bluetooth.
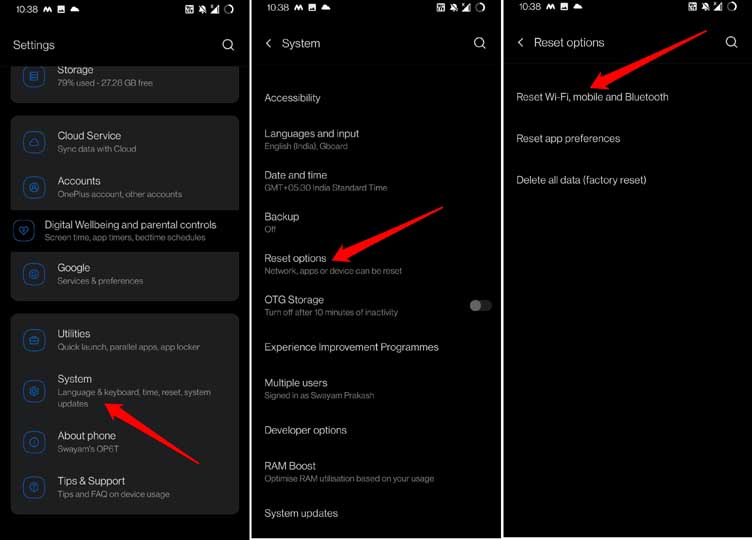
After the Android device reboots, connect to the WiFi. The internet should now work without any issue
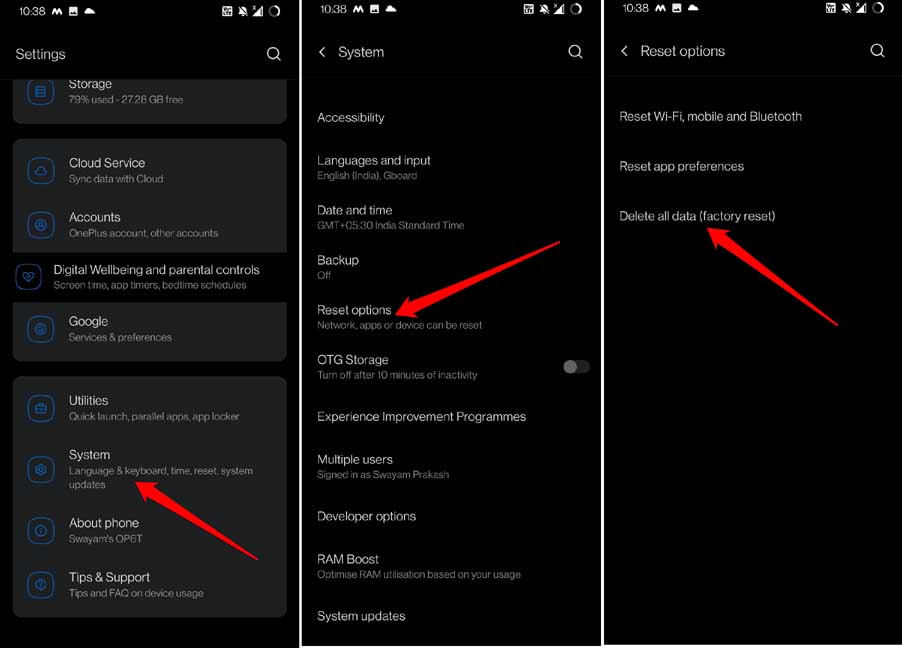
9. Reset the Android Device
Resetting the Android device is one of the final fixes you can implement to solve the Android Connected to WiFi but No Internet issue.
Here I am referring to a factory reset, which will wipe out all the data on your device. So, backup your data to another device or cloud storage before performing a factory reset.
- Access the Settings app of Android.
- Tap on System > then tap on Reset Options.
- Select Delete All Data(Factory Reset).

- Wait until the reset process is over and the device restarts.
- After the Android device reboots, connect to the WiFi and check if you can use the internet.
10. Change the Wireless Mode of your Router
Here is an exciting fix that may do the trick for you in solving the issue of Android connected to WiFi but no internet. If you are using a very old smartphone, it is set to a weak wireless mode. Hence, your device is susceptible to a weak network or no connectivity.
Wireless modes are often represented as 802.11b or 802.11g etc. The alphabet suffixes b and g are the wireless modes, and b is the oldest wireless mode and refers to weak network connectivity. Similarly, 802.11ac denotes that the network is stable and swift.
If you have an old Android device, then you can change its wireless mode from only b or g or n or b/g/n to ac.
- Open your account on the ISP’s website.
- Find the Wireless mode settings for your router.
- Change it to 802.11 ac.
If you are not tech-savvy enough to understand the above steps, get in touch with your ISP support team. They should be able to help you out.
Wrapping Up
Having the WiFi network around but not being able to use it on your Android device is a bummer. It hinders your work and connectivity to the world. If you are facing an Android connected to WiFi but no internet issue, follow this guide to resolve it now.
")
")
")