BSOD or Blue Screen of Death error on Windows can disrupt the complete workflow. These errors appear out of nowhere and can sometimes be fatal to the system leaving permanent damage. There are different types of BSOD errors, and you can identify the reason behind the error by knowing the error code of the BSOD error.
One common BSOD error that you can encounter on your Windows PC is the FAT File System (fastfat.sys). If you encounter this BSOD error on your system, then the fastfat.sys file is to be blamed for that. If you are facing this issue then that means this file is causing some issues with your Windows or the file is corrupted.
Apart from that, there can be other reasons for facing this issue such as new hardware installed on the system, viruses, faulty hardware, outdated Windows version, outdated drivers, etc. Let’s go through all the ways to fix FAT File System (fastfat.sys) BSOD on Windows.
Fix FAT File System (fastfat.sys) BSOD on Windows
Facing this issue can be disturbing but that doesn’t mean there’s no way to fix it. Given below are all the working steps that you can follow to fix the FAT File System BSOD error on Windows PC-
1. Run SFC Scan
As we mentioned above, fastfat.sys file is to be blamed for the BSOD error in general. If the file is corrupted or missing then you can fix this error by running SFC scan to scan and fix corrupted system files.
- Press the Windows + R key combo. Type CMD and press Ctrl + Shift + Enter.
- In the UAC prompt, click on Yes. This will run Command Prompt as administrator.
- Type the following command in the Command Prompt window and execute it-
-
sfc /scannow
-
- Once the command is executed, close Command Prompt and reboot your system.
2. Update Windows
Outdated Windows can also cause the FAT File System BSOD error on Windows. Follow the steps given below to update your Windows to the latest version and fix this issue-
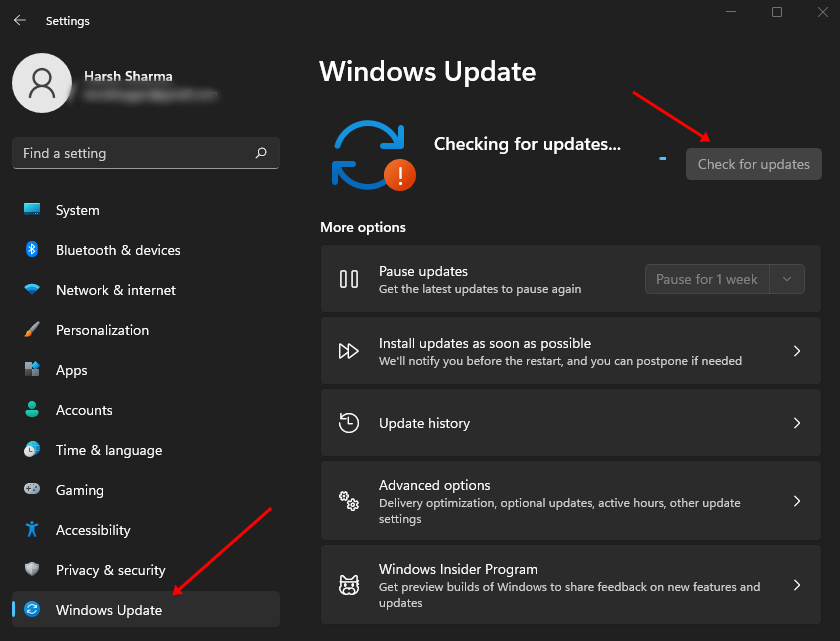
- Open the Settings app using the Windows + I keyboard shortcut.
- Now, click on the Windows Update tab on the left pane.
- On the right side, click on the Check for Updates button.

- Install all the updates that are listed on the Settings app.
3. Update Drivers
Another common reason for facing the FAT File System BSOD error on Windows is outdated drivers. Windows needs all the drivers to be updated to function properly.
The Windows Update method that we listed above will also update the driver. In case, the Windows Update method didn’t help you update the drivers, then you can use third-party tools like Driver Booster and DriverPack Solution to update the drivers.
4. Scan for Virus and Malware
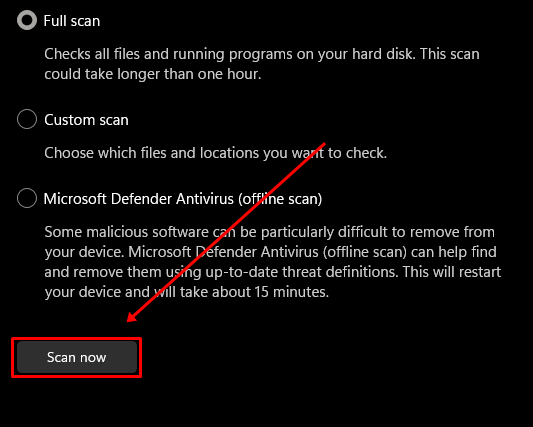
You can also face the FAT File System (fastfat.sys) BSOD error in Windows due to viruses and malware. Use Windows Security to scan your system for viruses and fix issues caused due to them-
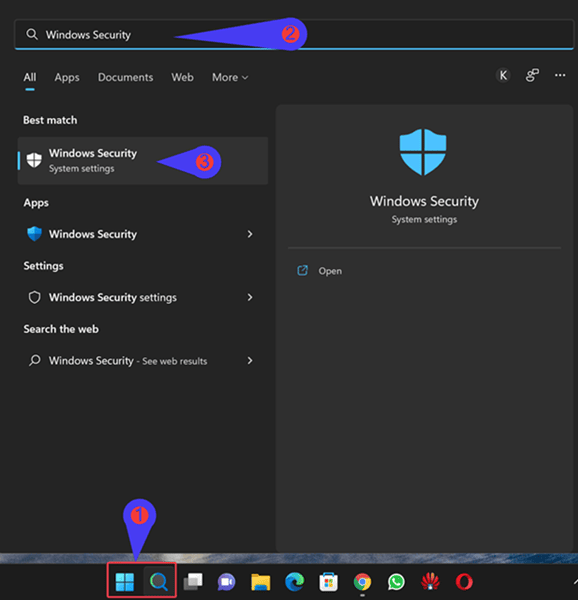
- Press the Windows key, search for Windows Security and press Enter.

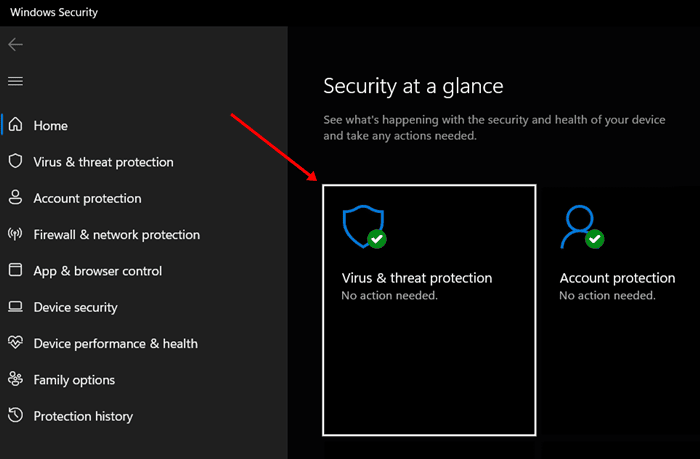
- In Windows Security, click on Virus and Threat Protection.

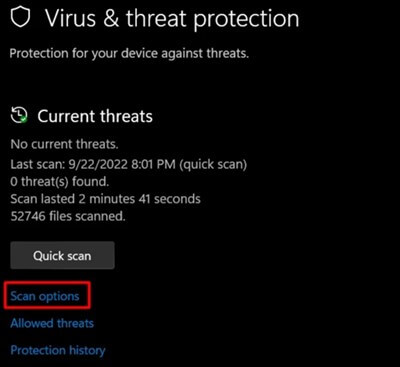
- Click on Scan Options now.

- After this, select Full Scan and then click on the Scan Now button.

5. Use the Driver Verifier Tool
The next thing to do is run the Driver Verifier Tool. This tool scans your PC for unsigned drivers that can be causing the issue and fix the issue. Given below are the steps to run the Driver Verifier Tool-
- Press the Windows key, search for Verifier, and press Enter.
- When the UAC prompt appears, press Enter.
- Select the Create Standard Settings option and click on Next.
- Now, select Automatically Select Unsigned Drivers and click the Next button.
6. Run DISM Tool
DISM tool scans and repairs the system image. If the FAT File System BSOD error is caused due to errors in the system image then running the DISM tool will fix the issue. Given below are the steps to run the DISM tool-
- From the Start Menu, run Command Prompt as administrator.
- In the Command Prompt window, execute the following commands one by one-
-
DISM /Online /Cleanup-Image /CheckHealth
-
DISM /Online /Cleanup-Image /ScanHealth
-
DISM /Online /Cleanup-Image /RestoreHealth
-
- Wait for the commands to get executed and then restart your PC.
7. Run CHKDSK Command
CHKDSK Command scans your disk for errors and solves all the errors that you may encounter due to disk failures. Running the CHKDSK command will scan your hard disk for errors and fix this BSOD error if being caused due to disk failures.
- Open the Start Menu, and search for CMD. Select Command Prompt from the search results and then click on Run as Administrator.
- Click on Yes in the UAC prompt.
- Run the following CHKDSK command in the command prompt-
-
CHKDSK /f /r
-
- Wait for the command to be executed and restart your PC.
8. Unplug Incompatible Hardware
Not all the hardware is compatible with every system. If you have bought a new peripheral and started facing this issue on your Windows after using that peripheral on your system, then probably that hardware is incompatible with your system.
Unplug any new hardware that you are using with your system. It can be a keyboard, mouse, SSD, or any other device. After unplugging the device, wait for the BSOD error to pop up again. If you don’t encounter the issue now, then that hardware was causing the issue.
9. Uninstall Incompatible Software
Not only incompatible hardware, but incompatible software can also cause this issue. If you are facing the FAT File System BSOD error on Windows after installing some software, then uninstall it and see if the issue is fixed or not. The steps given below will guide you on how to do that-
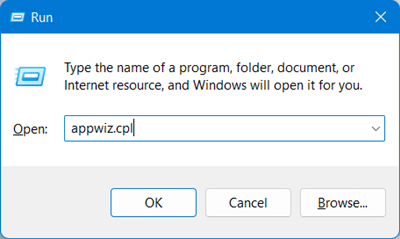
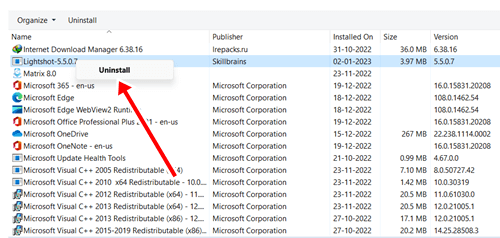
- Press the Windows key, type appwiz.cpl and press Enter.

- From the list, search for the software you recently installed.
- Select the software and then click on Uninstall.

- Click on Uninstall again to confirm uninstalling the software.
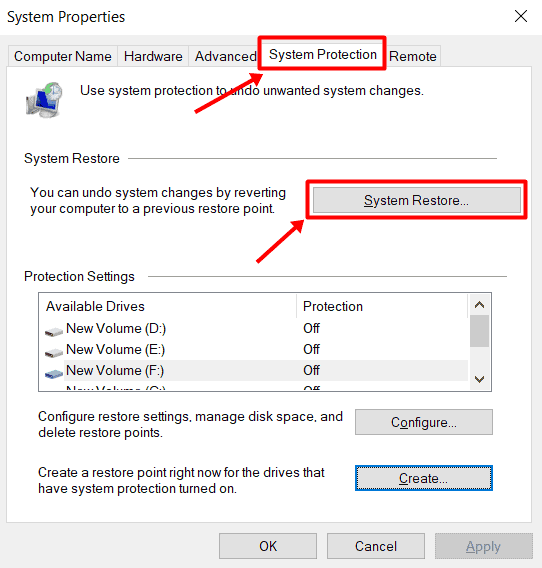
10. Perform System Restore
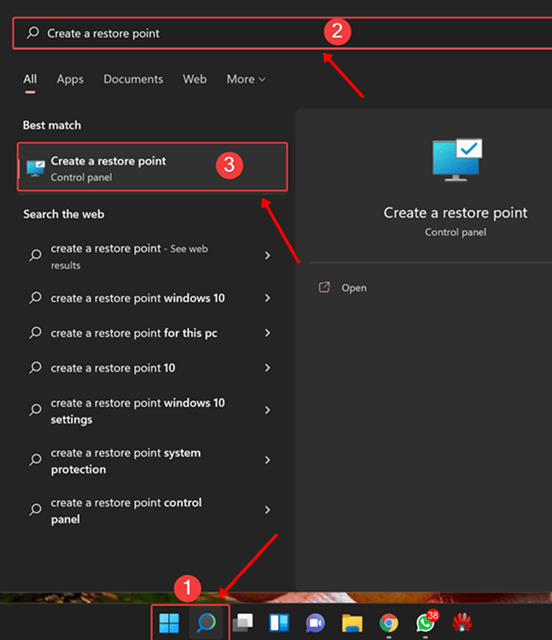
Recent changes to the system like installing Windows Update, driver update, etc., can also cause this BSOD error. If this BSOD error was first encountered after you made some prominent changes to the system, then we suggest you perform a system restore. Given below are the steps to perform system restoration-
- Open the Start Menu, search for Create a Restore Point and press Enter.

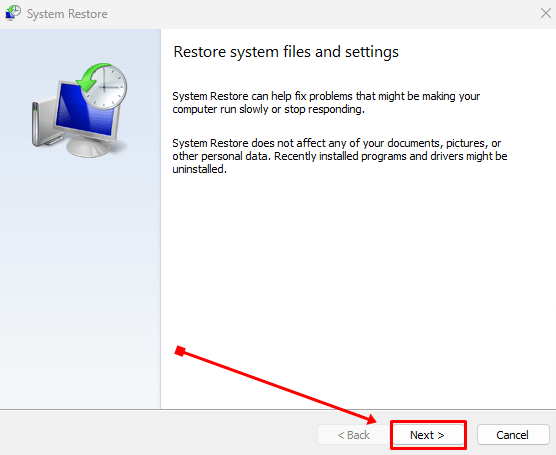
- Next, click on System Restore.

- In the System Restore window, click on Next.

- Select the restore point from the list and then click Next.
- After this, click on Finish to perform the system restore.
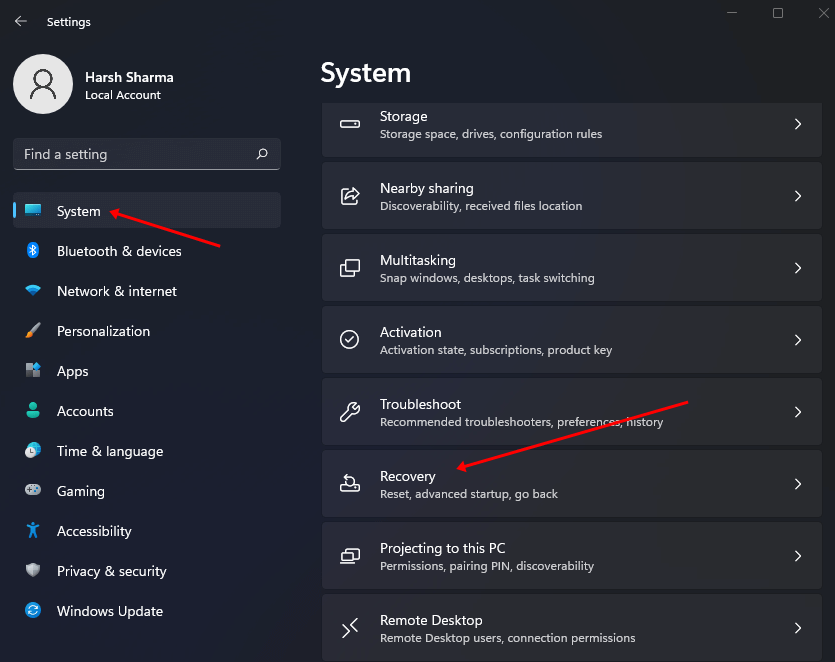
11. Reset PC
If performing a system restore didn’t help in solving the issue then probably you can perform a system reset. Before you continue, take a backup of your files and everything on your PC, as resetting your PC will delete all the system settings, apps, as well as files (if you opt for it). To reset your PC, follow the steps given below-
- Launch Settings by pressing Windows + I.
- Under the System tab, scroll down to the Recovery option.

- Click on the Reset PC button.

- Select either of the two options that you will see on your screen-
- Keep My Files- This will remove apps and settings but not your files.
- Remove Everything- This will remove everything including your files, apps, and settings.
- You will now get two options to reinstall Windows-
- Cloud Download- Go for this option if you want Windows to be downloaded from the internet.
- Local Reinstall- Select this option if you have Windows ISO and want the Windows to be reinstalled from that.
- Follow the on-screen instructions to reset your PC.

Bottom Line
The above steps should help you fix FAT File System (fastfat.sys) BSOD on Windows. However, if you have tried everything mentioned in this guide and even reset your PC, but the issue is still not solved, you should contact a technician for customer support.
The issue can be due to some internal damage to the PC’s hardware. The technician will diagnose your system for the fault and fix the issue. For that, you can either contact some known technician, or get in touch with the brand’s service center if you have a laptop, AIO, or complete PC build from a particular brand.


