The memory leak is a common issue that has come a long way in the Windows operating system, as now it can also occur in their new OS, Windows 11. People who use Windows or in the computer field already know about memory leaks.
If not, then let me tell you when RAM memory mishandles any process, like it can hold resources but is unresponsive while the code is running.
It mainly happens when we open multiple programs and processes running in a single allocated memory in RAM. Sometimes it can be fixed automatically when we wait for a process and memory properly allocates it. If not, then we have listed the top working ways to fix the memory leak issues in Windows 11.
How to Confirm Memory Leak Issue in Windows 11?
We don’t want to waste your precious time, as you can easily confirm a memory leak in your computer system before applying the below methods.
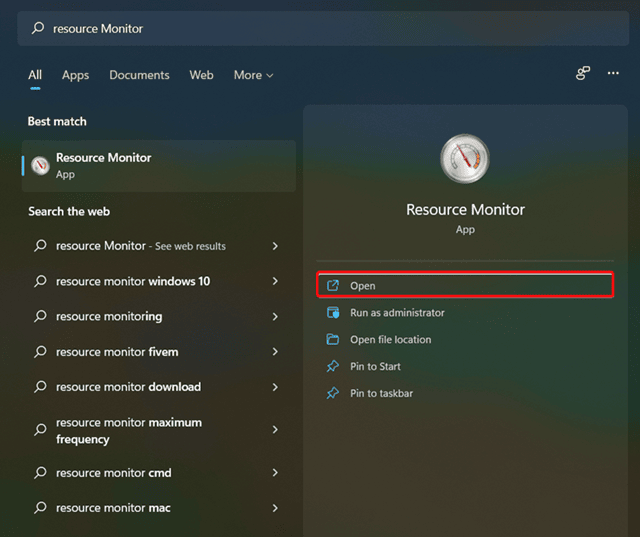
- Click on the Start button and search for Resource Monitor and open it.

- In the resource monitor window, switch to Memory Tab. In the below, you can see Physical Memory. Is it acquiring more memory than usual? It means it is a memory leak in Windows 11.

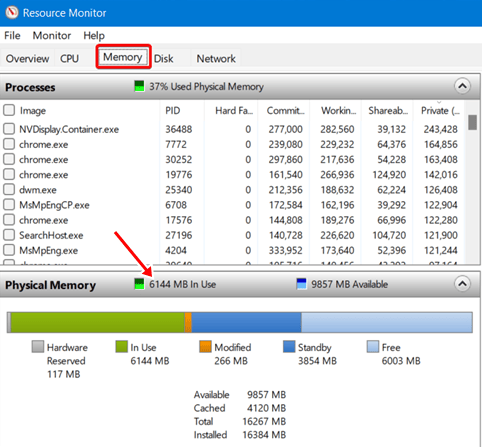
Look closely at physical memory and observe if some processes consume more memory than usual and allocate more space to specific processes. On the other hand, maybe you have low RAM, so it can be unresponsive when you open multiple programs at the same time.
Suppose it takes more RAM for some specific process, so there is a memory leak in your Windows PC. Now is the time to jump on multiple ways to fix this issue. You can apply these one by one and one of the methods should definitely work for you.
1. Close Windows File Explorer
It is usual for Windows users to open multiple file explorer windows. Unfortunately, they forget about it, so when they launch another application, the system will not allocate proper memory to that problem and cause a memory leak in Windows 11.
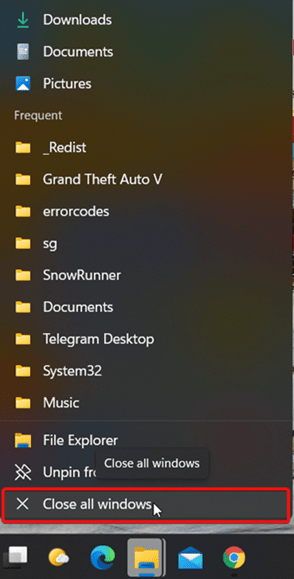
- Right-click on the File Explorer icon on the taskbar.
- Select Close all Windows from the pop-up window.

2. Make Changes in the File Explorer
If you still face the memory leak issue after closing all File Explorer windows, you need to tweak some changes to File Explorer settings. To apply these settings, follow below steps:
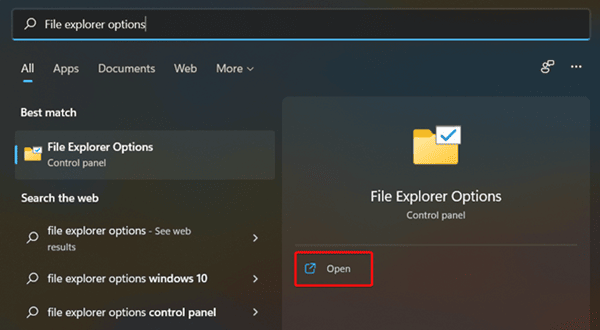
- Click on the Start button and search for File explorer options and press enter.

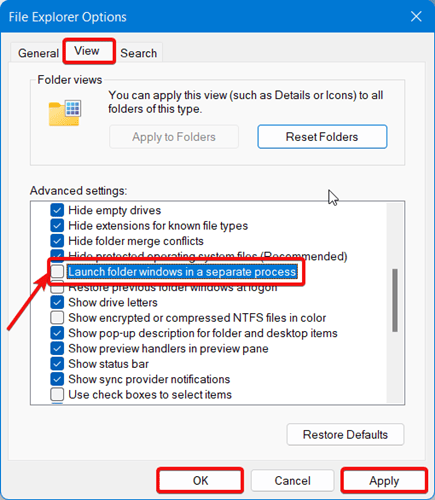
- In the File Explorer options window, switch to the View tab.
- Next, in the Advanced settings panel, find Launch folder windows in a separate process and put a checkmark beside that.

- Next, click on Apply > OK.
When you complete the above steps, the File Explorer’s RAM consumption will be reduced to an extent and your memory leak issue will be fixed.
3. Free Up Some RAM Manually
Sometimes, it totally depends upon your memory, and you can easily resolve it by freeing up RAM by closing some inappropriate programs and fixing the issue.
Here, we mention some simple steps to free RAM in Windows, or you can use Advanced SystemCare to Free up your RAM in One click.
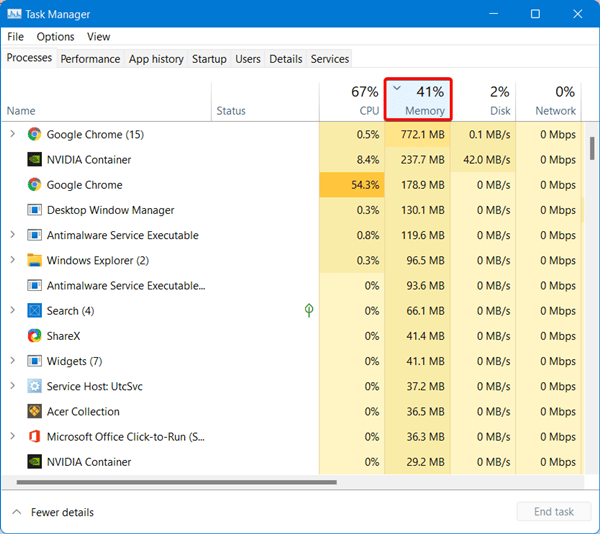
- Press Ctrl+Shift+Esc. This will open up the task manager.
- In the task manager window, click on the Memory tab and check which application is consuming the most memory.

- Now, right-click on that app and click on End task from the drop-down menu.
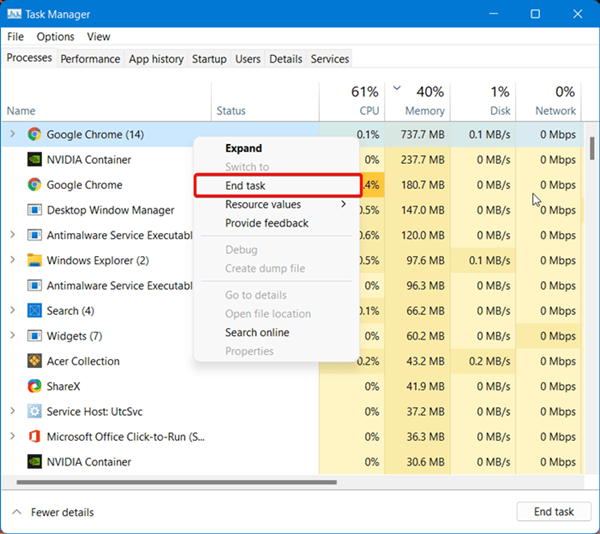
After doing this, Windows will instantly close that application and free up some memory.
4. Close Unnecessary Apps, Programs & Browser Tabs
As we discussed above, when we open multiple programs simultaneously, it can cause instability in our system. which leads to a problem. One of the common problems is a memory leak.
So be ensure that you have opened multiple browser tabs, windows, and other background running apps and programs. If yes, then close these inappropriate processes and see if it can free up memory to run programs and fix this issue.
5. Close Startup Apps / Services
It is a bit similar to the previous one, but the main difference in this step is you can disable some of the high-impact processes that consume more memory while Windows startups. Windows boots can automatically fire a command to run all those enabled apps and services, leading to a memory leak.
To Disable startup apps and services, follow the below steps:
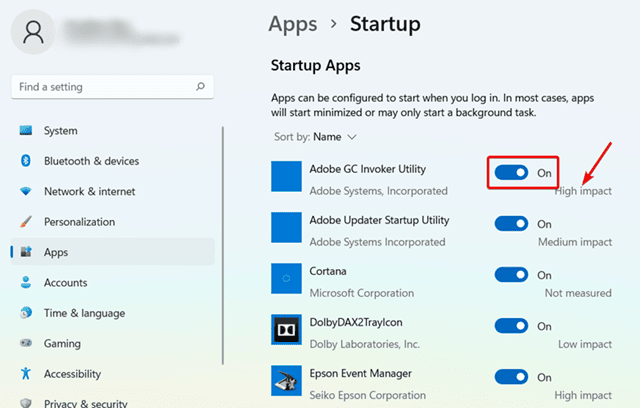
- Press the Windows + I keys together to open Settings.
- Now go to Apps > Startup. Go through the system impact status and disable the ones you think are not required.


Once you disable the apps, you may need to restart your PC. After that check if there is any memory leak issue.
6. Restart Windows 11
Apps and programs consume RAM, including background processes. Therefore, restarting the system helps to stop memory leaks. It flushes the RAM and clears temporary files. As a result, your system performance improves drastically. Even though it’s a basic method, you must try it.
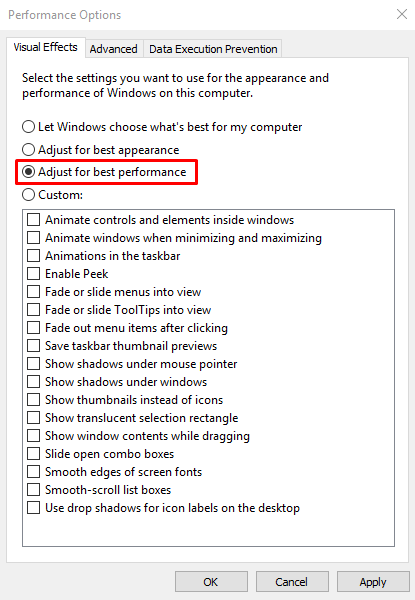
7. Enable Adjust for Best Performance
Windows 11 looks visually nice for animation, shadows, and effects, but it takes system resources and RAM. Therefore, this may be causing your system to feel sluggish due to RAM usage. Tweaking to best performance could be helpful in this regard.
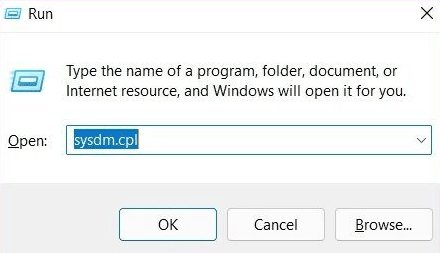
- Press Windows + R to open, type sysdm.cpl, and hit the Enter button.

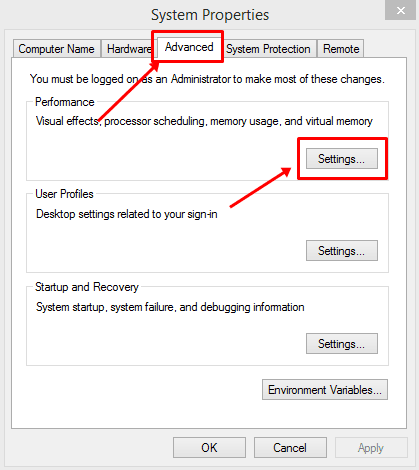
- Then head over to the Advanced tab, and select Settings under Performances.

- Here, you have to select Adjust for best performance on the Visual Effects tab.

- Now click on Apply and then the OK button.
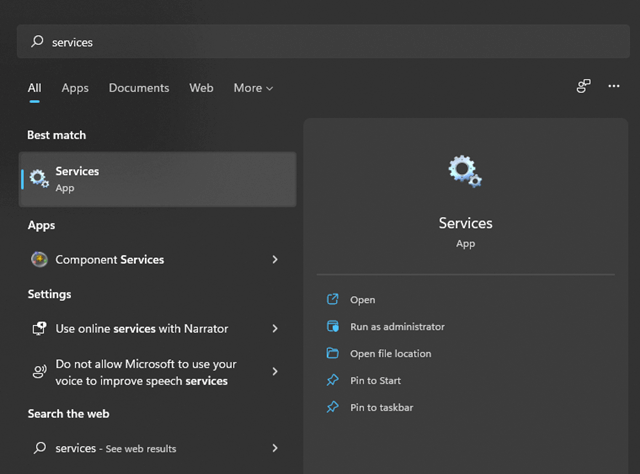
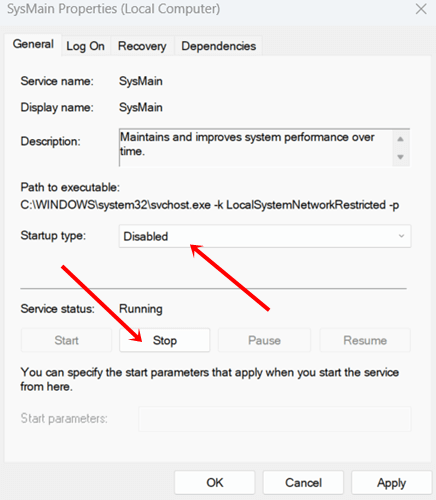
8. Turn Off SysMain Service
SysMain consumes a significant amount of RAM while preloading the content of frequently used apps. Considering to disable its service can get rid of the memory leak problem in Windows 11.
- Click on the Windows button, type services, and click on Open.

- Then find SysMain and double-click on it.
- Now, in the startup type section, select Disabled, and then click on the Stop button in the Service status section.

That’s all we have here about how you can fix memory leak issues in Windows 11. We hope you found this guide helpful. There is no need to worry about memory leak issues. Using our methods one by one will ensure that one of the methods will solve your problem.


