Microsoft Outlook is one of the best email clients, preferred by many users. It is part of the Office 365 suite. Despite its reliability, issues like the ‘not connecting to server’ error may disrupt Outlook’s normal functionality.
This issue is commonly encountered due to reasons such as slow internet, faulty/buggy extensions, corrupted data files, or incorrect account settings. In this guide, we will be discussing the troubleshooting steps to fix the Outlook ‘Not Connecting to Server’ error.
Before we discuss the troubleshooting steps, ensure your internet is not slow; to check this, you can visit fast.com. If your internet is stable, then you can continue with the steps given ahead-
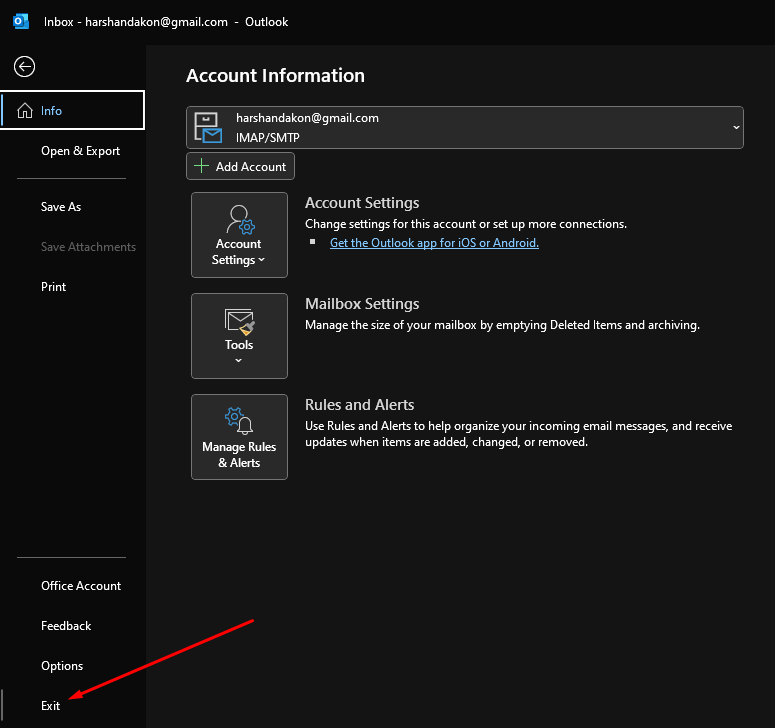
1. Restart Outlook
If Outlook encounters this issue and does not connect to the server, then something is likely wrong with the app itself. As a basic step, restart Outlook before you try other methods.
- Click on the File tab from the top menu, and then select Exit.

- Wait for a few seconds and then relaunch Outlook.
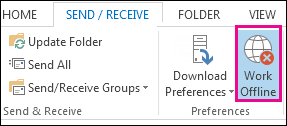
2. Disable Offline Mode
One of the features of Outlook is the offline mode, which allows you to access your emails even when you are not connected to a network. If you turn on this mode while working on Outlook, then the email won’t sync with the server, and you will be prompted with the server error. You can turn off this mode through the steps below to fix the issue-
- Click on the Send/Receive tab from the menu bar.
- See if the Work Offline button is highlighted or not; if it is, then click on it to turn it off.

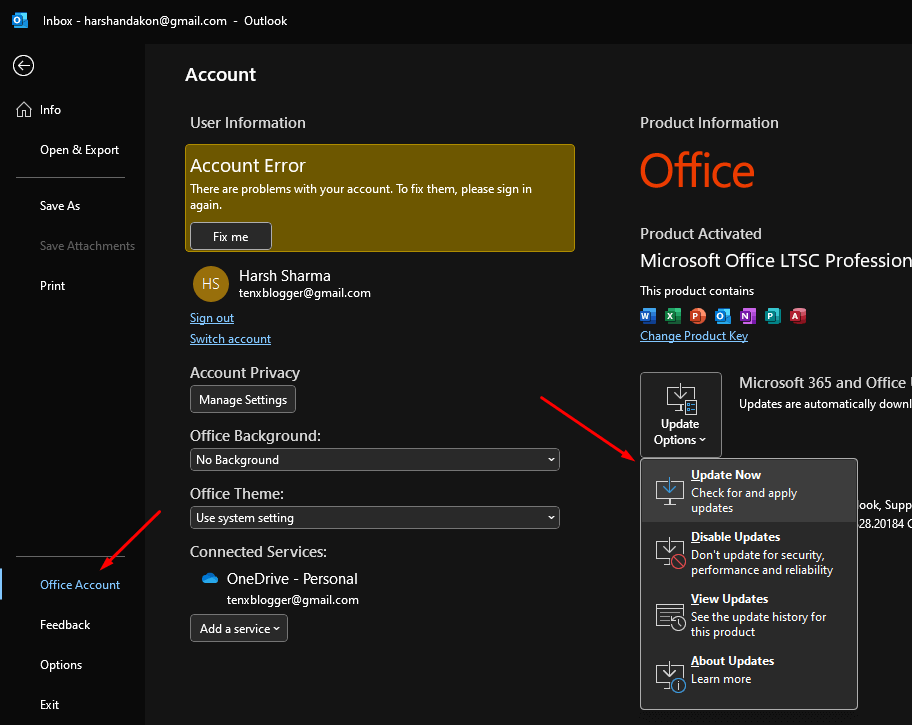
3. Update Outlook
Just like any other app, Outlook needs to be updated to the latest version to work properly. Ensure that Outlook is updated, and if it’s not, here are the steps to do it-
- In the Outlook window, click on File at the top left corner.
- From the left pane, click on Office Account.
- Next, click Update Options and then on Update Now.

4. Repair Outlook Account
Corrupted account settings are another reason behind facing ‘Not Connecting to Server’ error on Outlook. You can repair the Outlook account settings from within the app to solve this issue.
- Open the Outlook app and click on File.
- Next, click on Info and then on Account Settings.
- Click on Account Settings option again.
- Select the problematic account and click the Repair button.
- Click the Repair button again.
5. Disable Extensions
Extensions can cause issues with the background processes running in Outlook and you might face this issue. If you have any extensions installed on Outlook, then consider disabling them.
- Click on the File at the top right corner and then on Options.
- Within the Options menu, click Add-Ins.
- Click on the drop-down menu next to Manage and select COM Add-ins; click on Go to continue.
- On the next screen, uncheck all the extensions, and click OK to disable them.
6. Re-add Outlook Email Account
If disabling the extensions and repairing the account didn’t solve the issue, then try removing and re-adding the email account to Outlook.
- Click File tab from the top menu bar.
- Head to Info and click Account Settings.
- From the given options, click on Account Settings.
- Here, under the Data Files tab, click on Add and OK.
- Head over to the Email tab and click on Remove and hit Yes.
- After this, click on New and add your account.
7. Repair Outlook Data File
Outlook stores the data locally on your PC’s hard drive. If this data gets corrupted for any reason, then you may encounter Outlook ‘Not Connecting to Server’ error. You can repair this data by following the steps below-
- Head to File > Info in Outlook.
- Click on the Account Settings option and then on Account Settings again.
- Select the Data Files tab, and then click Open File Location.
- You will see the path to data files under the Location column; copy it.
- Now, press Windows + E keys together, and navigate to either of the following paths depending on your Outlook version-
-
Outlook 2019- C:\Program Files (x86)\Microsoft Office\root\Office16
-
Outlook 2016- C:\Program Files (x86)\Microsoft Office\root\Office16
-
Outlook 2013- C:\Program Files (x86)\Microsoft Office\Office15
-
Outlook 2010- C:\Program Files (x86)\Microsoft Office\Office14
-
Outlook 2007- C:\Program Files (x86)\Microsoft Office\Office12
-
- Look for the SCANPST.exe file here and execute it.
- Next, click on the Browse option and paste the path you copied earlier in step 4.
- Click on the Start button.
- Click the Repair button when you are prompted to.
Bottom Line
Outlook must be connected to the server for your emails to sync. The steps discussed in the above article should help you fix Outlook’s ‘Not Connecting to Server’ error. However, if you have reached the end of this guide and are still facing the issue, consider reinstalling Outlook for a fresh start.


