Windows firewall settings are one of the important security features of the comprehensive Microsoft Defender Security. It plays a significant role in monitoring your inbound and outbound network connections.
It protects the system from spyware, trojans, viruses, and malicious software. It is also useful for regulating and restricting internet access. However, a little mess around its settings could cause trouble.
Anyhow, if you’re facing issues because of misconfigured firewall settings, you should restore the default settings as a fix. Thus, we’ve mentioned some of the best ways to reset firewall settings on Windows 11.
How to Reset Firewall Settings on Windows 11
Since Windows is the simplest OS, changing its settings is also very simple. However, for your convenience, we’ve featured top simple ways to reset firewall settings on Windows 11. Here we go!
1. Reset Firewall Settings using Windows Security
All security and firewall-related settings are integrated with Windows Security on the Settings app. Therefore, making any changes within the provided features hardly takes a few minutes. Here is the process of resetting firewall settings on Windows Security.
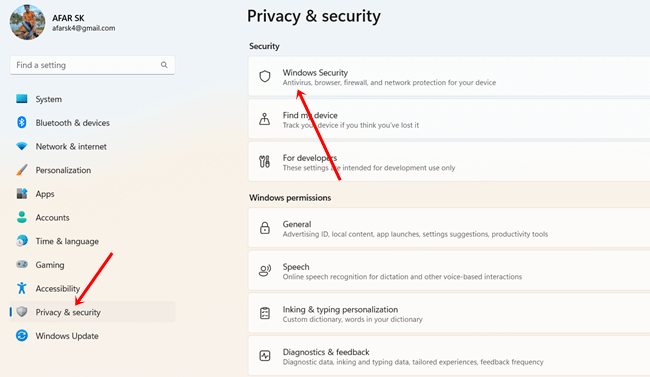
- Press Windows > Settings > Privacy & Security.
- Then, click on Windows security.

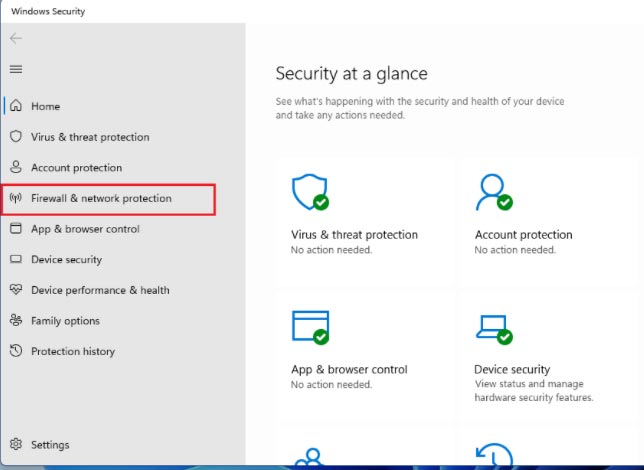
- You can see Firewall & network protection, click on it. It will land you to the settings windows on Windows security.

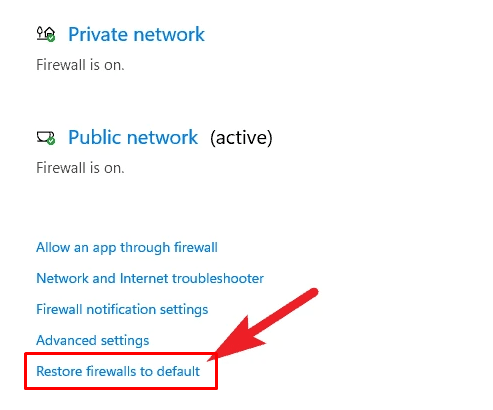
- Next, click on the Restore firewalls to default. This will land you on the Control Panel.

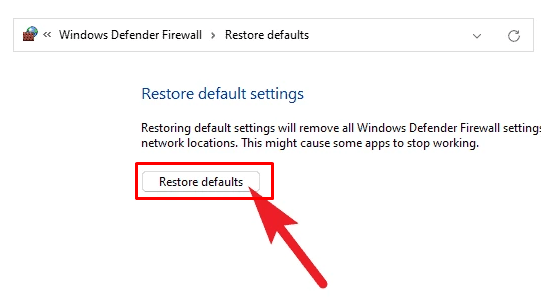
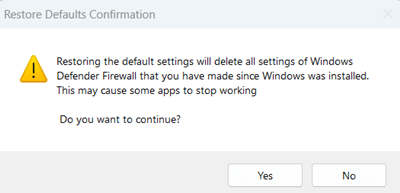
- Now click on Restore default one more time.

- A confirmation window will appear on the screen, click on Yes to reset firewall settings.

2. Windows Defender Firewall Default Settings using Control Panel
Control Panel is one of the most important components to make any changes to the system and control the software and hardware. Therefore, changing to firewall default settings using Control Panel is a steady method.
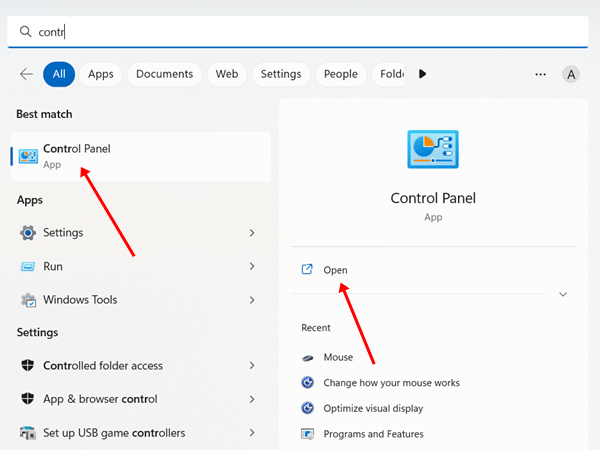
- Press Windows > search for Control Panel > click on Open.

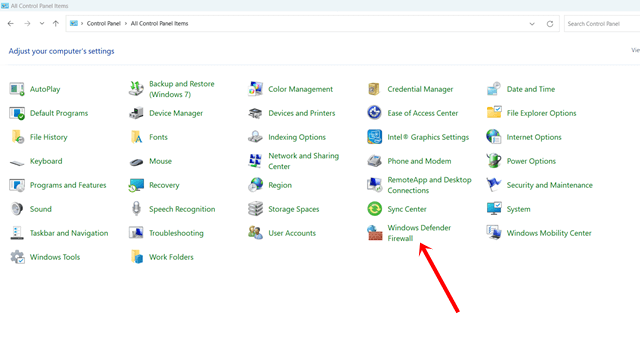
- Here you can see all items, however, click on Windows Defender Firewall.

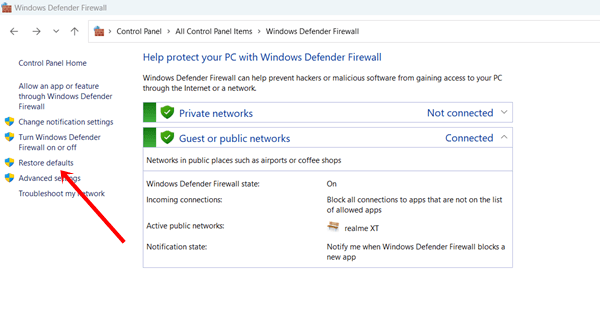
- Then click on Restore defaults.

- In the next step, click the Restore default.
- Now simply click on the Yes button to execute reset firewall settings.
3. Reset Windows Firewall Rules to Default PowerShell
PowerShell is a configuration management framework. Using it, you can manage various tasks and automate different activities. However, you can also reset Windows firewall rules to default with it.
- Press Windows > search for PowerShell > click on Run as Adminitrator.

- Click on the Yes button to continue.
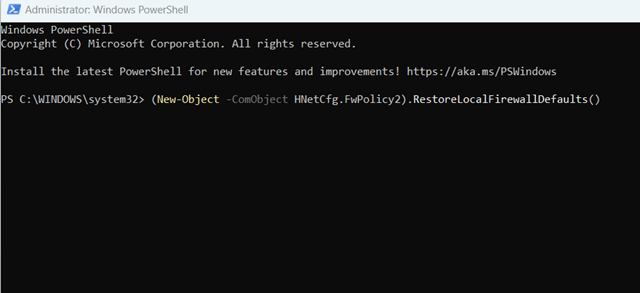
- Now copy the command from here and paste it over PowerShell.
(New-Object -ComObject HNetCfg.FwPolicy2).RestoreLocalFirewallDefaults()
 After that, hit the enter button to perform the command to reset firewall settings.
 After that, hit the enter button to perform the command to reset firewall settings.
4. Restore Windows Firewall to Default using Command Prompt
Command Prompt, aka CMD, and PowerShell might look to work the same, but both can be used for different purposes. When it comes to changing some settings within the system, CMD is the fastest option.
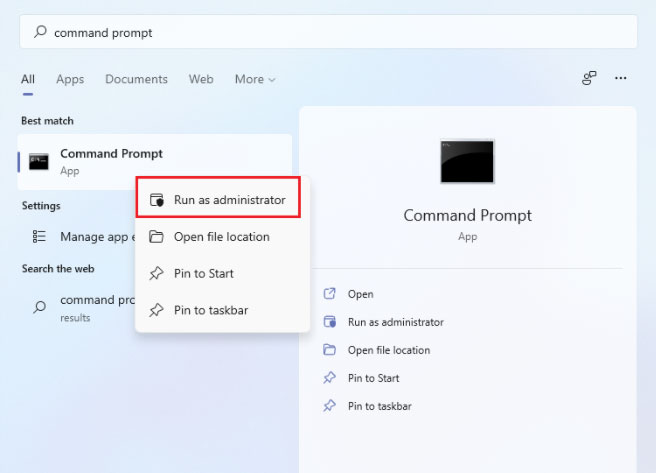
- Press Windows > search for Command Prompt > click on Run as Administrator.

- Again click on Yes to open CMD.
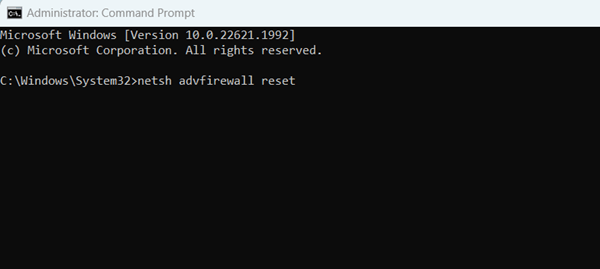
- Then type the following command on CMD.
netsh advfirewall reset
 Now hit the enter button, it will reset the firewall setting in the blink of an eye.
 Now hit the enter button, it will reset the firewall setting in the blink of an eye.
5. Reset Firewall Settings through Advanced Security
Advanced security is an important element of the Windows security program. It helps in two ways to keep your system secure. However, using this feature, we could reset the firewall setting. Here’s what you need to follow.
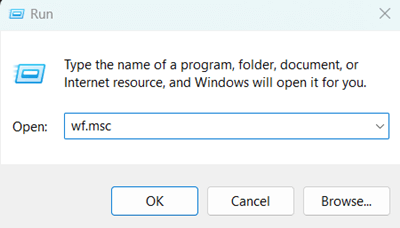
- Press Windows > search for Run tool > open it. (Alternatively, you can press Windows + R to open the Run tool).
- Now type this wf.msc on the Run tool, and hit the enter button. It will take you to the Windows Defender Firewall with Advanced Security.

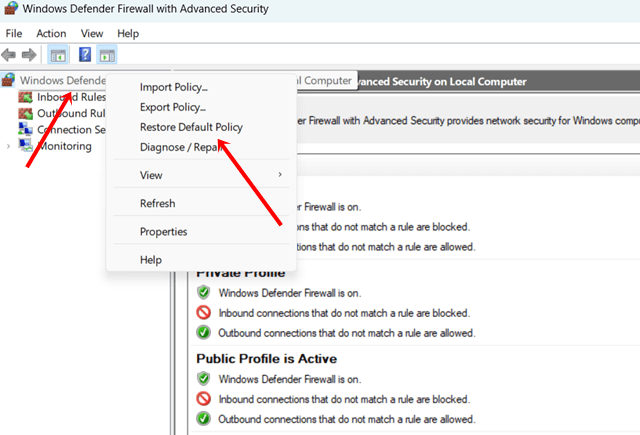
- Then right-click on the Windows Defender Firewall with Advanced Security on the Local computer. After that, click on Restore Default Policy.

- Finally, to confirm the process, click on the Yes button.
Final Words
If you are not an expert on networking and firewalls, our recommendation is that you don’t mess up with its settings. It works perfectly fine unless you need to restrict certain internet access. Even if you’ve made some mistakes unknowingly, you can easily reset firewall settings on Windows 11.


