Windows 11 was released recently, and though we all just wish to try it out. But, of course, we all know that Microsoft is already famous for its “good-bad-good” reputation with operating systems, where a good release will be followed by a not-so-great one, followed by another good one.
Well, although it’s been a month since the Windows 11 stable version was officially released, many errors still bother users. However, many users tweak some changes in their Windows settings to fix them because they now face many issues.
But guess what? You can fix every issue just by resetting your computer to its default settings. Well, in case you don’t know how to reset your Windows 11 PC to default, then make sure to be within this journey. So, let’s get started with this.
How to Reset Windows 11 to Default Factory Settings?
There are a few simple steps that you can use to reset your PC. But, before that, keep in mind that there are two methods that you can use. So, without wasting more time, let’s get into it.
Steps To Reset Your Windows 11 PC Without Losing Files
Here are the steps that you can follow to do this. So, make sure to follow them carefully:
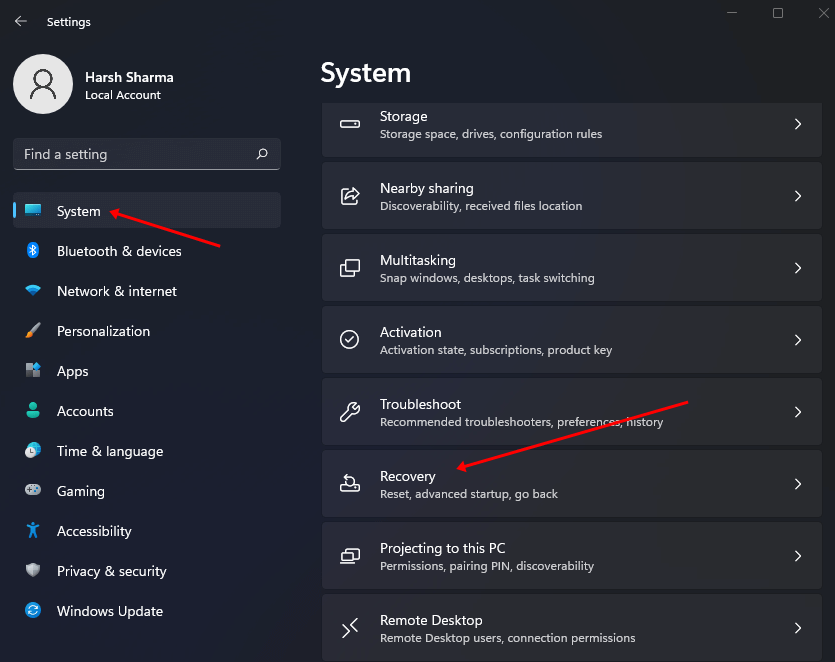
- First of all, you are required to open the Windows Settings.

- After that, navigate to the System and click on the Recovery page located on the right side of the opened window.

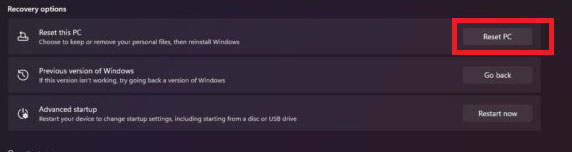
- Then, click on the Reset PC button from the Recovery Options to open the Reset This PC feature.

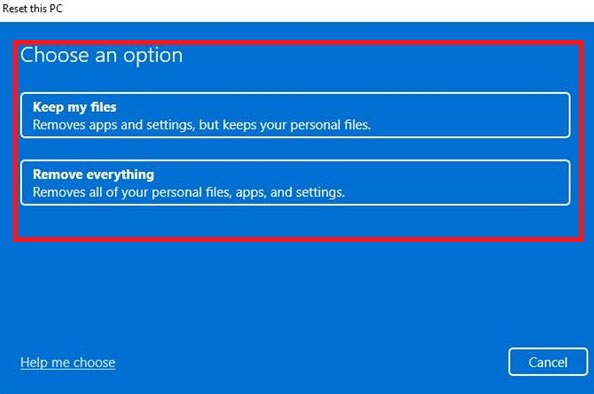
- Now, select the Keep My Files option.

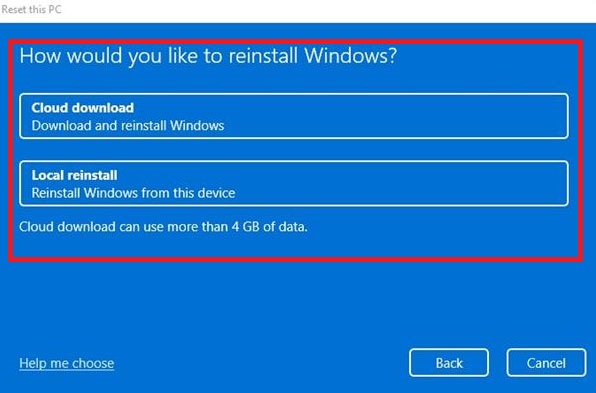
- That’s it. Now, you need to select the option to reset Windows 11:

-
- Cloud download: This option will allow you to download and install the latest version of Windows 11 to reset your settings to default.
- Local reinstall: This option will use your local Windows file to reinstall it.

After that, hit the Next button, followed by the Reset button.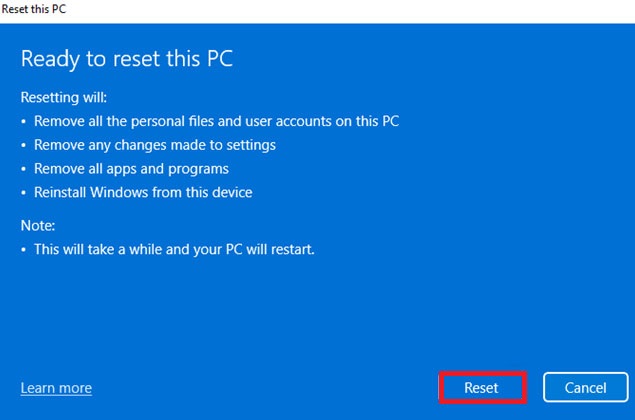
How to Factory Reset Windows 11 Using the Remove Everything Option
If you want to make your Windows 11 PC new, you need to factory reset it while removing everything from your PC. So, to do this, you need to follow the steps given below:
- Initially, you are required to open the Windows Settings.
- Then, navigate to the System and click on the Recovery page located on the right side of the opened window.
- After that, click on the Reset PC button from the Recovery Options to open the Reset This PC feature.
- Now, select the Remove Everything option.
- That’s it. Now, you need to select the given option to reset Windows 11, depending upon your need.
-
- Cloud download
- Local reinstall
- Also, if required, then click on the Change Settings option.

- After that, toggle the settings that you want to use and hit the Confirm button.

- Finally, hit the Next button, followed by the Reset button.


What To Do After Resetting Your Windows 11 PC?
There are many steps that you need to do once the resetting process is finished. So, let’s take a look at them:
- Check for Windows updates by following the given path: Settings > Windows Update > Check for updates.
- Also, check if there are any missing drivers. So, to check that follow the path: Start > Device Manager > Confirm that there’s no branch called Other devices as it indicates that the devices do not have a driver.
So, that’s it from our side on how to reset your Windows 11 settings to default. We hope you find this guide helpful. Also, if you have any doubts regarding the same, you can feel free to ask us in the comment section. Our team will surely help you.


