Security is a very crucial aspect of our life, especially when it comes to data protection, and the Windows firewall is doing the same thing for us on Windows PC. In addition, this Windows security will provide you with history protection reports of any threats and infections that you recently have been through.
But, sometimes, simple things are not as simple as they should be. Yes, Windows 11 user recently reported some bugs in the Windows Firewall as it is continuously closing or deleting the new application without any prior notice.
Microsoft is aware of this issue, but we have to temporarily fix it until they provide any fix. But, there are not many options to do so except disabling Windows 11 firewall. So, you have to follow the steps that we have explained in this guide to disable Windows 11 firewall. Therefore, make sure to be with the guide till the end.
Also Read- Best Free Firewall for Windows 11
Steps to Disable Firewall on Windows 11
You can disable or turn off the Firewall on your Windows 11 PC by following these simple steps. So, let’s take a look at them:
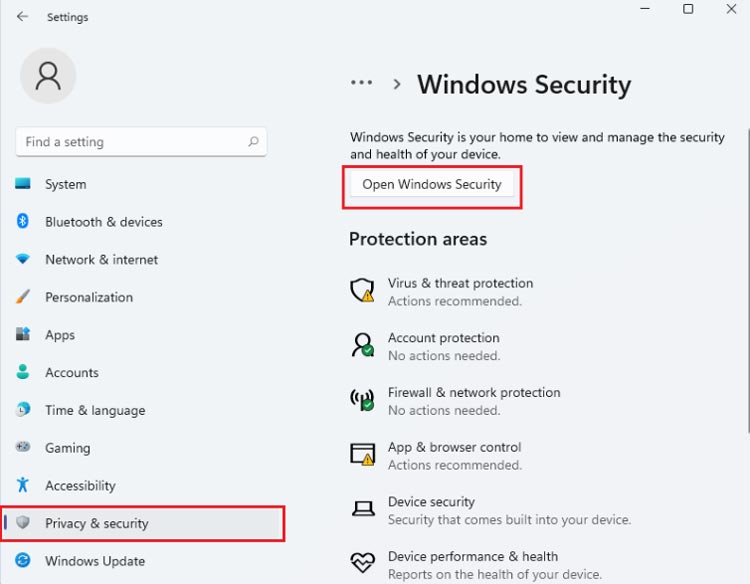
- Initially, right-click on the Windows icon, and click on the Settings option.
- After that, hover to Privacy & Security and click on Windows Security.

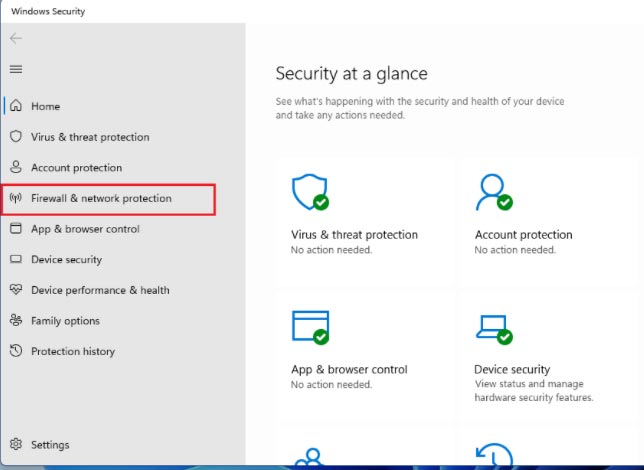
- Then, click on the Open Windows Security >> Firewall & network protection.

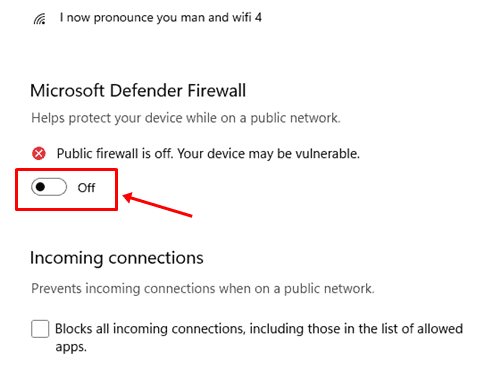
- Now, click on the Public Network option. After that, toggle the button to the OFF position located under the Microsoft Defender Firewall.

- That’s it. Now, a warning message will appear on your computer screen that the Microsoft Defender Firewall section: Public Firewall is off. Your device may be vulnerable.
Disable Windows 11 Firewall For Individual Apps
Did you know that if you don’t want to disable your Windows 11 PC’s protection, you can also try disabling the Firewall for some individual applications? If not, then you can do so just by following the steps given below:
- Initially, press Win+I to open the settings app.
- Then, click on Privacy & security, followed by Windows Security.
- After that, hover to the Firewall & network protection.
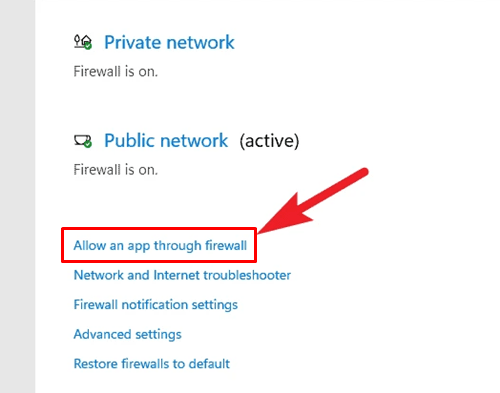
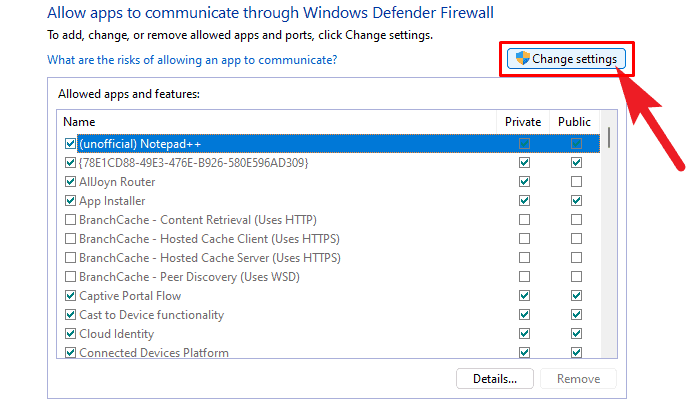
- Then, click on the Allow an app through the Firewall.

- Now, select the Change settings and click on the Allow another app.

- Then, hit the Browse option and add the application that you want to add there.
- Finally, after selecting the application, select the add option and hit the Ok button.
How To Restore Windows 11 Firewall Settings to Default
Now, in case you don’t want to use the above-mentioned methods, then you can simply restore the Windows 11 Firewall settings to default. So, if you don’t know how to do it, simply follow the steps mentioned below:
- Firstly, right-click on the Windows button, and click on the Settings option.
- After that, hover to Privacy & Security and click on Windows Security.
- Then, click on the Open Windows Security followed by Firewall & network protection.
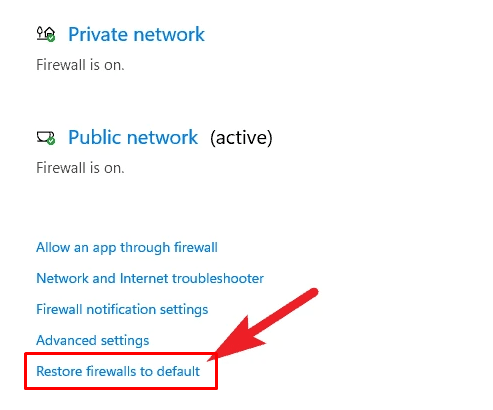
- Now, scroll down and select the Restore firewalls to default option.

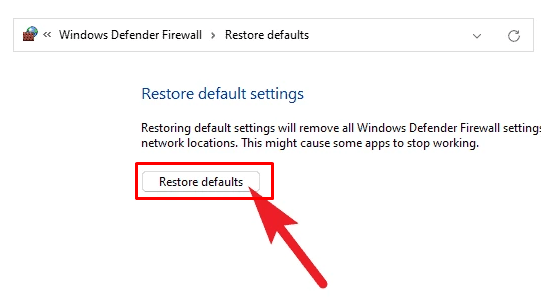
- After that, on the next screen, hit the Restore defaults button.

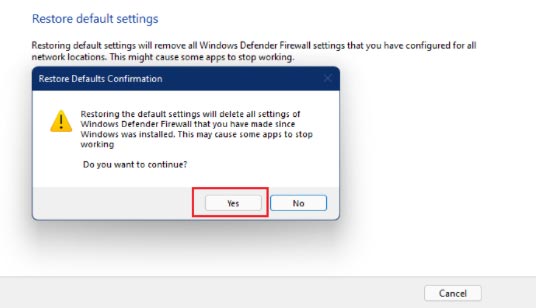
- That’s it. Now, if ask for confirmation, then hit the Yes button.

So, that’s it for this guide. We hope this guide has helped you. Furthermore, in case you have any queries regarding the methods we have discussed in this guide, make sure to let us know in the comment section. Also, if you are new here and the first time you are visiting here, then make sure to read our other guides too.


