Windows 11 lock screen is the first thing you see when your Windows boot up. The lock screen shows a wallpaper or a slideshow along with additional information. Not only this, but you can set up a password and biometric lock on the lock screen through which you will have to enter the login credentials every time you sign into your PC.
Though this feature has been available in Windows for a very long time, users can sometimes encounter issues with it. If you have set up a lock screen with PIN/password and the lock screen doesn’t appear when you turn on your PC, then it can be a major issue as you won’t be able to sign in to your account.
So what can be done in that case if one cannot log into their PC if the lock screen does not appear? We will be guiding you with all the troubleshooting steps that you can follow to fix Windows 11 not showing the lock screen.
What Causes the Windows 11 Not Showing Lock Screen Issue?
If Windows 11 is not showing the lock screen, then it can be due to the following reasons-
- The system files are corrupted
- There is some problem with the current account
- The recent update that you have installed is buggy.
- You can face this issue due to misconfigured settings.
How to Fix Windows 11 Not Showing Lock Screen?
Is the lock screen not appearing when booting into the PC? If you are facing issues with the Windows 11 lock screen, then you can follow the steps given below to fix this issue-
1. Force Restart PC
If you are not seeing the lock screen, then you won’t be able to sign into your PC. You can try force restarting your PC to fix this issue. To do so, press and hold the Power Button until your PC turns off.
Once your PC is off, turn it on by pressing the Power button. Just check if the issue with the lock screen is fixed or not.
2. Boot into Safe Mode
If force restarting the PC doesn’t help, then you will have to boot your PC into safe mode to continue with the other steps mentioned in this article. Here’s how you can do it-
- Press and hold the Power button to turn off your PC. Now, press the Power button to turn on your PC.
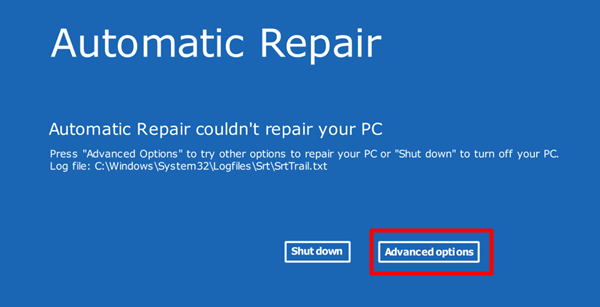
- Repeat the above step 3-4 times and you will see the Automatic Repair Screen.
- Now, click on the Advanced Options.

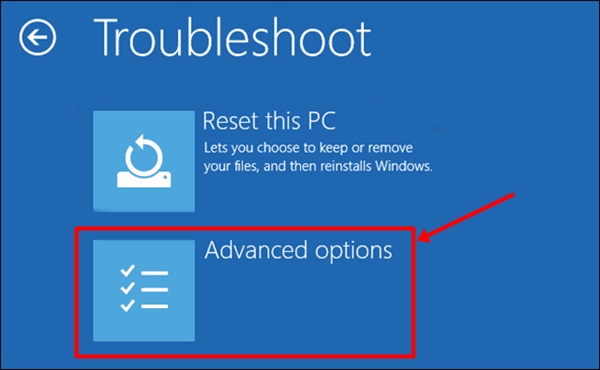
- After this, click on Troubleshoot and then on Advanced Options.

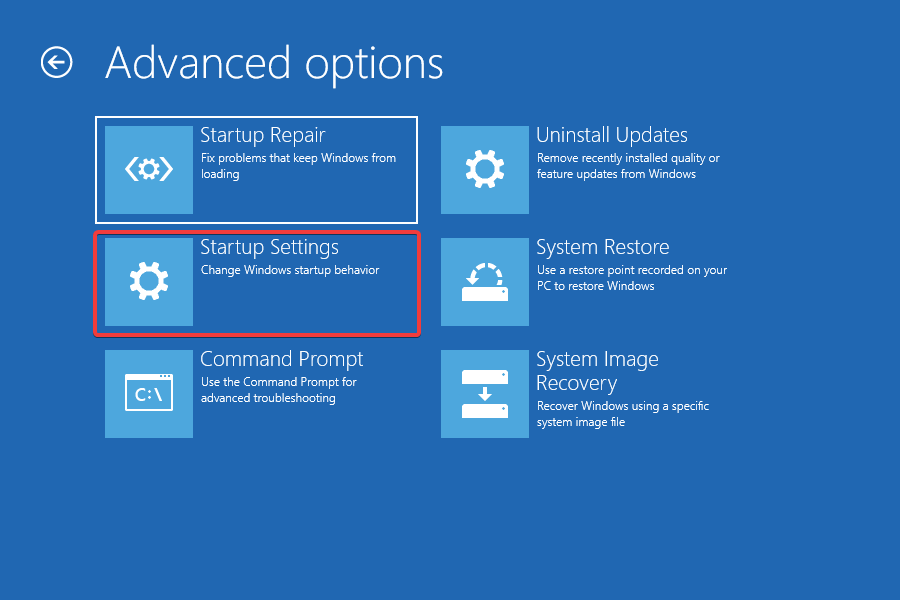
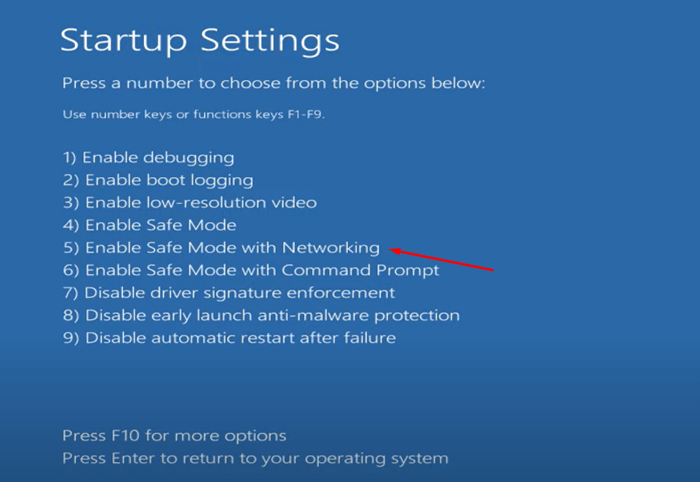
- Now, click on Startup Settings.

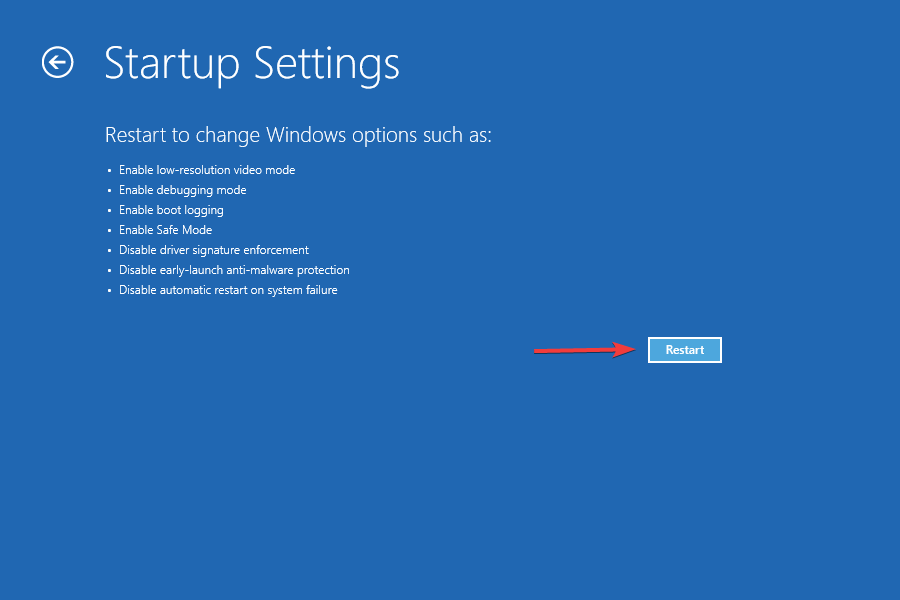
- On the Startup Settings screen, click on the Restart button.
- Now, check which buttons go for Safe Mode with networking. It should be 5 or F5. Press either of those buttons to boot your PC into safe mode.

Once you are in safe mode, you can move to the next step in this article to fix the Windows 11 lock screen not showing. Note that for all the steps mentioned ahead, you will have to boot your PC into safe mode.
3. Run SFC Scan
The issue can be encountered if the system files are corrupted. You can try running the SFC scan to scan and fix the corrupted system files on your PC. The steps given below discuss how you can run an SFC scan-
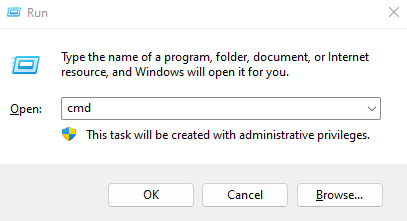
- Press Windows + R, and type CMD in the Run dialog box. Press Ctrl + Shift + Enter to run CMD as administrator.

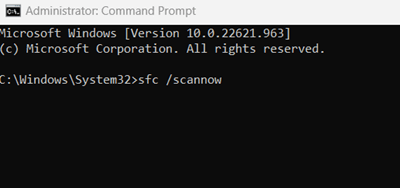
- Now, type the command given below, and execute it by pressing Enter–
- sfc /scannow

- sfc /scannow
- Once done, wait for the process to complete and then restart your PC.
4. Update Windows
The next thing that you can do is try updating the Windows to the latest version. Sometimes the current version can be corrupted and can cause such issues. Try updating the Windows to clear off the bugs caused by the current version of Windows. You can do this by following the steps given below-
- Open the Settings on your Windows 11 PC by pressing the Windows + I keyboard shortcut.
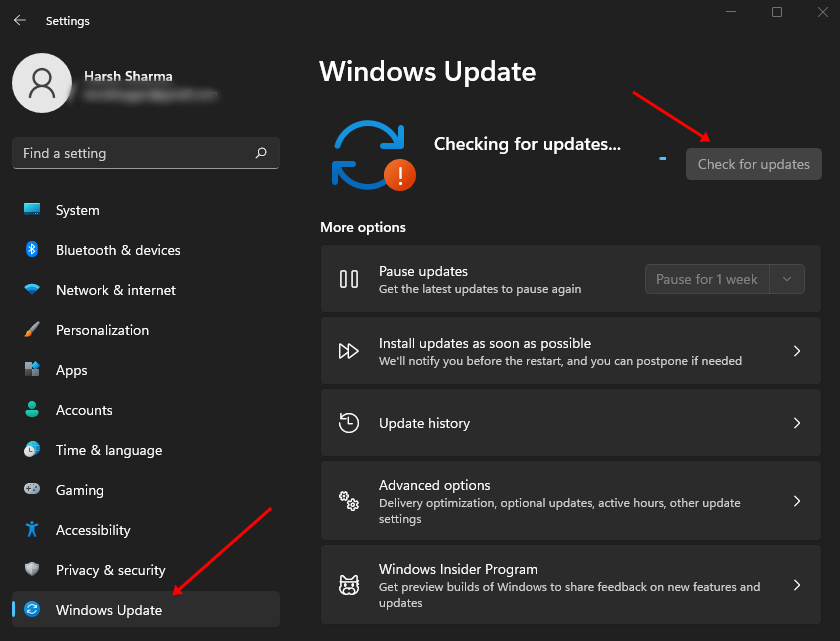
- On the left pane, select Windows Update.
- Now, click on the Check for Updates button on the right side.

- Install all the available updates and then restart your PC.
5. Turn Off Fast Startup
Fast startup ensures your PC boots and shuts down quickly but that can sometimes be the root cause of the problem. You can try turning off the fast startup to fix the issue.
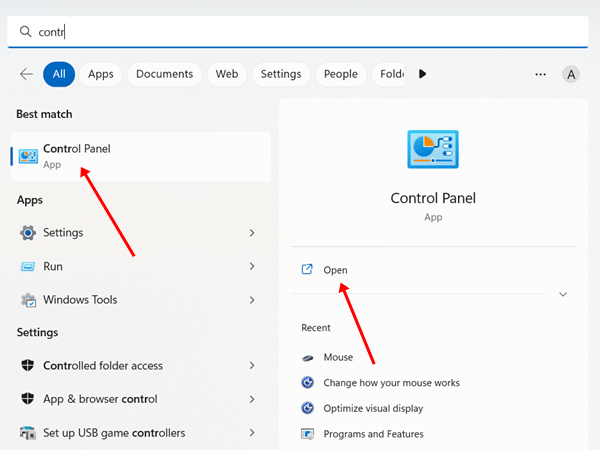
- Press the Windows key, type Control Panel, and open it by pressing Enter.

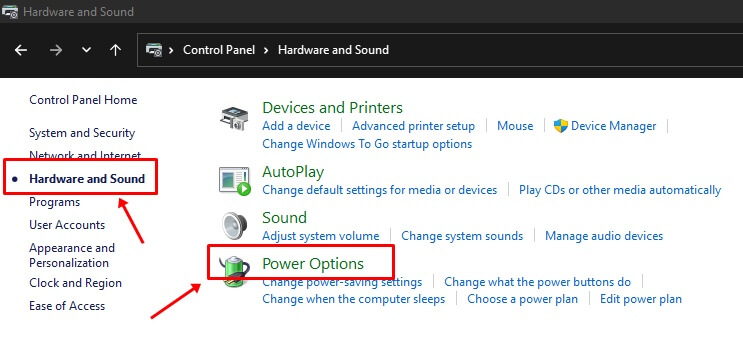
- Search for the Power Options here and click on it.

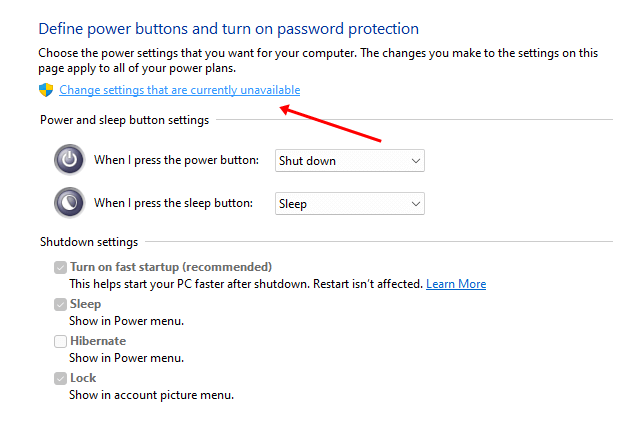
- Now, click on Change settings that are currently unavailable.

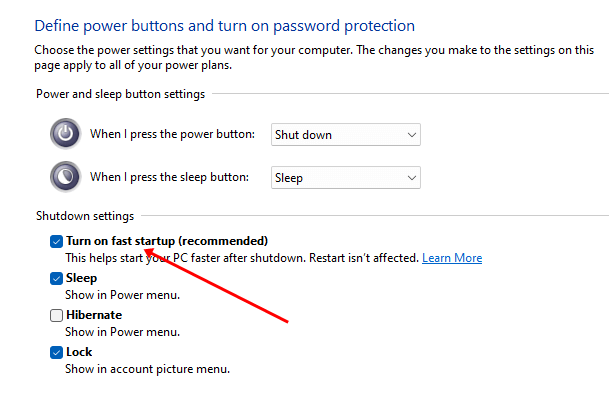
- After this, uncheck the checkbox next to Turn on Fast Startup (recommended).

- Now, click on Save Changes to save the changes.
6. Manually Enable Lock Screen through Registry Editor
Another thing that you can do is make some changes to the Registry Editor to manually enable the lock screen. Here’s how this can be done-
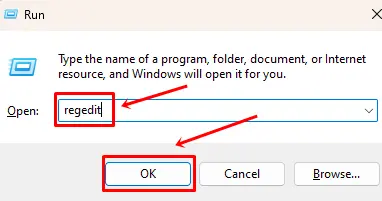
- Press the Windows key and type regedit. Now, press Enter to open the Registry Editor.

- In the Registry Editor, navigate to the following path
-
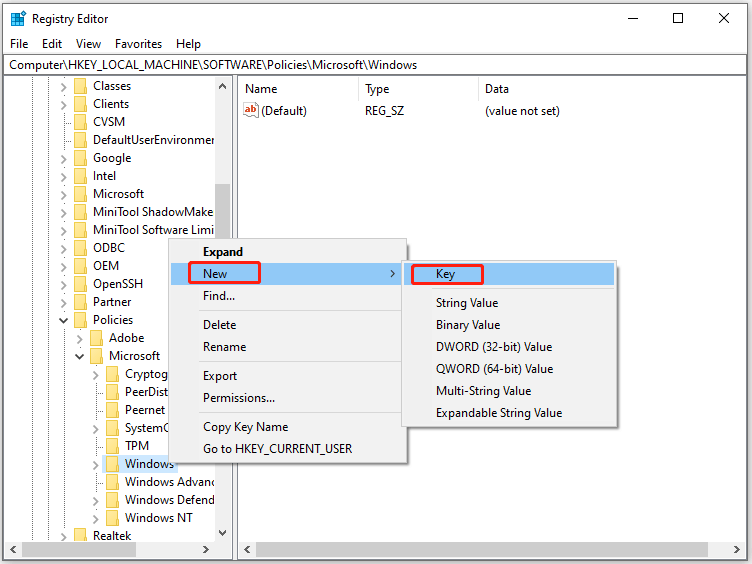
Computer\HKEY_LOCAL_MACHINE\SOFTWARE\Policies\Microsoft\Window
-
- Right-click on the Windows folder, and Click on New > Key. Name it as Personalization folder.

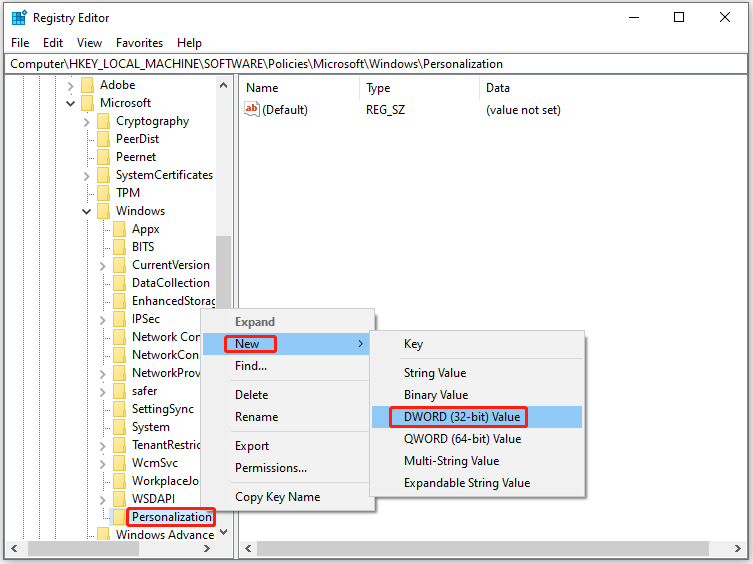
- Now right-click on the empty space on the right pane and click New > DWORD (32-bit) Value. Name it as NoLockScreen.

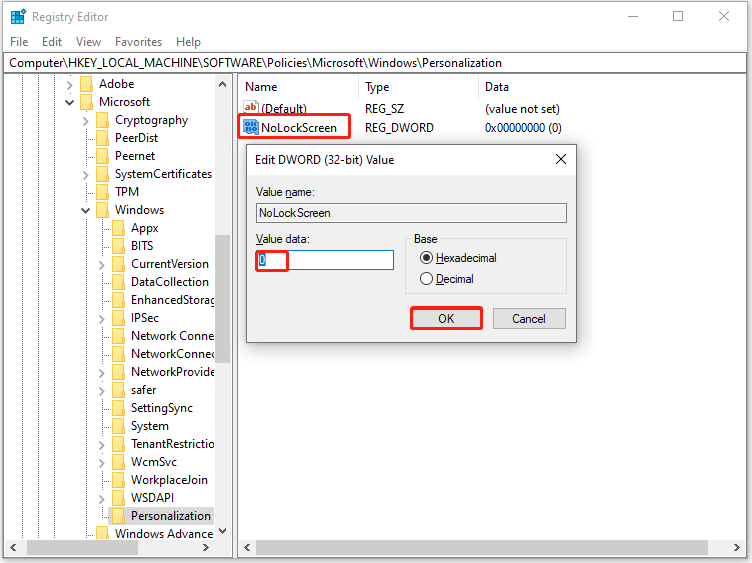
- Double-click on NoLockScreen, then Under the Value Data, change the value to 0 and then click on OK to save the changes.

- After this, restart the PC to save the changes.
7. Manually Enable the Lock Screen Through the Group Policy Editor
Windows 11 Pro users can use Group Policy Editor to manually enable the lock screen. Do note that this feature is not available for Windows 11 Home, so if you have Windows 11 Home edition try the Registry Editor method instead of this.
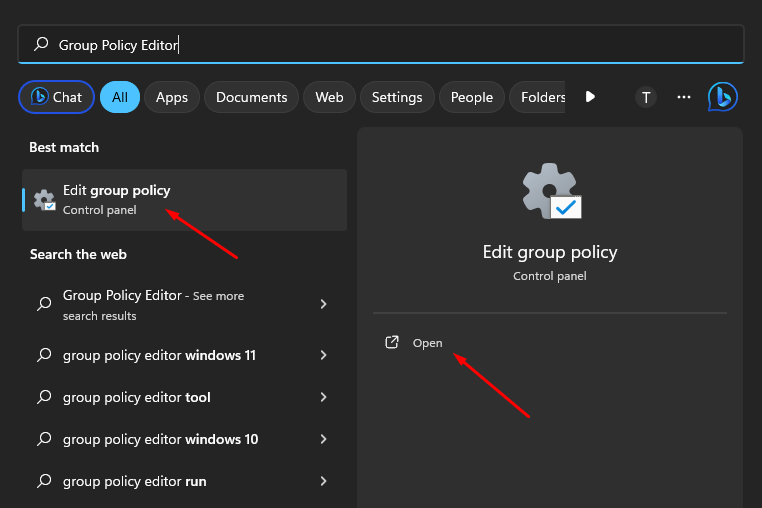
- From the Start Menu, open the Group Policy Editor.

- Head to the following path here-
-
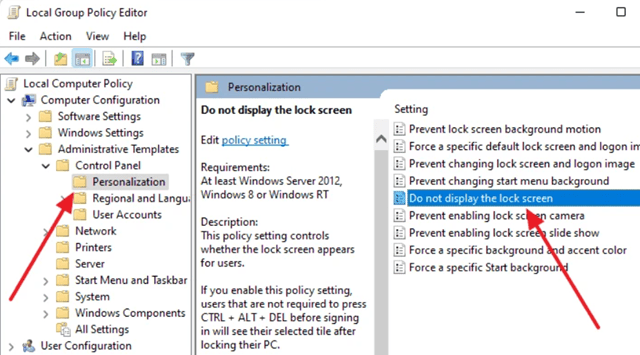
Computer Configuration > Administrative Templates > Control Panel > Personalization
-
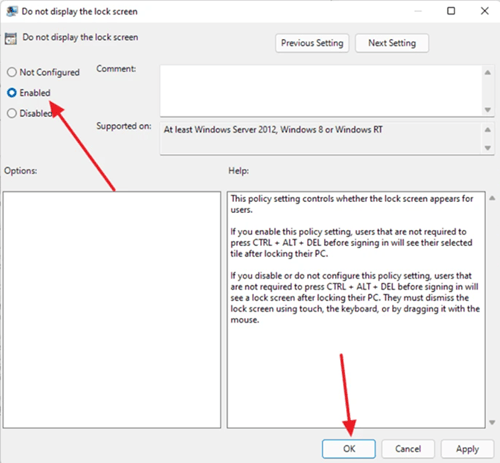
- Here, double-click on Do not display the lock screen to make changes to it.

- Select Disabled and click on OK.

- Now, restart your PC to implement the changes.
8. Disable Automatic Login
If you still cannot see the lock screen on Windows 11, then you can simply bypass it by disabling the automatic login option. The steps to do this have been discussed below-
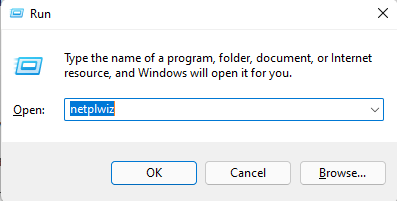
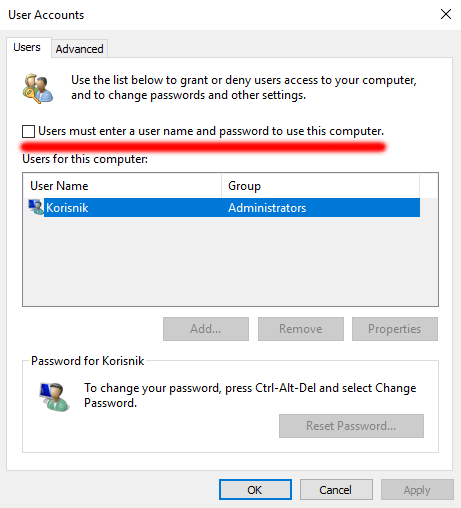
- Press Windows + R to open the Run box. Here, type netplwiz and press Enter.

- Under the Users account tab, uncheck the checkbox saying Users must enter a user name and password to use this computer.

- Now, click on Apply and then on OK to save the changes.
9. Reset PC
Reached the end of the article but Windows 11 is still not showing the lock screen. Nothing to worry about, you can try resetting your PC.
This will remove all the settings and the apps and give you are fresh start with your Windows PC. You can try resetting your PC by following the steps given below-
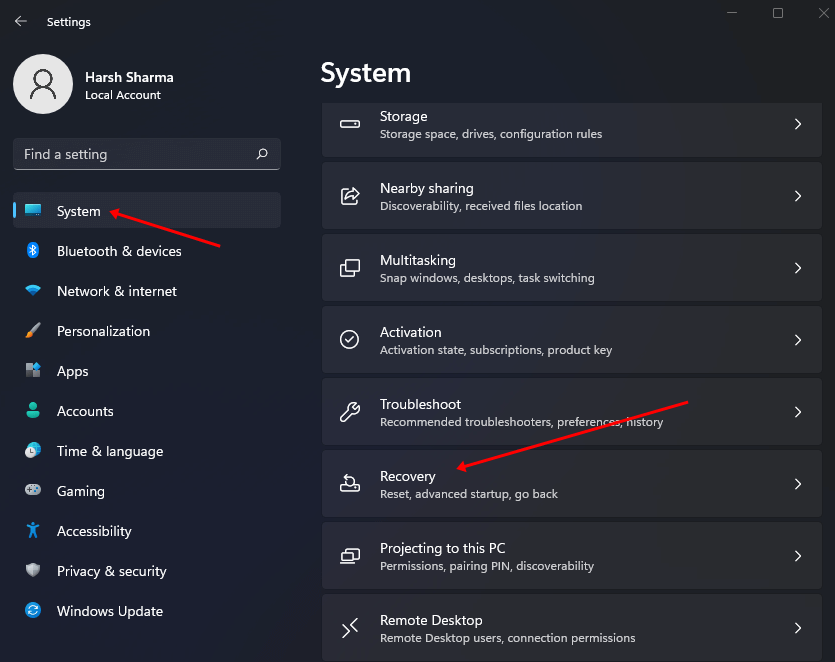
- Open the Settings app.
- Now, click on the System tab and then on Recovery.

- Now, click on the Reset PC button.
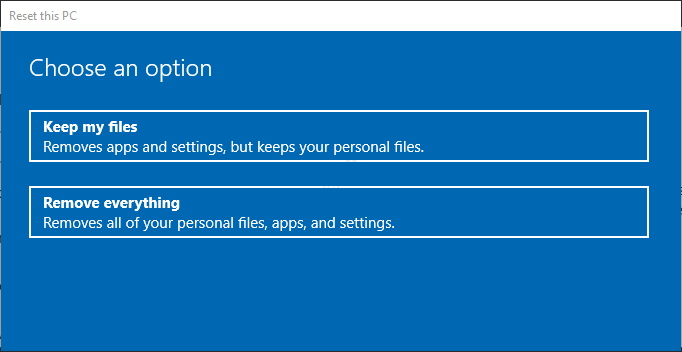
- You will be given two options, i.e., Keep my files and Remove Everything. Choose either of the options depending on whether you want to keep your files or not.

- Next, select between Cloud Download or Local Reinstall.
- Now follow the on-screen instructions to reset the PC.
Bottom Line
That should help you to fix Windows 11 not showing a lock screen. If you still face the issue even after the reset, then you should try reinstalling Windows 11. We hope this article helps you solve the issue that you have been facing with the lock screen of Windows 11.


