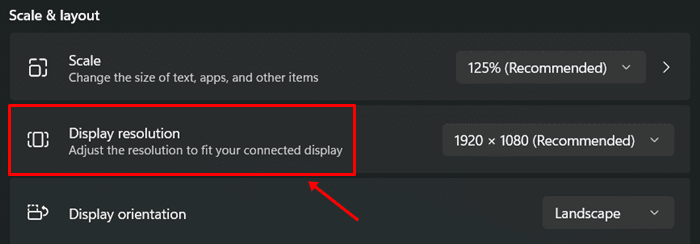
Screen resolution is a fundamental property on a PC as depending on resolution, text and items shown on-screen will be either sharp or pixeled, and so on. My laptop recommends that the default and higher screen resolutions be 1920×1080 pixels, although different systems can have different screen types and resolutions.
The higher the resolution, the clearer all texts and objects are, which is why people feel the need to yank up screen resolution. Changing screen resolution is not a complex procedure, as you have a few steps to take on your Windows 11. Bingo, you have changed screen resolution right there.
How to Check Your Screen Resolution
You want to know just what the screen resolution of your desktop/laptop is before deciding to change its resolution for XYZ reasons. Here’s how you can do it.
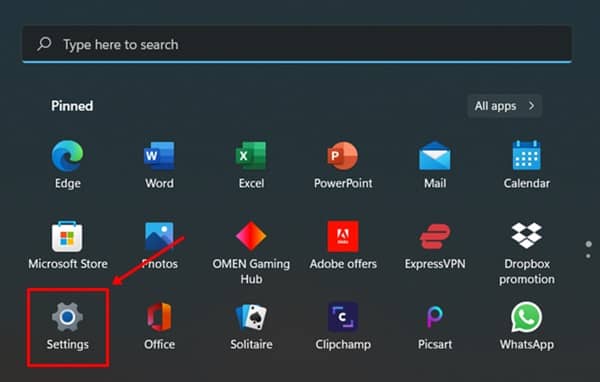
- Press the Windows button and head over to Settings.
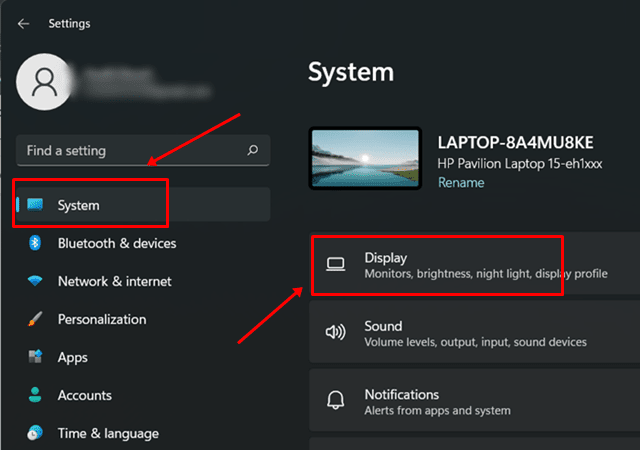
- On the left sidebar, click on System >> Display.
- Scroll to find Display Resolution, such as mine is 1920×1080 pixels.
Another Method
- Go to the Desktop.
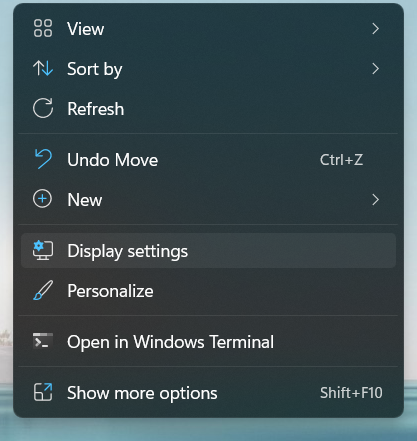
- Right-click on the black space and go to Display Settings.
- Head over to Display Resolution and there you have it.
How to Change Screen Resolution on Windows 11
Follow these steps to change screen resolution on your Windows 11 PC. Almost all Windows OS versions have somewhat the same procedure, although interfaces have changed.
- Go to Settings > System > Display OR Desktop > Right-click on the blank space and select Display Settings.
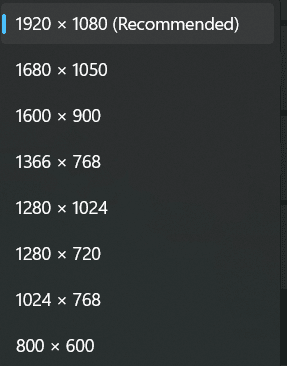
- Head over to Display Resolution and tap on the resolution selected that should give you a dropdown menu.
- Select the resolution that you want on your PC.
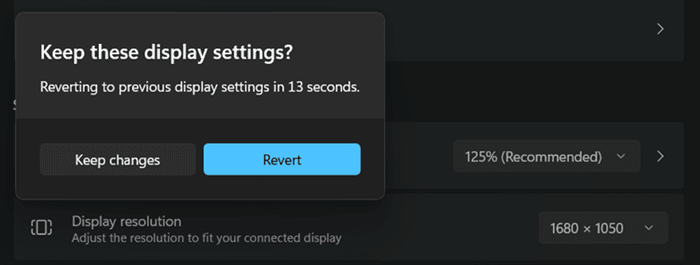
- When you select a resolution, the system will automatically demo said resolution.
- If you want to keep it, tap on Keep Changes or else tap on Revert.
How to Higher Screen Resolution
For those who want to upgrade to a higher screen resolution, note that the only thing that can prevent you from doing it is the resolution that your laptop/PC supports.
My laptop has a max resolution of 1920×1080 pixels which means I can downgrade to 800×600 pixels and anywhere in between but cannot upgrade above 1920×1080.
Of course, some apps will help you achieve it, but you will end up with readability issues. You can try using the Scaling feature before using third-party apps to upgrade to higher-than-support screen resolutions.
How to Change Scale Without Changing Screen Resolution
Your PC doesn’t support higher than recommended screen resolution, which means you have two choices. You can either scale the display or use third-party apps to unlock higher resolution (which I don’t recommend). Here’s how you can scale on your Windows PC.
- Go to Display Settings and head over to Scale.
- My PC supports scaling from 100% to 500%, whereas it is set to 125%. If I scale it more than 125%, the texts and objects will become bigger but without changing the screen resolution.
- If I reduce scaling from 125%, the size of the text and objects will decrease.
- When you click on the scaling value, you will get a dropdown list consisting of minor changes to the scaling that you can select.
- You can use its custom scaling feature to add any value from 100 to 500.
Note: Changing scaling by a bit won’t cause any issues. However, if you mention a humongous increase or decrease in scaling, this will affect readability. Therefore, I recommend scaling bit by bit unless you find the sweet spot.
You will have to restart the PC for all settings to take place. You can always revert to the default scaling by entering the value, although you will have trouble navigating if there’s a drastic change in scale.
Conclusion
There you have it. This was all about how you can use Settings on your Windows PC to change screen resolution, scaling that makes things smaller or larger without changing screen resolution, and more. Do let us know if there’s any problem with the methods mentioned above.

