In this guide, I will show you how to create a contact group on your iPhone. iPhone contact groups come in handy for sending the same message or email to multiple contacts. They also reduce the effort of creating a mailing list on your PC. You can create a contact group for text messaging using the native iPhone Messages app.
You can also create a contact group for sending emails on your iPhone. As specified in this guide, you must upgrade your iPhone to iOS 16 to create contact groups on your iPhone. Also, to add any contact to a group, they must be saved as your Contacts in the corresponding app.
1. Create Group Contacts on iPhone for Sending Emails
First, you must check that all users you want to add to a group for creating a mailing list must have an email ID associated with their contact details. Here are the steps to add the contacts into one or more groups on an iPhone for sharing emails.
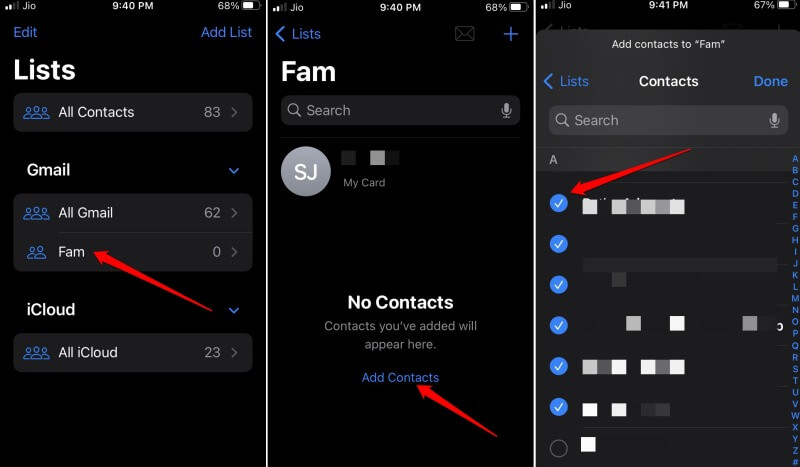
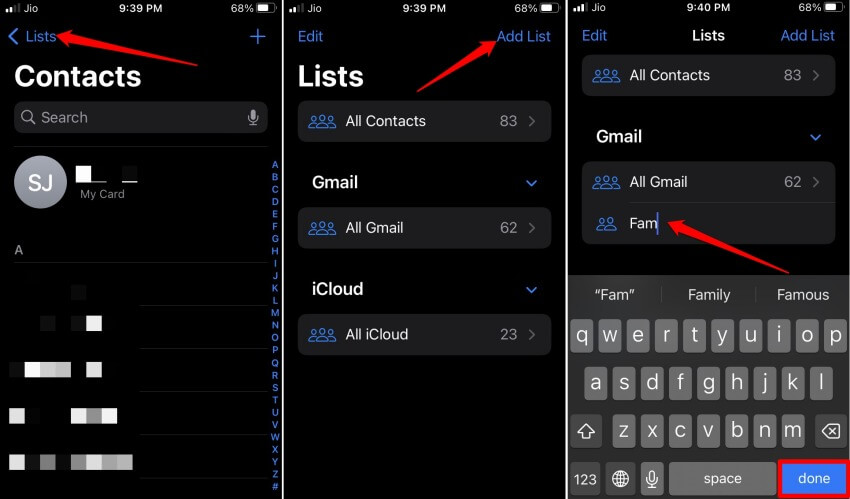
- Launch the Contacts app > tap on the option Lists at the upper-left corner.
- Tap on Add List > Enter a name and then tap on Done.
- This new List will show up under lists. Tap on it and start adding contacts to it.
- Under the new list you created, tap on Add Contacts.

- You will see the list of entire Contacts saved on your iPhone. When you select the contacts by tapping their name, a blue tick mark will appear beside them.
- Once you select the Contact names to add to the mailing list, tap on Done.

- At the top of the list, tap on the Mail icon whenever you want to send an email to the participants of that email listing.
- In the To: field, type the name of the Contact Group. The email will reach every member of the group.
2. How to Create a Contact Group on iPhone for Text Messaging?
Just as you may need to send out an email directed to one or more contacts, you may also need to send text messages to your contacts.
Instead of sending them one by one and wasting time, you can create a contact group on your iPhone, add the contacts and send a message only once.
The message will reach everyone. Again, ensure that the contact number is saved before adding them to the text messaging group.
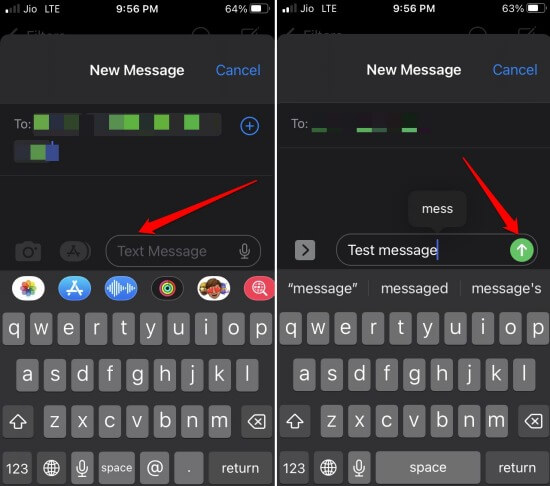
- Open the Message app on the iPhone.
- In the To: section, add the name of all those contacts.
- Draft your message and tap the upward arrow button in the message field to send the message.

2.1 Change the Name of the Message Group on the iPhone
To name your messaging group,
- Tap on the Contacts at the top.
- Then tap on Change Name and Photo.
- Enter the new name, and add a photo from your iPhone.
Make sure every contact in the text message group uses an iPhone and iMessage. Having a name for the group will reduce your effort in entering the name of each contact to whom you wish to send a message. Enter the group name in the To: field and send your message swiftly.
3. What if You Have Not Upgraded the iPhone to iOS 16?
If you have not updated the iPhone to iOS 16, you can still create an email list of your contacts using iCloud.
- Access iCloud from your Mac or Windows PC.
- Within iCloud, open the Contacts app. The contacts must be synced across your Apple devices through iCloud.
- Click the + icon > click on New Group.
- Select the contacts to add them to the new group.
- As your Mac and iPhone are synced through iCloud, the update will reflect on your iPhone.
Wrapping Up
Now, you know how to create a contact group on your iPhone. This will enable you to send urgent emails and text messages to the desired contacts fast and without spending effort on sending individual emails and messages.


