Have you ever wondered if you can delete the system folders in Windows like the System32 folder? I’ve always wondered and once tried to do so. But the results were disastrous. Your system will become unstable, and you cannot do anything, and the only way to restore is to reinstall the system.
If you learn to delete the system32 folder, you can apply the same methods to delete folders like “Windows.Old” and its content, which will be created if you reinstall the system without formatting the existing Windows installation.
The system32 folder is located under C:\Windows\. It contains important files and executables required to run the Windows OS. If removed or deleted, your system will crash and will not recover at all.
Steps to Delete System32 Windows Folder and Files
You cannot easily delete the system32 folder or its content. You would delete any other of your personal files or folder because the folder “System32” and its content are created while installing Windows OS by the Trusted installer.
Should You Delete the System32 Folder?
No! You should not delete the folder, and we won’t recommend or encourage you in any way to delete the folder or its content. Windows as an Operating system relies on the System32 folder and its content to function correctly.
Method 1: Using DEL Command in the Command Prompt (CMD)
DEL command can be used to delete files from any folder in the windows command prompt. So let’s see how to use the del command to delete any file within System 32 folder.
- Open Command prompt or PowerShell as admin. Shortcut Win key+X, A.
- Now change the working directory into the System32 folder by typing in the following command:
cd C:\Windows\System32
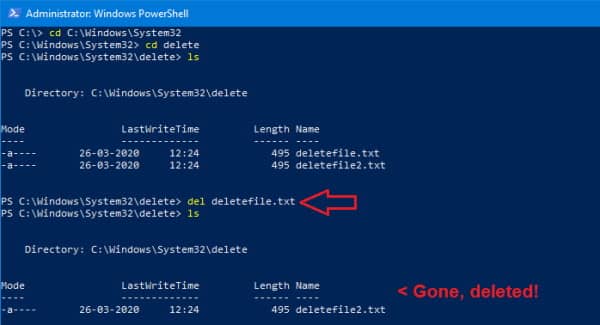
- If you know the name of the file you want to delete, type in “del” followed by the filename. For instance, if I want to delete the file with the name “deletefile.txt,” I would type:
del deletefile.txt
- Hitting enter will remove the file from the folder.
In the example, I delete a file “deletefile.txt” inside the C:\Windows\System32\delete folder, which I already created. But you can manipulate this command to delete any file you need to delete in any folder. Just CD into that folder and perform the del command on it.
Method 2: TakeOwn (Take ownership command)
- First, cd to the C:\Windows directory using the cd command.
cd C:\Windows
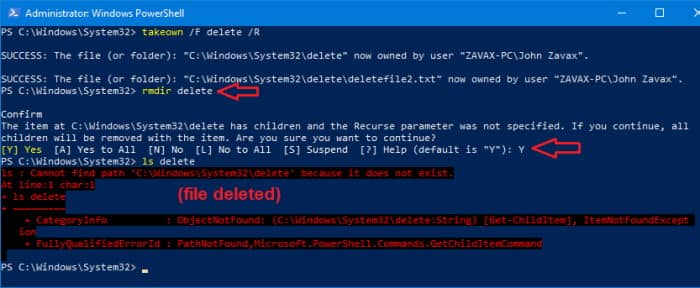
- Now take ownership of the folder system32 and all its contents using the takeown command.
takeown /F System32 /R
- Here in the above command, /F denotes we’re specifying the folder after that, and /R will apply the action to all of its subfolders and files. If you’re using this command on a single file, you don’t need to specify /R.
- Hit enter, and you should have taken ownership of the system32 folder and files.
- Finally, you can pass on the del command to the file or folder you wish to delete and delete it.
del delete/deletefile.txt
- Or you can remove the whole directory using :
rmdir delete
Method 3: Take Ownership from the Explorer Properties Tab
The same can be accomplished using the Windows File Explorer if you’re not comfortable using the command line.
- Open File Explorer by pressing the Windows key and E at the same time.
- Navigate to C:\Windows\ (you can copy-paste this text into the explorer’s address bar to open this quickly).
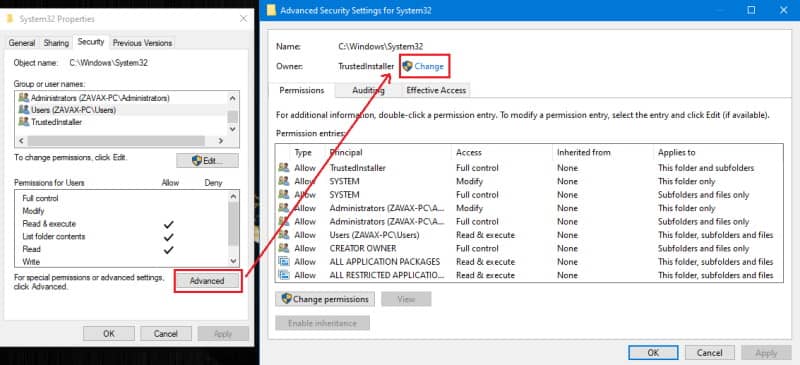
- Now right-click on the System32 folder and click on Properties.
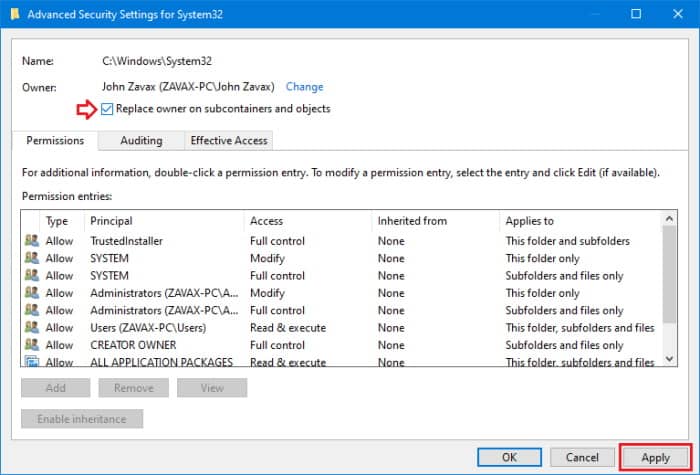
- Click on Advanced, and from the pop-up, click on the change as shown in the picture.

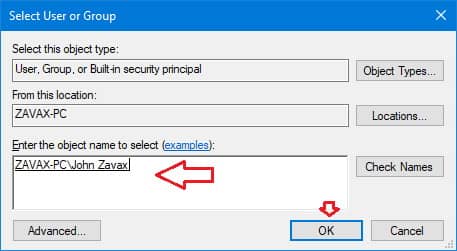
- Again, another pop-up opens where you have to type in your account’s user name and hit enter.

- Now put a tick mark on “Replace owner on sub-containers and objects” hit Apply.

- Finally, close all open properties tab.
Once you perform the above operation, you should’ve taken ownership of the folder and its contents. Now, let’s change the permissions for your account.
Method 4: Change Permission to Full Control for your Account
Now once you acquire the ownership, it’s time to take full control of the files. You can do this by following these steps:
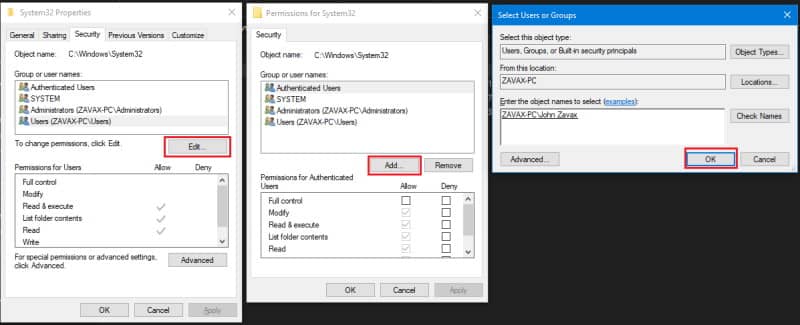
- First, right-click on the system32 folder and click on Properties.
- Now click on Security and click on Edit to edit the properties.

- Next, click on Add and add your Username to the list and hit enter.

- Finally, highlight your Username from the list, click on Full Control, and hit Apply.
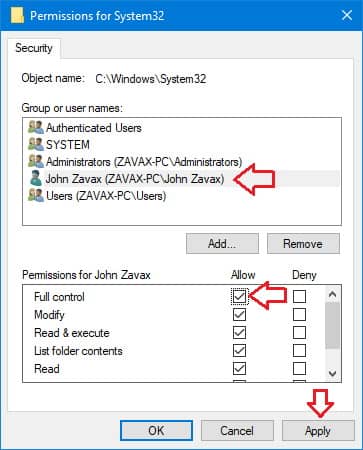
If you do so, you should have complete control of the files and folders. Now you can right-click on the folder and delete it without any error message or prompt.
From Editor’s Desk
So this is how you can delete the System32 folder and files in Windows. As you can see, the steps are a bit more complicated because it’s a complicated task. To warn you again, you shouldn’t be deleting the sytem32 folder unless you’re in absolute knowledge of what you’re doing and its consequences.


