Through the Internet Connection Sharing feature, users can share the internet of a PC with the other computers on the local area network. This feature allows any of the local area networks (LAN) computers to access a PC’s internet on a user even without permission.
This feature proves useful when you want to share your internet with another PC, but you may find other PCs using your internet without your permission, even if you don’t want them to. In that case, you have no option but to turn off or disable internet connection sharing in windows 11.
If you are wondering how this feature can be turned off, you need not worry about it, as we have covered you. This article discusses various ways using which you will be able to disable Internet Connection Sharing in Windows 11.
Ways to Disable Internet Connection Sharing in Windows 11
You can disable Internet Connection Sharing on your PC using Services, Group Policy Editor, or Control Panel. We have discussed all of these methods in the article ahead-
1. By Using Services
Users can use the Services app to disable Internet Connection Sharing in Windows 11. The steps for the same are as follows-
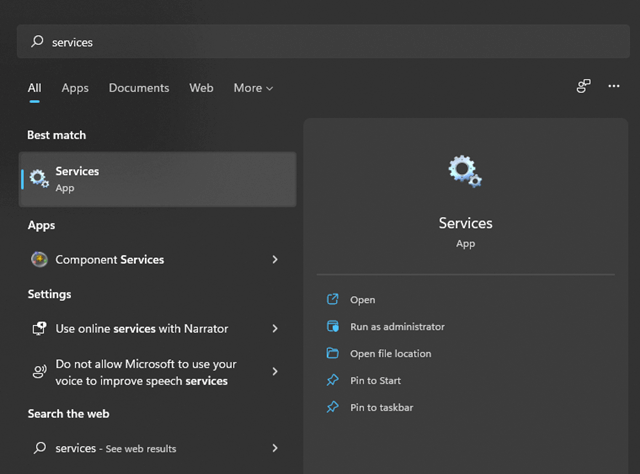
- Go to the Start menu, search for the Services and open it.

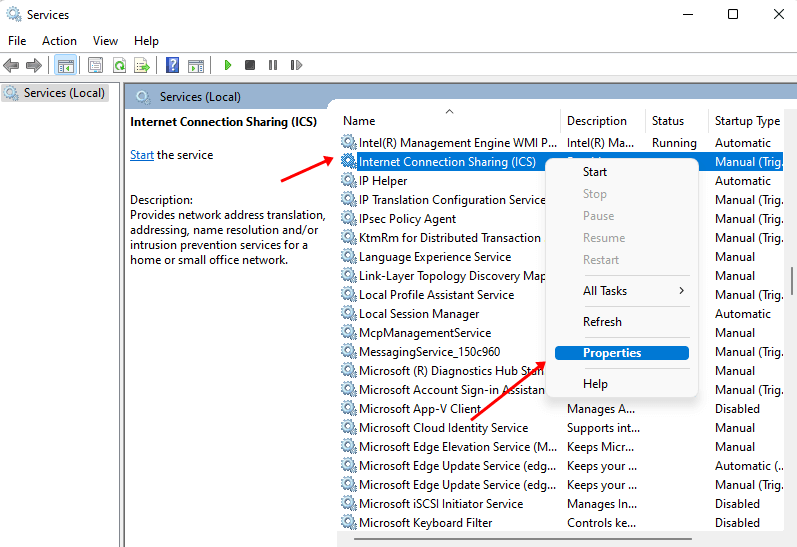
- Here, search for the Internet Connection Sharing (ICS) service. Right-click on it and then click on Properties.

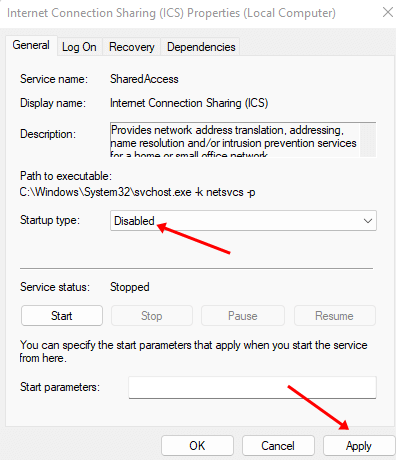
- Here, set the Startup type to Disabled and click on the Stop button.

- Now, click on Apply and then on OK.
- Once done, close the Services app and the Internet Connection Sharing feature will be disabled.
2. By Using Local Group Policy Editor
Another method to disable Internet Connection Sharing is by using the local group policy editor. To do so, follow the steps given below-
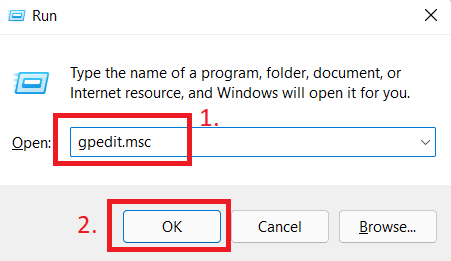
- Press Windows + R key combo, type gpedit.msc, and hit Enter. This will open Local Group Policy Editor.

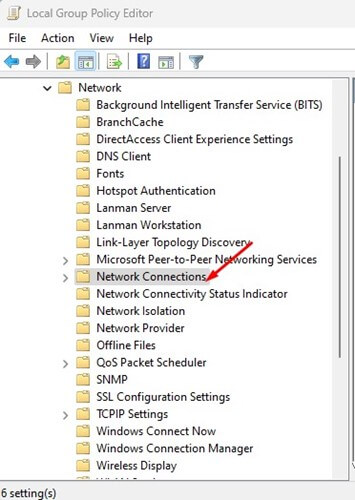
- Here, navigate to the following address-

-
Computer Configuration > Administrative Templates > Network > Network Connections.
-
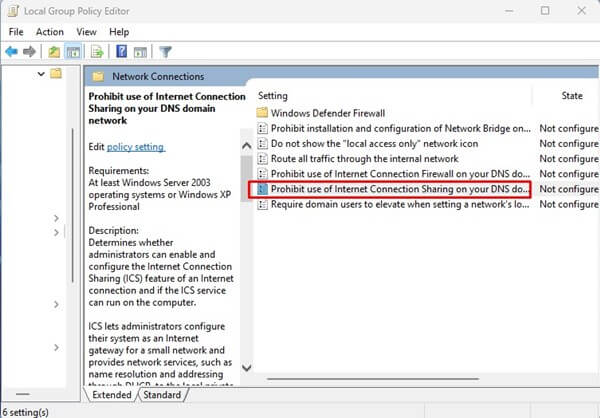
- On the right side, double click on the Prohibit use of internet connection sharing on your DNS domain network.

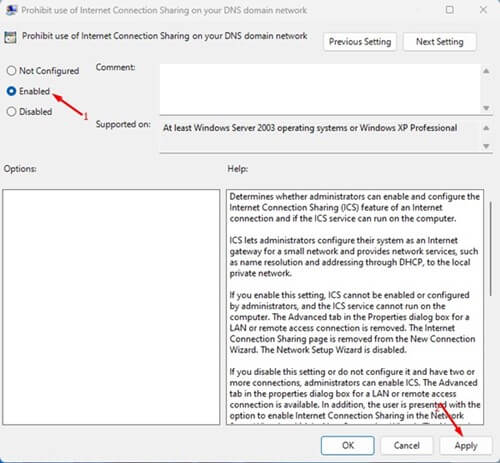
- Next, select the Enabled option. Click on Apply and then on OK to save the changes.

3. By Using Control Panel
The last method user can apply to disable Internet Connection Sharing in Windows 11 is with the help of the Control Panel. Given below are the steps to do so.
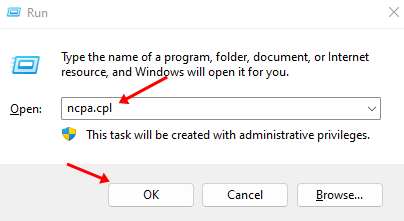
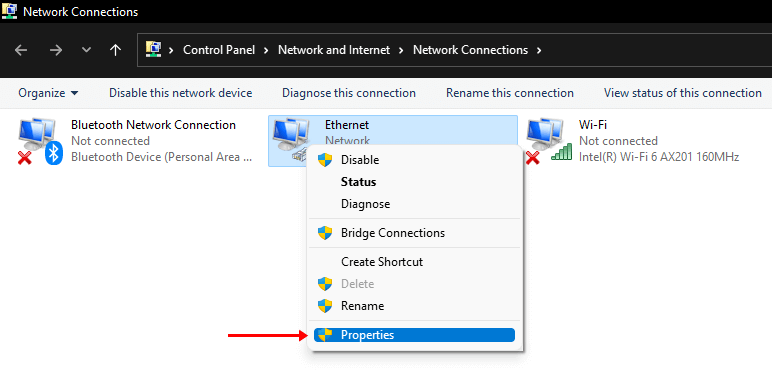
- Press the Windows + R key combo, and type ncpa.cpl and press Enter. This will open the Network Adapter window.

- Next, right-click on the network you are connected to and then click on Properties.

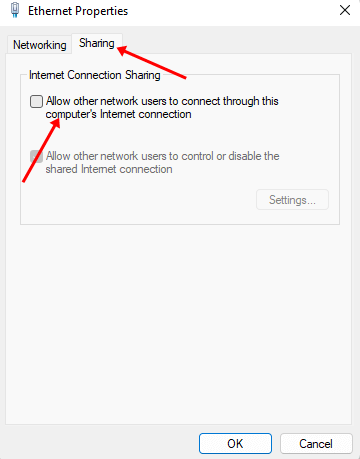
- Under the Sharing tab, uncheck the checkbox for Allow other network users to connect through the computer’s internet connection.

- Lastly, click on Apply and then on the OK button.
Conclusion
These were some ways to disable Internet Connection Sharing on Windows 11. Though Internet Connection Sharing is useful, you may have to turn it off to prevent unwanted internet sharing. If you want to turn off this feature, you can follow the steps in this article.
Frequently Asked Questions (FAQ)
1. What Is Internet Connection Sharing Service?
It is a feature that allows users to share the PC’s internet with the local area network. The feature is available for both Windows 10 as well as for Windows 11.
2. How do I turn off Internet Connection Sharing?
If you want to turn off Internet Connection Sharing, this article will surely help. This article discusses various ways to disable the internet connection sharing feature, so you can follow them if you want to turn it off.


