If you know how to boot Windows, you must know about Secure Boot, which protects your computer from harmful software during the boot process. However, if you do not know how to enable Secure Boot or want to check whether it is enabled or disabled, we will teach you how to do that.
Every motherboard has its own BIOS settings options, and in this article, we’ll specifically discuss MSI motherboards. If you are looking for a way to enable Secure Boot on MSI motherboards, then you are in the right place.
There are many articles on this topic on the internet, but most of them are complicated. In this article, we will explain everything in as simple a way as possible so that anyone with zero knowledge about it can easily follow it. So without any further delay, let’s start looking at the method.
How to Enable Secure Boot on MSI BIOS?
Before proceeding with the main process of enabling Secure Boot on MSI BIOS, there is one thing you need to know. Many people are installing Windows 11; if you are one of them, keep reading. However, if you want to install Windows 10 or an earlier version, you can directly proceed with the main method.
Windows 11 requires a UEFI (Unified Extensible Firmware Interface)- based system with a GPT (GUID Partition Table) partition for secure boot. To do this, partition your drive to GPT and switch the BIOS to UEFI mode. Follow the steps given below.
Checking Current Partition Style
Let’s first check your current partition style to decide if your disk’s partition style is MBR, then, you can proceed to upgrade it to a GPT partition. Basically, the partition style instructs the operating system on how it analyzes and manages disk partitions.
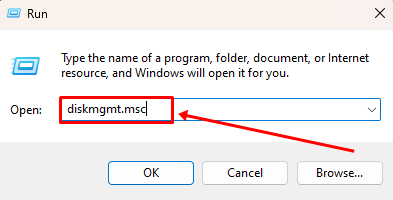
- Press Windows + R, type diskmgmt.msc, and hit Enter. Or Press Windows + X and select Disk Management.

- Right-click on the disk you want to install Windows and then go to Properties.

- Select the Hardware option and then Properties.

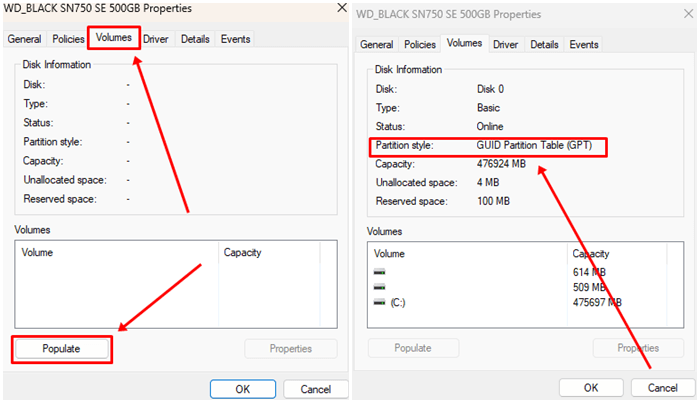
- Now, click on Volumes and then click on Populate to view the disk information.

- Finally, if the partition style is GPT, you can go directly to the Enable Secure Boot method. If it is MBR, then follow the steps below to convert it to GPT.


Convert Partition Style to GPT
GPT is a newer and more efficient partitioning style than MBR, so converting to GPT is a good option. Follow the steps below carefully; if there is any important data on that disk, make sure to backup it. After converting, your disk data will be permanently deleted.
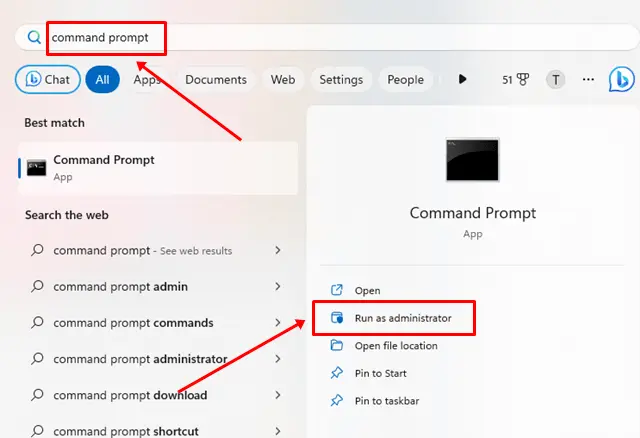
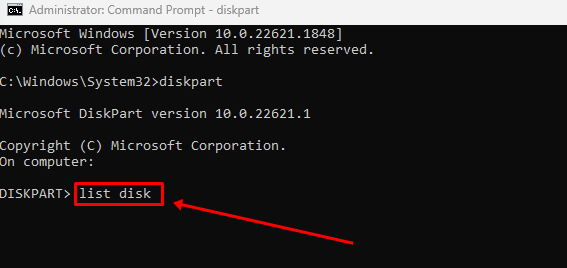
- Press the Windows key and type command prompt, then click Run as administrator.

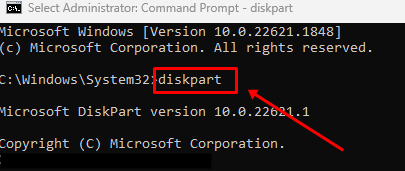
- Type diskpart in the command prompt and hit Enter.

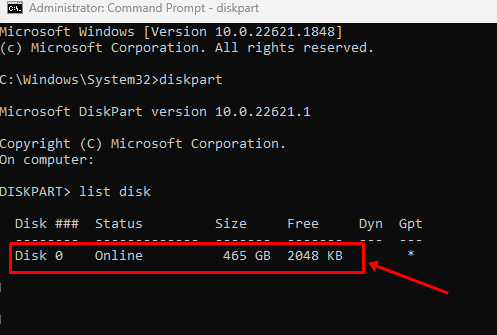
- Now, type list disk and press Enter.

- You will see a list of drives in the command prompt. Select the disk you want to convert. For example, as you see on the screenshot we have only one disk listed as Disk 0.

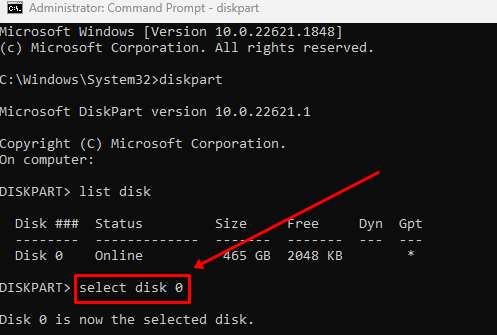
- Type select disk 0 and hit Enter, make sure to replace “0” with your own disk number.
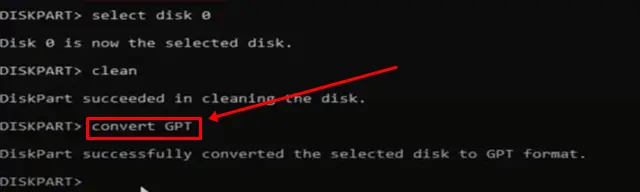
- Type clean and press Enter. This command will delete all your data and partition from the selected drive, so make sure to create a backup first.

- lastly, type Convert GPT and press Enter. After successfully converting into GPT, close the command prompt window.


Enable Secure Boot
Before enabling Secure Boot, let’s check if your BIOS mode is set to UEFI or CSM(Compatibility Support Mode), as some MSI BIOS versions may not provide access to Secure Boot settings when BIOS mode is set to CSM.
Check MSI BIOS Mode
As we discussed, Windows 11 requires a UEFI-based system, and enabling CSM may disable some UEFI features that are required to boot Windows 11. CSM is specially designed to support older operating systems.
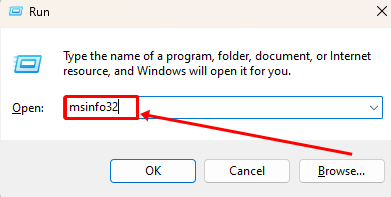
- Press Windows + R to open the Run box, then type msinfo32 and press Enter.

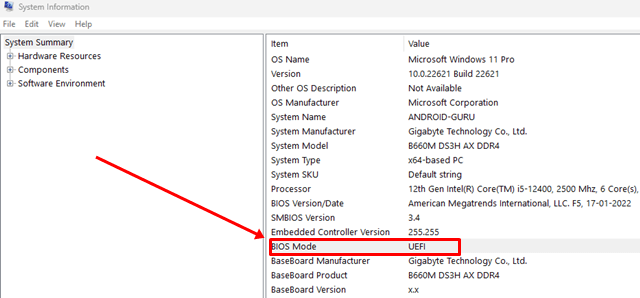
- In the System Information window, you will see the System Summary panel on the left side. Click on it, and you will find the BIOS mode displayed on the right-side panel.

- If your BIOS mode is set to CSM, follow the steps below to switch it to UEFI.
- If it’s already set to UEFI, then you can skip the next steps and proceed to the next method.
How to Switch BIOS Mode from CSM to UEFI
If you want to switch BIOS mode from CSM to UEFI then follow the below steps carefully.
- Restart your PC and during startup press the BIOS key continuously to enter BIOS. The BIOS keys you can use are Del, F2, or F10.
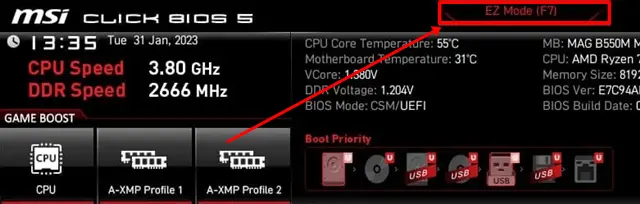
- Press F7 to enter EZ mode.

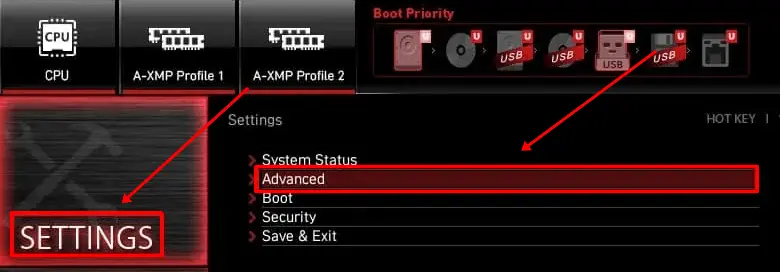
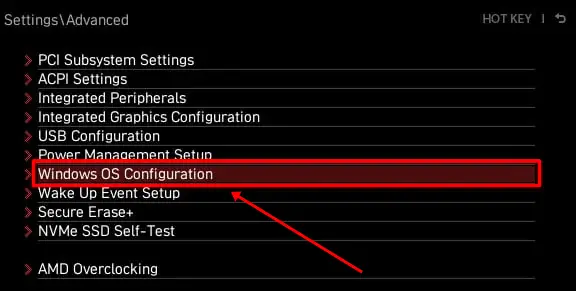
- Click on Settings > Advanced.

- In the Advanced Settings, click on Windows OS Configuration.

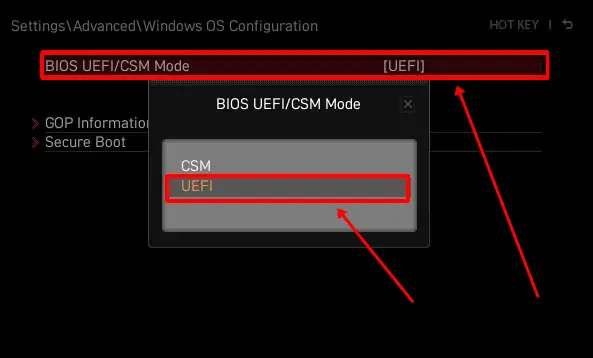
- Now change the BIOS mode from CSM to UEFI. After making changes, press F10 to save the settings and select Yes to confirm.

Enable Secure Boot
If you have successfully switched the BIOS mode from CSM to UEFI, you can now easily enable Secure Boot with a few steps.
- Restart your PC and continuously press the BIOS key during startup.
- Press F7 to enter EZ mode.
- In the EZ mode, click on the Settings menu.
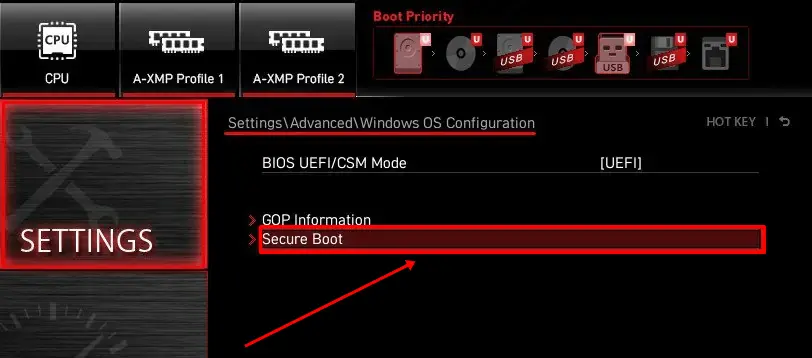
- Now go to Advanced > Windows PC Configuration > Secure Boot.

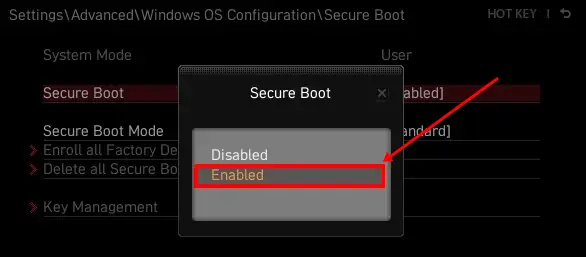
- Press Enter on Secure Boot to enter the menu and then select the Enabled option.

- Save the changes by pressing F10 and then restart your PC.
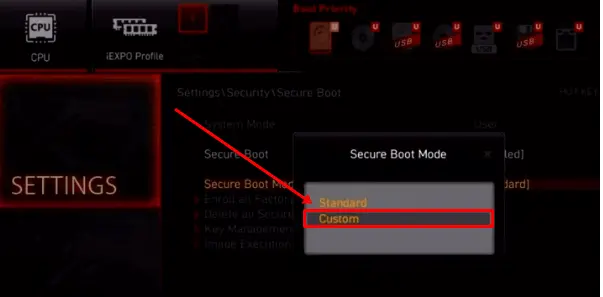
If Secure Boot can’t be enabled due to the setup mode, you need to switch to user mode by setting the Secure Boot mode to standard. Follow the steps below to do this.
- Go to the Secure Boot Mode option, located just below the Secure Boot setting, and select Custom Mode.

- Press F10 to save the changes and restart your PC.
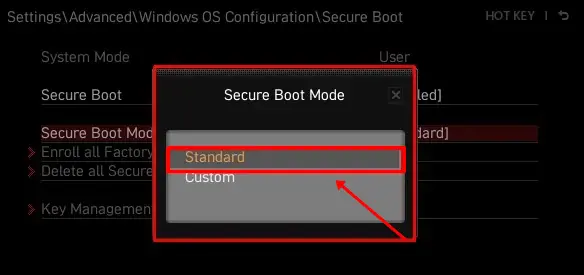
- Once your PC restarts, enter the MSI BIOS settings by pressing the boot key. Navigate to the Secure Boot option, as mentioned in the earlier steps.
- In the Secure Boot menu, change the Secure Boot Mode from Custom to Standard.

- Select YES for confirmation. If you see a confirmation message saying Reset Without Saving, select NO.
- Now, go to the Secure Boot option once again and select the Enabled option.
- Finally, press F10 to save the changes and exit the BIOS settings.
How to Check Secure Boot State in Windows?
If you want to check your computer system’s Secure Boot state, follow these steps.
- Press Windows + R to open the Run box.
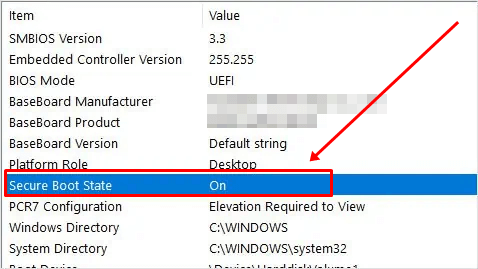
- Type msinfo32 and hit Enter.
- In the right panel, you will see Secure Boot State in the list of items with its current state as either ON, OFF, Enabled, or Disabled.

Conclusion
That’s all for this article. We’ve done our best to provide a simple and informative guide. We hope you found this article easy to understand and useful. If you liked this article, please feel sharing it with other people who are looking for a way to enable Secure Boot on their MSI motherboards.
If you have any questions regarding this article or any other topic, feel free to comment below. We will surely help you to solve your problem as soon as possible.


