BitLocker encrypts data on your device to protect it against data intrusions. However, users have come across an error with BitLocker with the error message ‘Failed to open the BitLocker control panel tool’ in Windows 11. If you are looking for troubleshooting steps to fix this issue, then this article will help you through it.
However, before continuing with the troubleshooting steps, it is essential to know the reason behind facing this error. Most likely, you may face this issue if the Windows 11 version on your PC does not have BitLocker. Moreover, you may also face this issue due to corrupted system files or bugs in the system. This guide discusses the troubleshooting steps to fix the ‘Failed to Open BitLocker Control Panel Tool’ error in Windows 11.
Also Read- Fix Ethernet Not Working in Windows 11
Fix Failed To Open Bitlocker Control Panel Tool in Windows 11
Given below we have listed some of the working troubleshooting steps to help fix the ‘Failed To Open BitLocker Control Panel Tool’ In Windows 11.
1. Ensure BitLocker Is Available On Your PC
The very first thing that you should ensure is that the BitLocker is available on your PC. To do so, follow the steps given below-
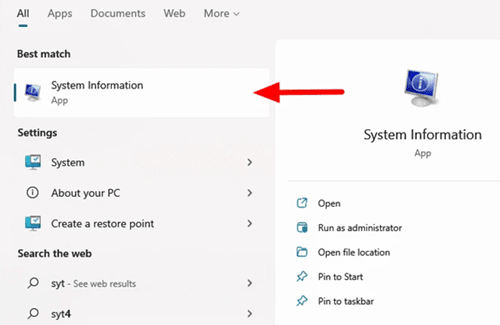
- Open the Start Menu and search for System Information.

- Now, right-click on the System Information from the search result and then click on Run as Administrator.
- Here, look out if the Device Encryption Support says Meets Prerequisites. If it says so, then you can follow the next steps in the article to fix the issue.

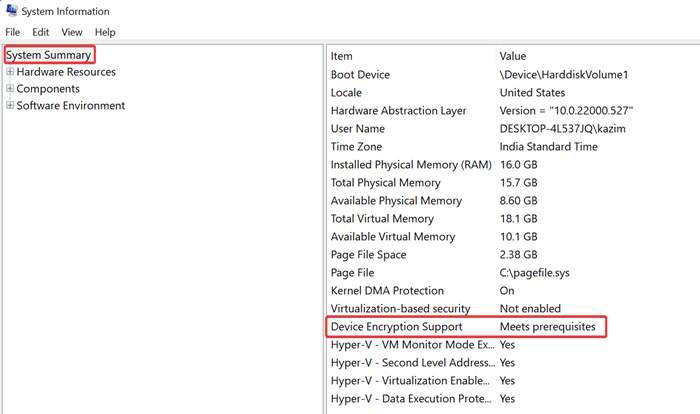
However, if the BitLocker is not available on your Windows 11 version then there is nothing you can do. This happens mostly with Windows 11 Home users. So, if you are a Windows 11 Home user, upgrade to the Pro edition.
2. Perform SFC and DISM Scan
The very next step to follow is running the SFC and DISM scan. Both of these scans help fix the issues and errors on your PC due to corrupted files. To run the SFC scan, follow the steps given below-
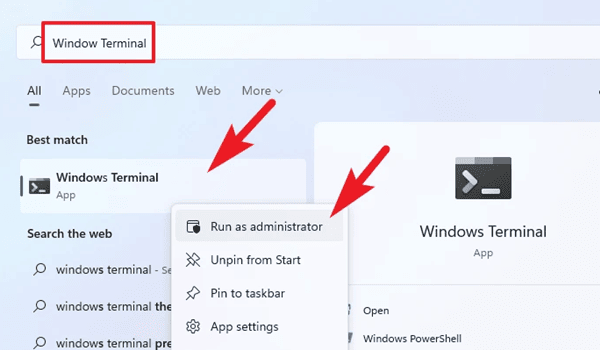
- Open the Start Menu and search for Windows Terminal.
- Now, right-click on the Windows Terminal from the search results and then click on Run as administrator.

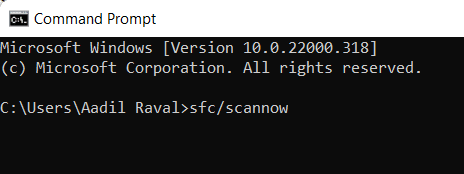
- In the Command Prompt, type and execute the command sfc /scannow

- The process will begin. Now, wait for the process to complete and then restart your PC.
The issue should be fixed by now, and if you still encounter it, then you should perform a DISM scan. To do so, follow the steps given below-
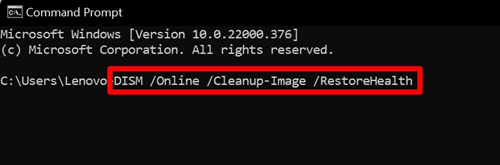
- In the Command Prompt with administrative privileges, type and execute the command
DISM.exe. /Online /Cleanup-Image /Restorehealth
- Now, wait for the process to complete and close the command prompt and restart your PC.
3. Edit Group Policy Editor
Another troubleshooting step to follow is making changes to the Group Policy editor. To do so, follow the steps given below-
- Open the Start Menu and search for Local Group Policy Editor.
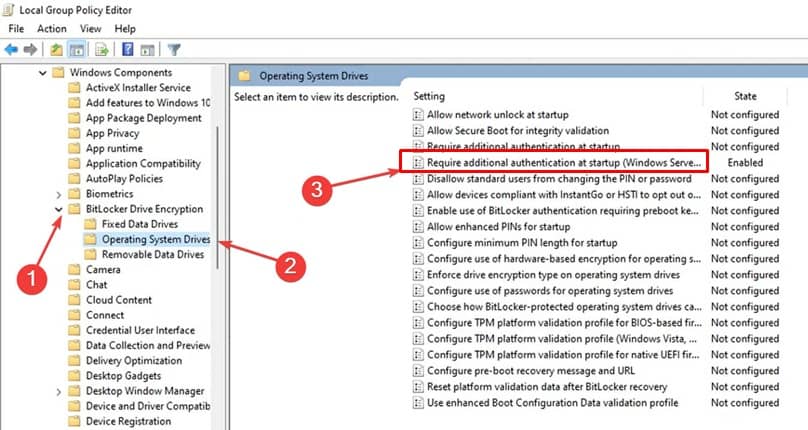
- In the Group Policy Editor, head to the following address-
Local Computer Policy > Windows Components > BitLocker Drive Encryption
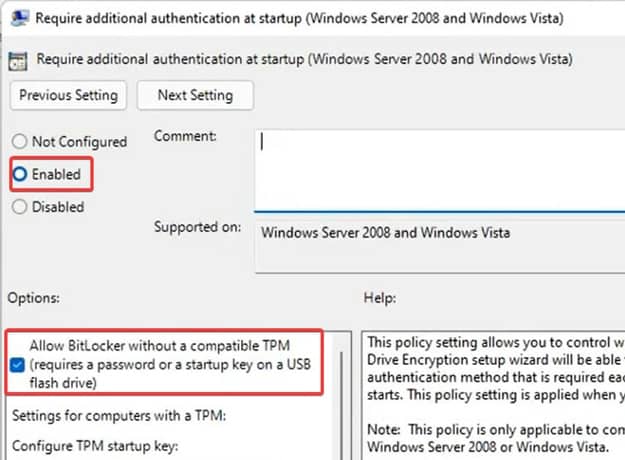
- Now on the right side, double click on Require additional authentication at startup (Windows Server 2008 and Windows Vista).

- Ensure that it is enabled and check the checkbox for Allow BitLocker without a compatible TPM.

- Click on Ok to save the changes.
4. Ensure BitLocker Device Encryption Service Is Running
If the BitLocker Device Encryption service is not running, then also you may face the issue. To enable this service, follow the steps given below-
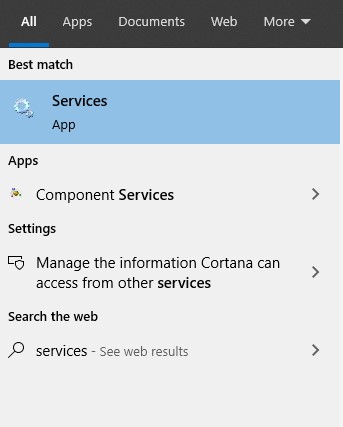
- In the Start Menu, search for Services and open it.

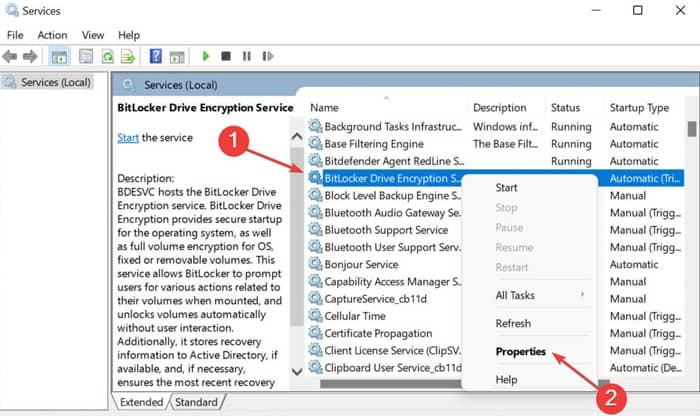
- Now in the Services app window, search for and select Bitlocker Device Encryption Service.
- Right-click on it and then click on Properties.

- Select the Startup Type as Automatic and click on the Start button to start the service.

- Now, click on Apply and then on OK to save the changes.

5. Perform System Restore
If you started facing the ‘Failed to Open BitLocker Control Panel Tool’ error in Windows 11 after installing an update or software then you will be able to fix it by performing a system restore. However, to do so, you will need to have a restore point before the update or the app was installed.
To perform a system restore, follow the steps given below-
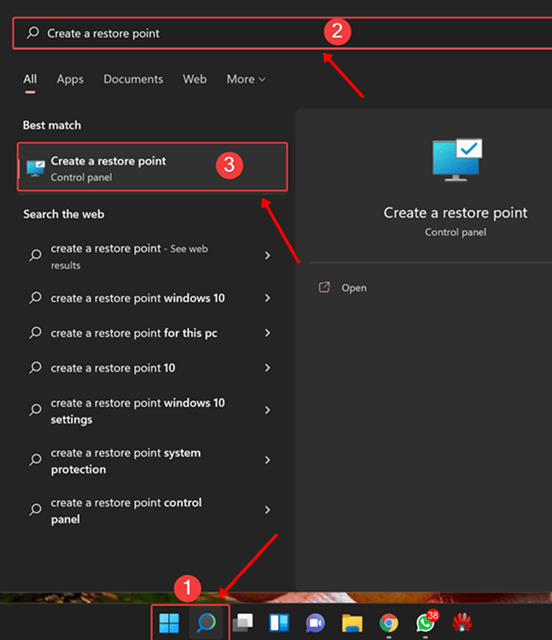
- In the Start Menu, search for Create A Restore Point. Now, click on the very first option in the search result to open it.

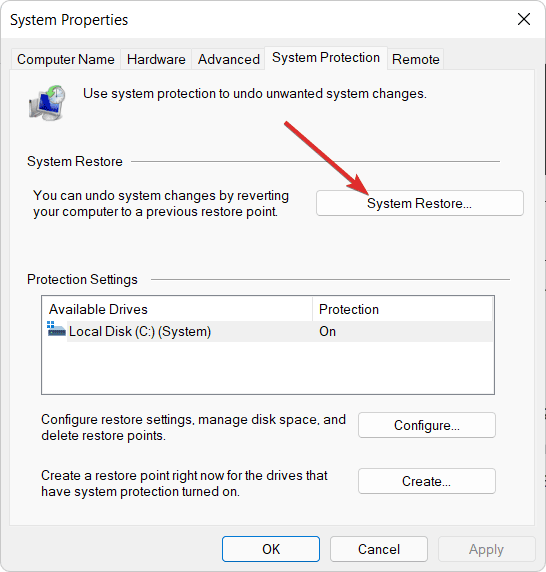
- Now, click on the System Restore.

- Now on the Next screen, click on Choose a different restore point and continue ahead.
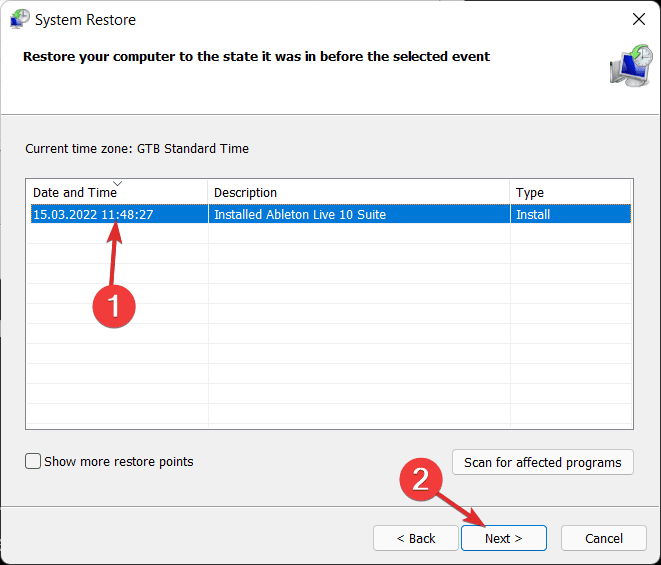
- Next, select the restore correct restore point.

- If you want to see what programs will be installed or uninstalled and what changes will be made, then click on Scan for affected programs.
- Now, click on Next and follow the on-screen instructions to perform the system restore.
Final Words
This is how you can fix the ‘Failed to Open BitLocker Control Panel Tool’ error in Windows 11. If you have been facing this error message because of which you are not able to use BitLocker, then the above steps will help you solve it.


