Windows 11, or the next generation of Windows, is all set to arrive anywhere soon, within a few months. However, this will be a whole new version instead of just another update to Windows 10.
Currently, Windows 11 is in the beta phase, and as we know, the beta version is not the final version. So, it might be possible that there is some sort of error and bugs present in it.
However, right now, there’s an error that bothers many users worldwide, i.e., whenever they try to close an application, they end up getting the “app process not closing error” on their Windows 11 PC
Nonetheless, the reason behind this error is still unclear, as it may be due to some random bugs or some temporary cache file. But don’t worry! We have a variety of ways to fix App Process Not Closing Issue. So, let’s get started with it.
How to Fix App Process Not Closing Issue in Windows 11
Here the methods we describe below are proven to be one of the best fixes to resolve this error. So, you must make sure to follow the guide step-by-step carefully. So, now let’s begin with our fixes.
1. Use System Configuration to Disable The Process
Many users reported that doing this helps them fix the “app process not closing error” on their Windows 11 PC. So, why don’t you give it a shot? Here are the necessary steps that you need to follow to disable the process via system configuration:
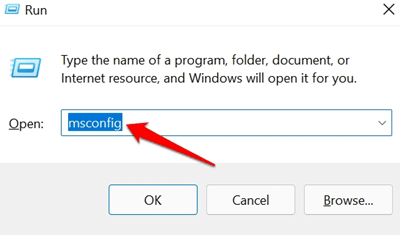
- Firstly, you are required to invoke the Run dialog box by pressing the Windows + R button from your keyboard.
- After that, search for the MSConfig. Doing this will open the System Configuration menu.

- Now, shift to the Services tab, uncheck all the processes you wish to disable or that give you the error, and hit the OK button.

- That’s it. Now, close the System Configuration windows and reboot your PC.

2. Close Them Using Command Prompt
Have you tried this method before? Well, this is one of the effective methods to fix this. So, if you aren’t familiar with this method, then follow the steps mentioned below:
- First of all, you should hover over to the Start menu and search for CMD using the Windows search button. Then, open it.
- Now, use this command to open the syntax of Task Kill:
TASKKILL /?

- Then, from all the parameter lists, use the /IM imagename. Therefore, next, you have to hold the imagename that you wish to disable. Then, use the below command for that:
Tasklist

- Now, a list of all the running processes on your Windows 11 PC will appear. Since the first column signifies the image name, note down all the image names you wish to close.
- That’s it. Now, use the mentioned command and replace the name of each imagename tag.
taskkill /IM imagename


3. Terminate the Application
As you may already be familiar with, Microsoft totally revamped the Windows Settings menu. Users may face difficulty finding this option in this new user interface. Therefore, here we mentioned some easy tricks to terminate the application to fix this issue easily.
- Initially, you have to invoke the Windows Settings menu. Then, from the left pane, select the Apps tab.
- After that, hover over to the Apps and Features and select the application you want to terminate.

- Now, click on the three vertical dot buttons located next to the application that you’ve selected.
- Then, from the new drop-down context menu, select the Advanced options.

- That’s it. Now, hit the Terminate button and, for a few seconds, let Windows finish the process.


4. Use ALT + F4 Keys
Alternatively, you can press the Alt + F4 keys to close the program or any process because it performs the same task as the Close (X) button. Many times our programs or apps hang for a moment and we are not able to close it with a cursor or close button, so we can give it a try with a keyboard shortcut. It is working for some of the users.
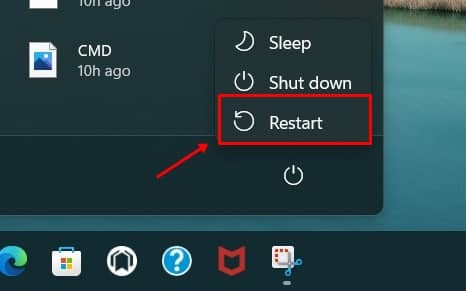
5. Restart Your Windows 11
If the above method doesn’t work for you, you can directly restart your computer so all the processes and apps close. Restarting Windows 11 helps you to fix temporary bugs and glitches. It can also close the crashed processes. After that, start your computer again and all apps and programs will run as normal.
Conclusion
So, this is how you can fix “app process not closing issue” in Windows 11 PC. We hope that one of the above three methods worked for you. But, if you are still facing any problems while performing the mentioned fixes. Let us know in the comment section. Our team will soon catch you and help you as far as possible.


