Using an external hard drive is one of the most reasonable ways to store your data. Many users use an external hard drive and an internal hard drive to keep a backup of their data. There’s nothing to worry about if you use an external hard drive to store your data, but the problem comes when it is not recognized by your Windows 11 PC.
If your PC does not recognize your external hard drive, it may probably be due to hardware issues (like a faulty hard drive) or software issues (like an outdated driver, unassigned drive letter, etc.). This article discusses troubleshooting steps to fix Windows 11 won’t recognize an external hard drive.
Fix External Hard Drive Not Showing Up in Windows 11
You may face this issue on your PC due to hardware and software-related reasons. Following the steps given below, you will be able to fix Windows 11 won’t recognize an external hard drive.
1. Ensure the Hard Drive is Properly Connected To Your PC
The first thing you should do is check whether your external hard drive is properly connected to your PC. You should check if there is any problem with the cable. Ensure the connection is not loose, and the cable is not worn off, as this might as well cause the problem.
2. Update Hard Drive Driver
The most common reason behind facing this issue can be outdated drivers. You should try updating the Hard Drive driver and then check if you still face the issue or not. To update the hard drive driver, follow the steps given below-
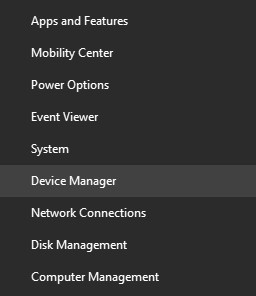
- Press the Windows + X key combo, and then from the menu, click on Device Manager.

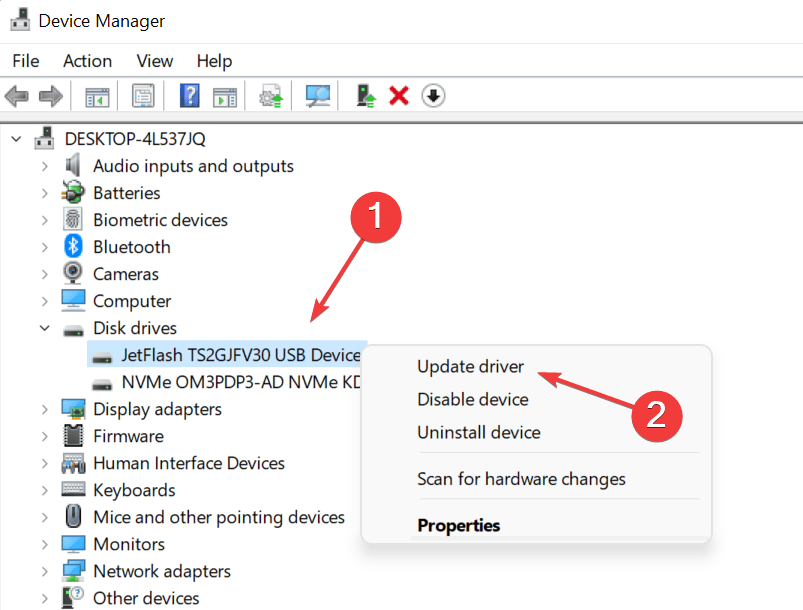
- Expand the Disk Drives section by double-clicking on it.
- Right-click on your external hard drive from the list, and click on Update Driver.

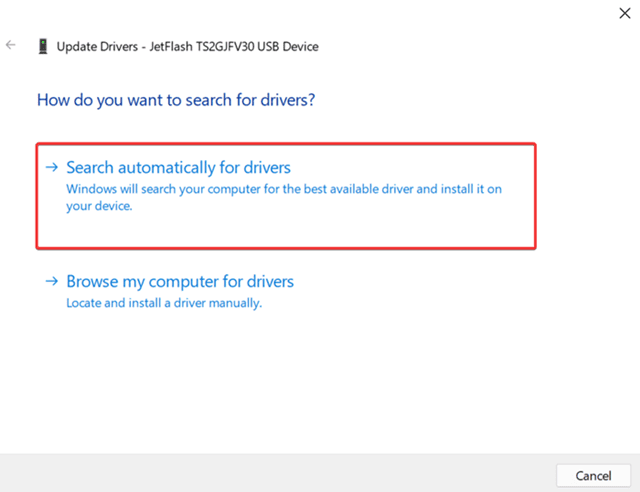
- Next, click on Search automatically for drivers to update the driver.

- Once the driver is updated, restart your PC and the issue should be fixed.
3. Initialize External Hard Drive
This works for new hard drives only. If you just bought an external hard drive and it is not recognized by Windows 11, you will have to initialize it first. Given below are the steps to initialize the external hard drive-
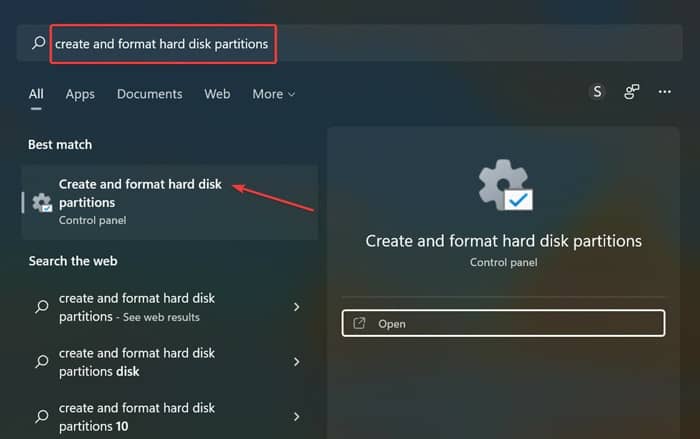
- In the Start Menu, search for Create and format hard disk partitions and open it.

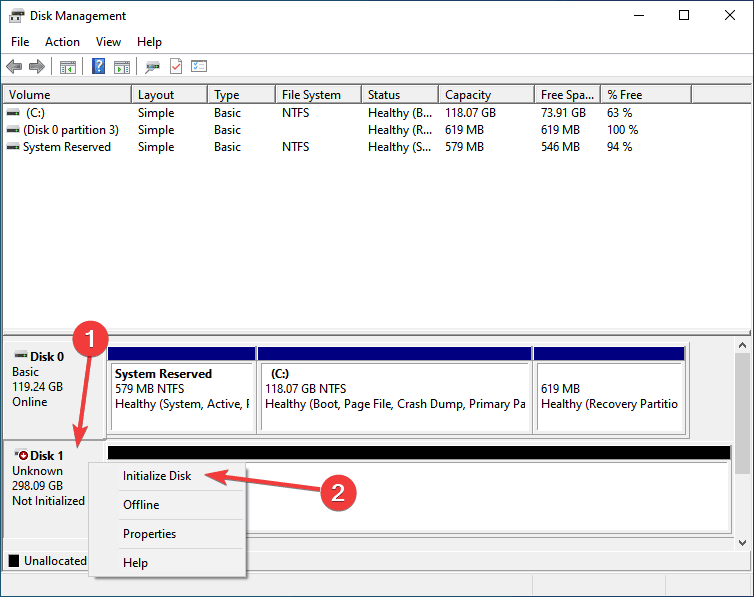
- Now, look out for the hard drive with the problem. If the hard drive is marked as Not Initialized, right-click on the hard drive and click on Initialize Disk.

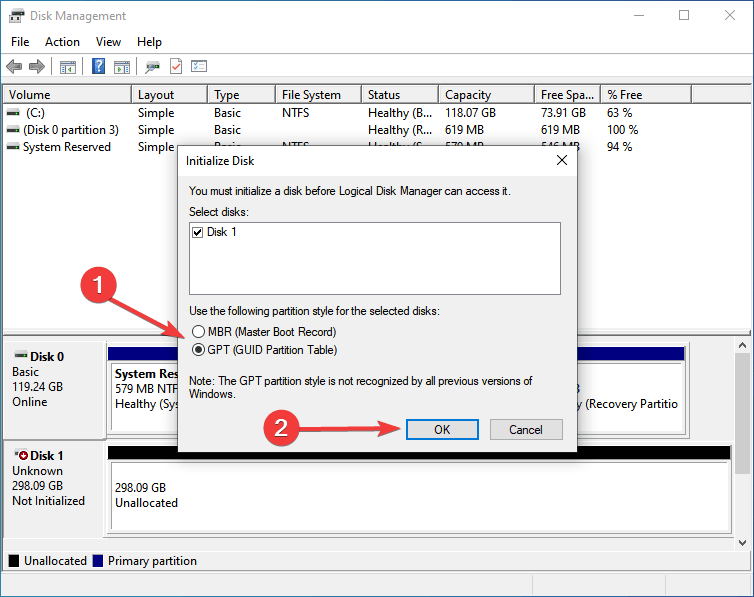
- On the next window, set the Partition Style as GPT (GUID Partition Table) and click on OK.
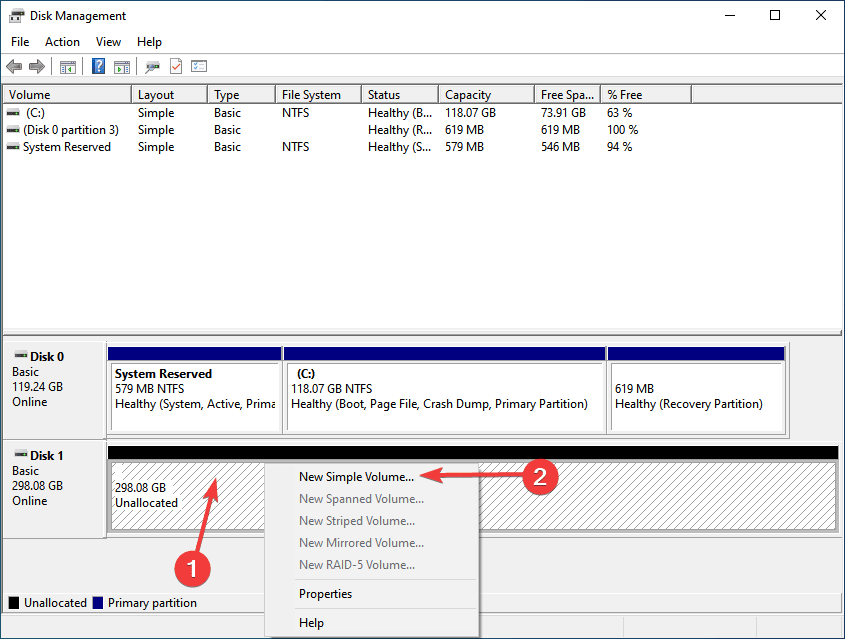
- Now, right-click on the unallocated external hard drive and click on New Simple Volume.

- Click on Next to continue ahead, creating a new simple volume.
- Next, enter the Simple Volume Size in MB. Enter the maximum size, and then click on Next.
- Now, assign the drive letter to the external hard drive, and click Next.
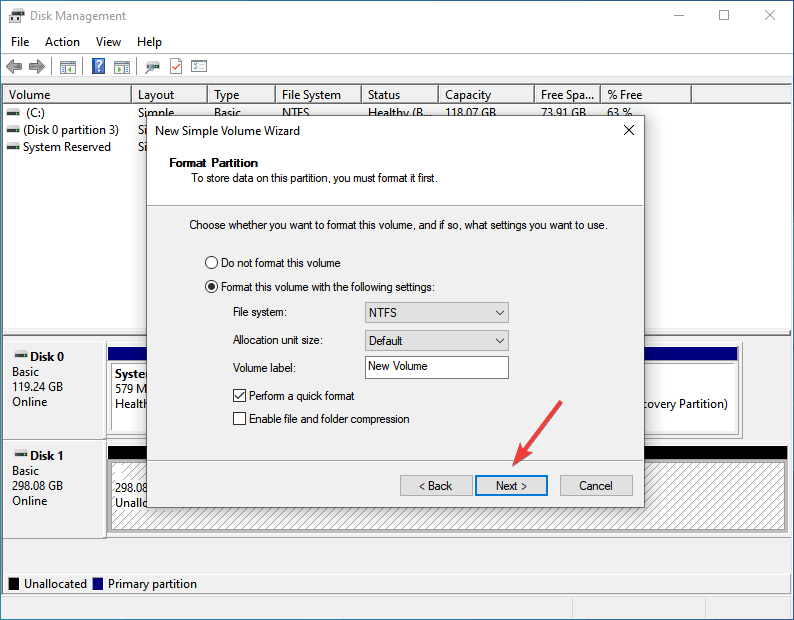
- Next, select the Format this volume with the following settings option, and do the following settings-
- File System- NTFS
- Allocation Unit Size- Default
- Volume Label- Set it to anything you want.
- Now, check the checkbox for Perform a quick format if you want to format the drive quickly. Click on Next to continue ahead.

- Once done, click on Finish to complete creating the new simple volume.
4. Assign Drive Letter
If the drive letter is not assigned to the External Hard Drive, you may also face the issue. You should try assigning the drive letter to the disk and then check if you still face the issue or not. You can assign a drive letter by following the steps given below-
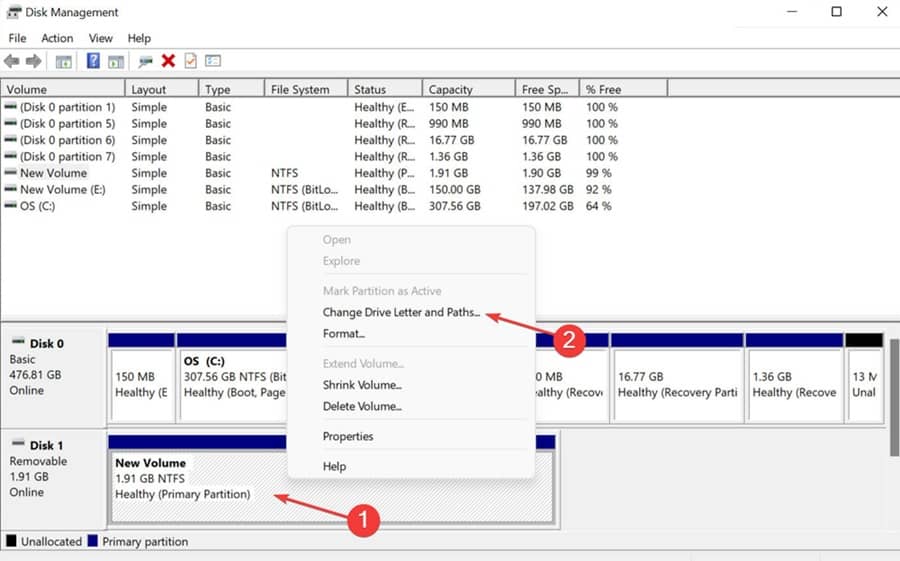
- Right-click on the Start Icon and then click on Disk Management.
- Right-click on the hard drive in the Disk Management window and then click on Change Drive Letter and Paths.

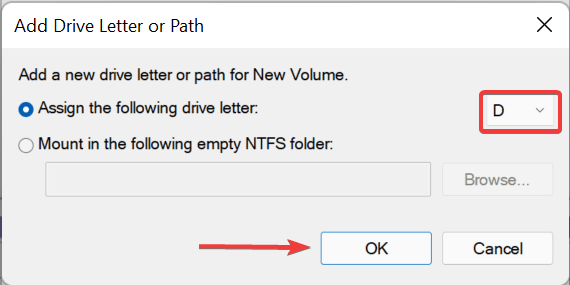
- On the next window, click on Add button.
- Select the option for Assign the following drive letter. Click on the drop-down menu next to it, and assign a letter.

- Once done, click on OK and close the Disk Management window to save the changes.
5. Perform Hardware and Device Troubleshooter
Hardware and devices troubleshooter is one of the essential in-built Windows tools. It helps to find out all the errors inside the Windows component and fix them for better functionalities.
- Right-click on the Windows icon and select Run.
- Type msdt.exe -id DeviceDiagnostic and click on Ok.

- The hardware and Device troubleshooting window will appear now; just click on Next.

- Then simply click on the Apply this fix.


6. Perform CHKDSK
CHKDSK has been used to fix issues on drives using logical integrity. So that we could perform this command to fix when the external hard drive not showing up.
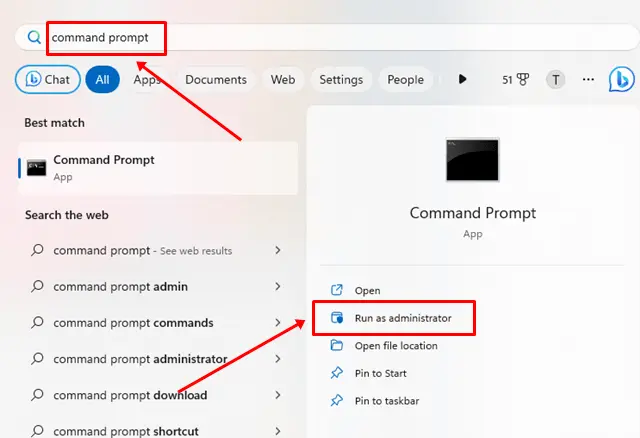
- Press the Windows button, search for CMD, and click on Run as administrator.

- Then type this chkdsk /f X command, and hit the Enter button. (Don’t forget to replace your drive letter in the place of F.)
7. Check Driver Status
All these methods won’t work until you check whether the driver is okay or not. Here is what you need to follow to check your driver status; otherwise, seek professional assistance.
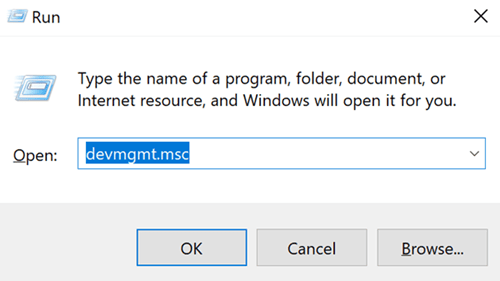
- Press the Windows + R key to open the Run tool.
- Type devmgmt.msc, and hit the Enter.

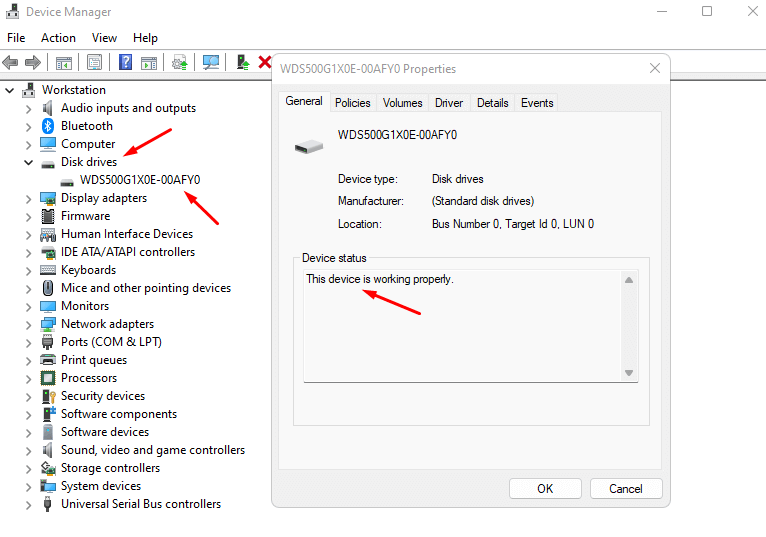
- Double-click on the Disk driver.
- Then, right-click on the inserted hard drive and select Properties.

- Now you can see the status of the driver.
8. Virus and Malware Scans
Virus or malware-affected system works differently. In this case, if your system has been infected by viruses, then your external hard drive may not show. Therefore, scanning and eliminating them is essential.
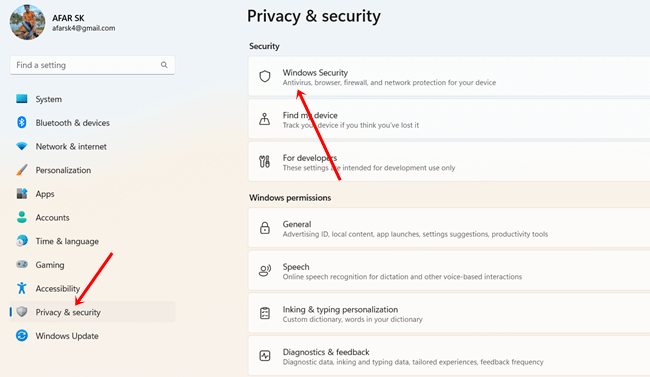
- Press Windows + I to open Settings.
- Then click on Privacy & Security > Windows security.

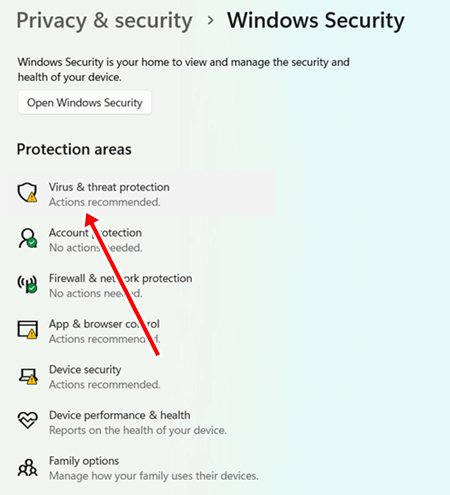
- Next, click on Virus & Threat Protection.

- Now click on Quick Scan to start the scanning process.
Final Words
If Windows 11 doesn’t recognize the external hard drive, this article will help you solve it. We have discussed some working troubleshooting steps to help fix the external hard drive not recognized by Windows 11.


