Is your computer not running as effectively as it used to do? If yes, then your computer might face a memory leak issue. Memory leak refers to the RAM memory loss in Windows because of an app or program.
The issue usually appears when some of your installed programs start using more RAM than they should. However, while it is a software-related issue, it can occur because of a wide range of reasons.
Luckily, fixing the issue is not as complicated as it might seem. Instead, there are a few simple methods that you can try out to get rid of the error. But before I move to the fixes, let’s know what memory leaks are in Windows in detail.
What are Memory Leaks in Windows 10?
Memory Leak refers to RAM memory loss in Windows. The issue is mainly caused by a program or an app.
Hence, you will find that every running process in Windows is taking a certain amount of RAM. As a result, you will face a laggy computer.
Fortunately, the issue doesn’t have to do anything with your computer RAM. Instead, it is related to software.
Applications like Photoshop, Google Chrome, games, and a few other programs have a high demand for RAM. But there are also apps that use a small amount of RAM.
However, the problem arises when a program is taking too much RAM than it should, which we know as Memory Leaks.
How to Fix Memory Leaks in Windows 10
1. Update Drivers
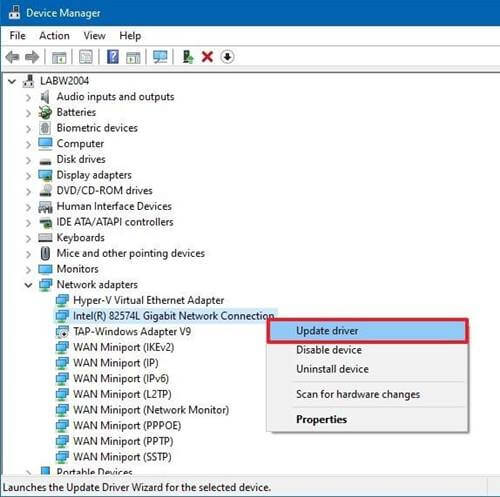
Outdated Drivers on Windows 10 can cause various issues, including Memory leak. Hence, it is important that you keep your driver software up to date. To update your drivers, do follow the below steps:
- At first, right-click on the start menu.
- Go to Device Manager.
- Then check if any driver has a yellow exclamation mark next to it.
- If it has, then right-click on it and select Update driver software and then follow all the on-screen instructions.

2. Memory Diagnostic Tool
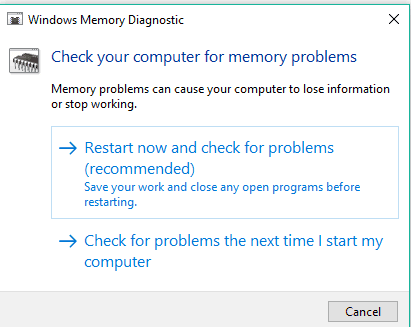
Windows comes with a tool called Memory Diagnostic Tool. This tool is designed to perform a scan of your computer’s physical RAM to help you identify possible errors. So you can figure out if the problem is with your RAM or not.
To get started with this, you have to follow these steps:
- Go to Windows 10 search bar and type down Memory Diagnostic Tool and launch it.

- Next, click on, Restart now and check for problems. Also, make sure you don’t have any unsaved work.
- After restarting, let Windows look for any errors, and once it completes the scan, it will let you know the results.
3. Restart The Program
If you find that one of the programs is using too much RAM than it should, then you can simply restart the program.
- For this, you have to press CTRL + SHIFT + ESC keys simultaneously to open Task Manager and click on More Details.
- Then look for what programs are using the most memory.
- Next, select the program and click on End Process to close the program instantly.


This, of course, closes the program, but the issue isn’t resolved yet. As the amount of memory it initially accessed is still unavailable for the other process. Hence, to solve this, you will need to restart your computer and then check if you are still facing the same issue.
4. Optimize Your PC
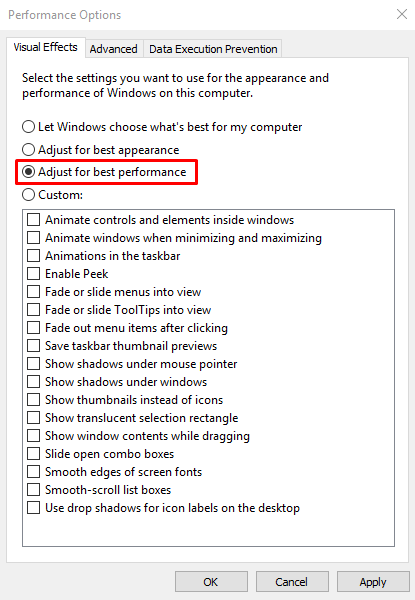
- At first, right-click on This PC > Properties Tab.
- Scroll down and select Advanced System Settings > Advanced tab
- Click on the Settings button under the Performance tab.
- Then select Adjust for best performance option and click on OK.

- Finally, restart your PC to make the changes.
5. Disable Programs On The Startup
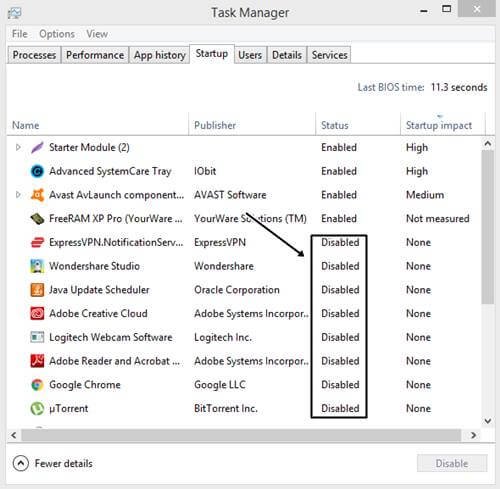
You can also try disabling programs on the startup. If programs are booting up alongside Windows, then it will take too much time for Windows to boot up. Plus, you will face the memory leaks issue.
Hence, it is important to disable apps that don’t need to start at the startup. For instance, apps like Spotify, Discord, and a few others open up at the startup.
However, to view and disable startup apps, you can follow the below steps:
- At first, press CTRL + SHIFT + ESC keys at the same time to open Task Manager.
- Then go to the Startup tab.
- Right Click on the program you wish to disable and then select Disable.

- Finally, restart your PC.
6. Defrag Hard Drive
The issue isn’t always with your system’s memory. But sometimes, it is the storage drive that can cause the issue. Hence, just to be sure, you should defrag the hard drive to optimize performance. For this, follow these steps:
- Go to This PC.
- Then right-click on the C: Drive or whichever drive you have installed Windows in.
- Select Properties > Tools > Optimize.
- Next, select your C drive and click on Analyze.

- Once the process completes, restart your computer.
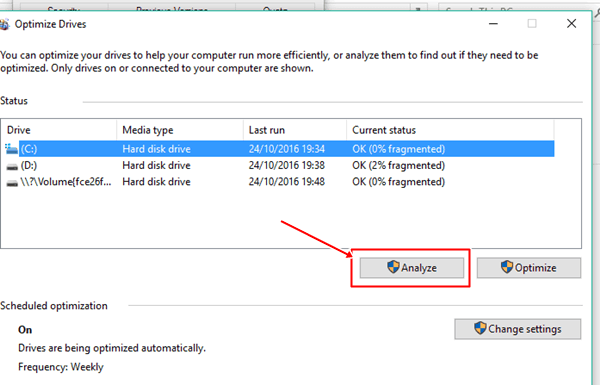
However, you may not be able to defrag the hard drive. Since Windows itself runs it from time to time. So after clicking on the C Drive, if the analyze button is grayed out, then do skip this step.
From Editor’s Desk
So those were a few ways to fix memory leaks in Windows 10. Now go ahead and try these fixes out. Also, even after trying everything, if your PC still lags, then your computer might be lacking RAM. So do install a physical RAM to your computer and see if it has worked or not.


