Are you unable to run an app on Windows 11? If yes, then you are at the right place because, in this guide, we have covered this topic with complete solutions. Most people are using Windows 11, but those who are using a lower version like Windows 10 / 8 and facing the same error can also read this article.
This app can’t run on your PC error is not a big issue because it happens due to minor mistakes, which we have discussed below. Just read the entire article carefully, and you will be able to fix this issue by yourself.
You can use these methods in Windows 11/10. All the methods are working properly and effectively, which will help you to fix this error. So, without any further delay, let’s see how to fix the “This app can’t run on your PC” error in Windows 11.
Best Ways to Fix This App Can’t Run on Your PC Error in Windows 11
In this guide, we have discussed some of the best solutions that you can use to fix This app can’t run on your PC error in Windows 11. If you are experiencing this error, you should try the methods mentioned below.
1. Check the App’s Version
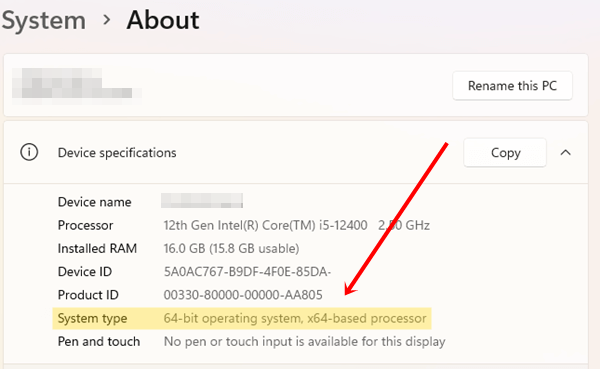
A reason for an app not running on your Windows 11 is compatibility issues. If you are trying to run a 32-bit version of an app, you may face difficulties because Windows 11 supports the 64-bit version. You can check your device specifically by following the steps below.
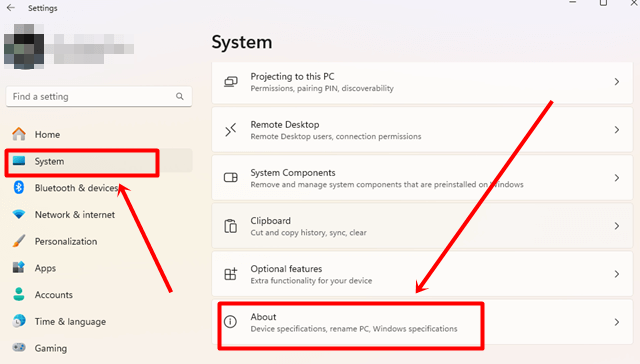
- Press Windows + I to open Windows Settings.
- Click on System > About.

- In the About section, you will see a Device Specifications section where you can find the System Type.

2. Run As Administator
The “This app can’t run on your PC” error may also appear if the app doesn’t get the required permissions to run. So, try to run the app with administrative rights.
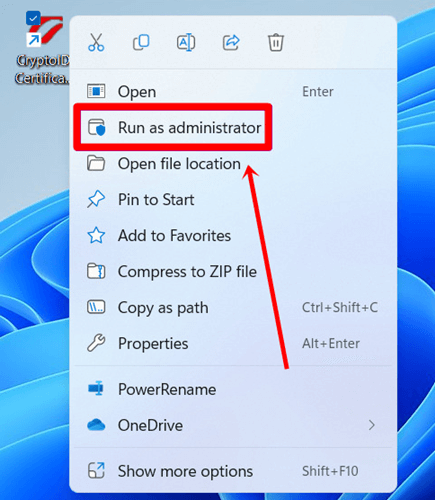
- Right-click on the app you want to run and then select Run as administrator.

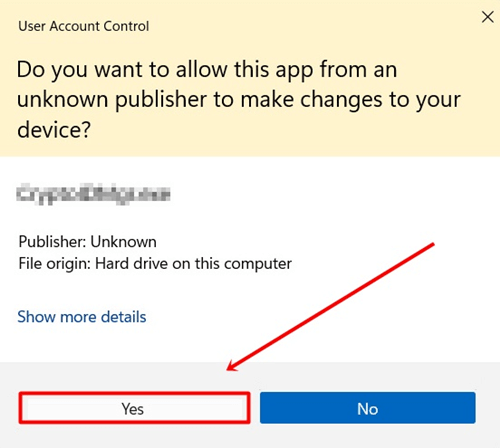
- In the User Account Control (UAC) prompt, click on the Yes button to confirm.

- If the app starts running properly without any issues, then continue following the steps.
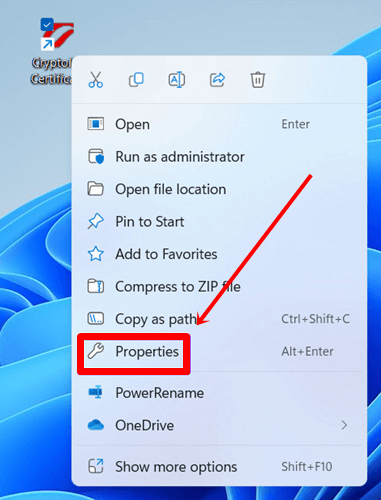
- Again, right-click on the app and click on Properties.

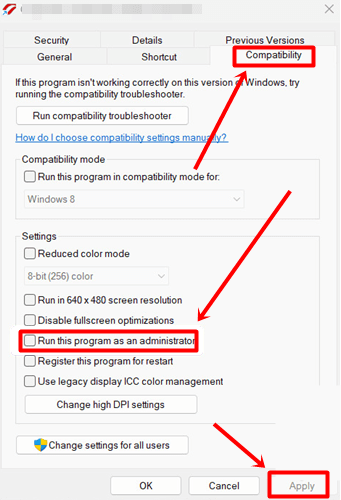
- Go to the Compatibility tab, select the Run this program as an administrator option, and click on Apply.

3. Run the App in Compatibility Mode
If you’re trying to run an older app that was designed for an older version of Windows, enable compatibility mode. This allows you to run any old app on the latest Windows version. Below, we have mentioned the steps to enable compatibility mode.
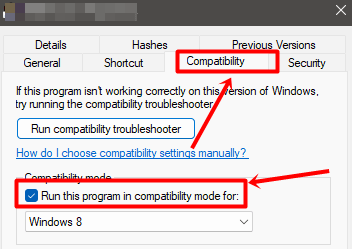
- Right-click on the app and go to Properties.
- Click on the Compatibility tab and select Run this program in compatibility mode.

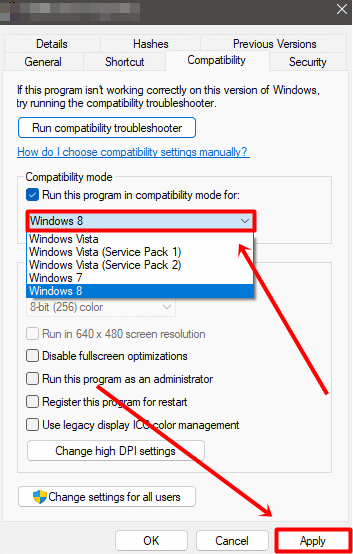
- Click on the dropdown menu and select the older Windows version, then click on the Apply button.

- Finally, click on the OK button and then try to run the app.
4. Run the Program Compatibility Troubleshooter
If the app is still not working properly, the next step is to run the Program Compatibility Troubleshooter. This tool will automatically detect and fix issues with all the apps that are not working on your Windows 11.
- Press Windows + I to open Windows Settings.
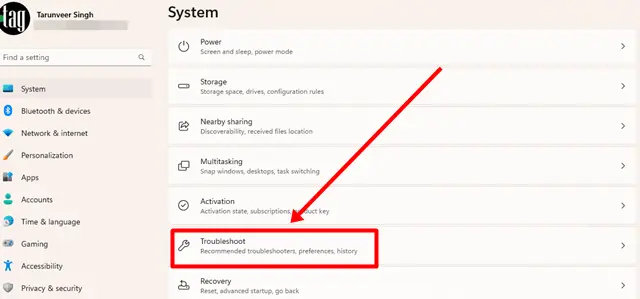
- Click on System > Troubleshoot.

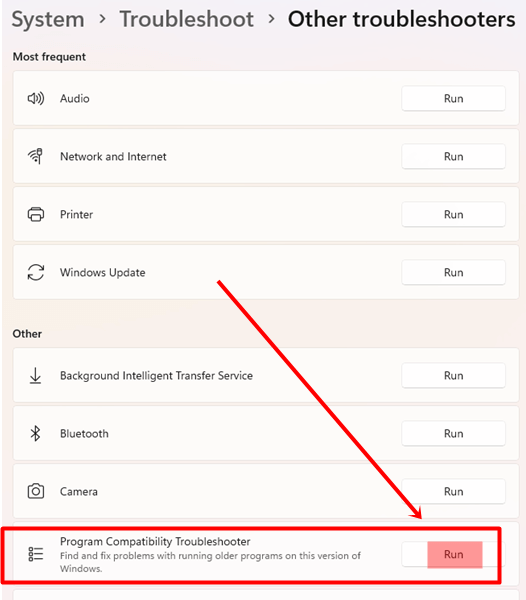
- Select the Other Troubleshooters option.

- In the Other section, click the Run button of the Program Compatibility Troubleshooter option.

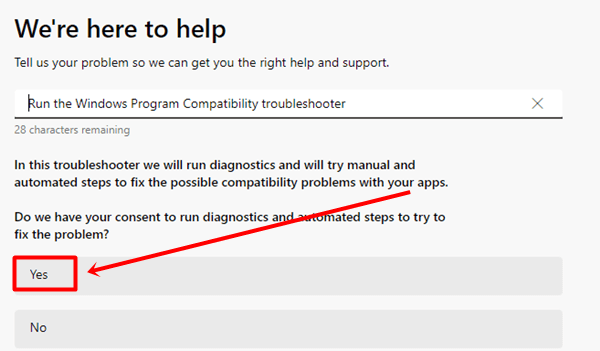
- A Help window will appear, click on the Yes option to detect app issues.

- It will show you the installed app list, click on the app you want to troubleshoot.
- Follow the on-screen instructions to complete the process.

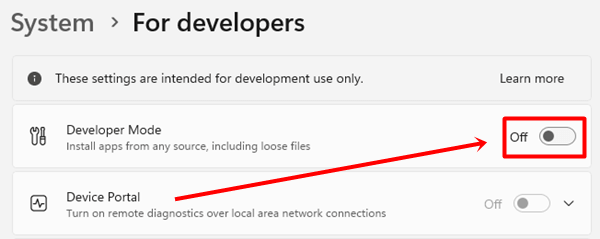
5. Enable Developer Mode
Developer Mode allows users to run apps that are not available on the Microsoft Store, which means you can run any app from any source with the help of Developer Mode.
Before moving with the steps, one thing to keep in mind is that enabling developer options may put your system security at risk, so proceed with this method at your own risk.
- Go to Windows Settings by pressing Windows + I.
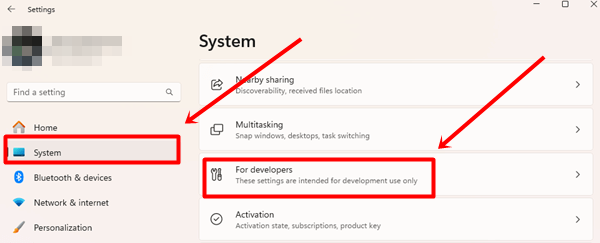
- Click on System > For Developers.

- Click the toggle button to enable Developer Mode.

- Done. Now, check if the app starts working or not.
6. Use the Disk Cleanup Tool
This error can also be caused by insufficient storage space on your computer because our PC stores junk files that take up a lot of space. So, if you’re trying to run an app that requires storage, use Disk Cleanup to remove unnecessary files.
- Press the Windows key and type Disk Cleanup in the search bar.
- Choose Run as administrator option.

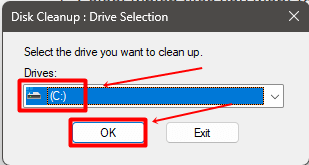
- Select the C drive.

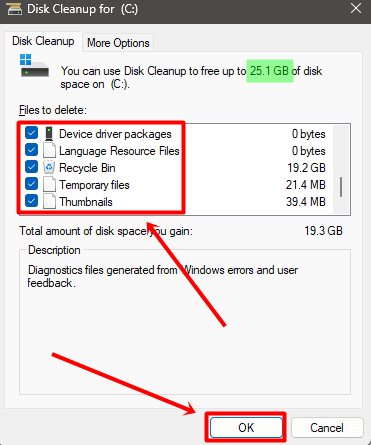
- It will start scanning for unwanted files and show you the amount of space you can recycle after cleaning.

- Select the files you want to remove and click on OK.

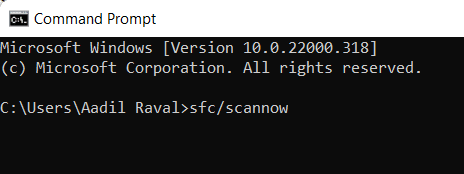
7. Run an SFC Scan
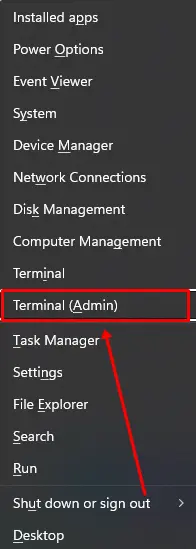
- Press Windows + X and select Terminal (Admin) from the menu.

- Click on the Yes button in the User Account Control prompt window.
- Type the following command and press Enter.
SFC /scannow

- Once the SFC scan is complete, run the following commands one by one.
DISM /Online /Cleanup-Image /CheckHealth

DISM /Online /Cleanup-Image /ScanHealth

DISM /Online /Cleanup-Image /RestoreHealth
Once the process is complete, restart your computer and then try using the app.
8. Reinstall the App
There is a possibility that some files were not installed during the app installation, which you can fix by reinstalling the app again.
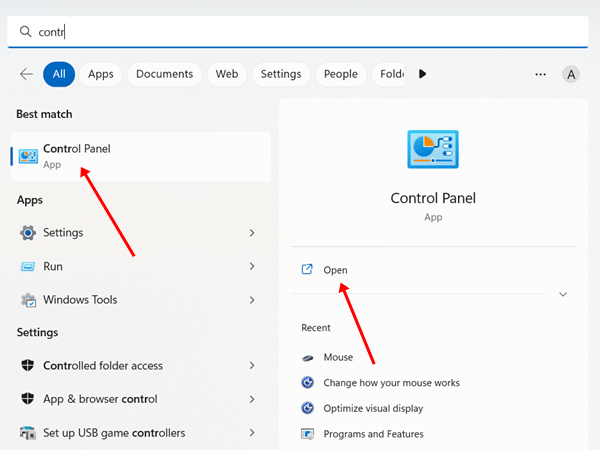
- Press the Windows key and type Control Panel, then click to open.

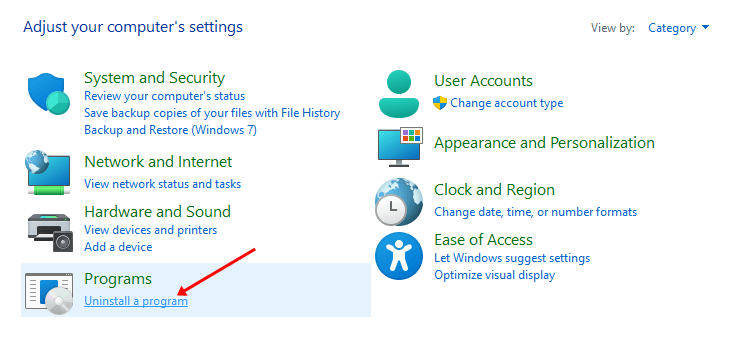
- Click on the Uninstall a program option.

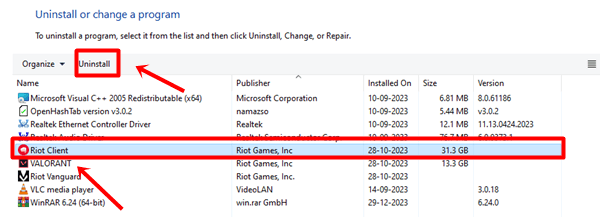
- Select the app you are facing issues with, and then click on the Uninstall button.

- Once you successfully uninstall the app, restart your computer, and then install the app again.
9. Try Clean Boot
A clean boot will help you identify the third-party app that might be interfering and causing the issue with the app you are trying to run.
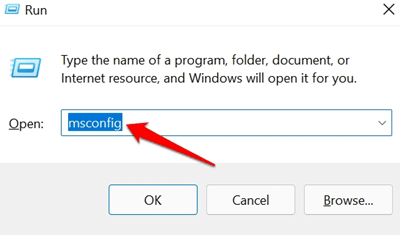
- Press Windows + R and type “msconfig”, then click on OK.

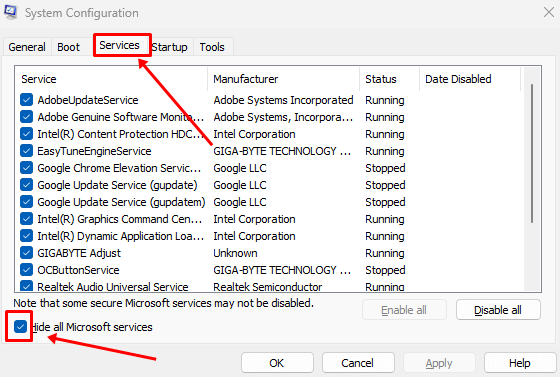
- Click on the Services tab and select the Hide all Microsoft services option.

- After hiding Microsoft services, disable all the other services you see on the list. Simply select all the services and click on the Disable All button.
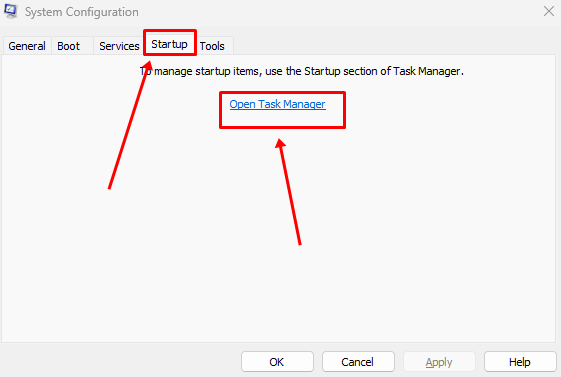
- Once you disable all the services, click on the Startup tab and then open Task Manager.

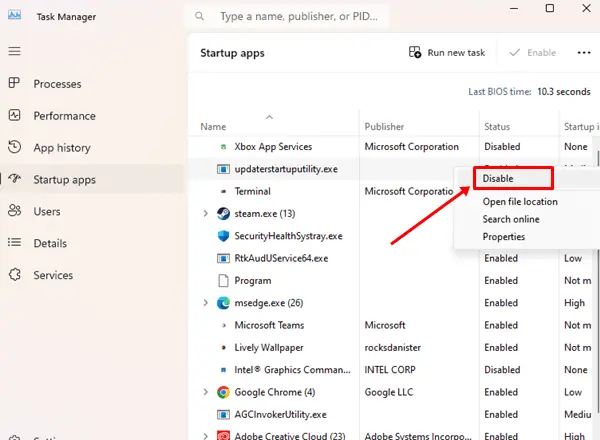
- Now, disable all the third-party apps that you see in the Startup Apps window. Select the app, right-click on it, and click on the Disable option.

- Finally, click on the OK button and restart the computer to apply the changes.

Conclusion
That’s all for this article; these are the best ways to fix the “This app can’t run on your PC” error in Windows 11. We have provided step-by-step guidance for each method, which everyone can follow easily. If you have read all the methods carefully, you have probably already solved the problem.
However, if you are still experiencing this error or have specific questions about specific methods, feel free to let us know in the comments section. We will try our best to provide you with the best solution.


