Have you ever thought about creating a partition on an existing disk? If there are only one or two drives, and you want to create more drives to manage storage, you can do this easily.
When we buy a laptop or computer from an online store, it comes with only one drive, called the C drive, where we can’t store our important data safely. One of the main disadvantages of having only one drive on Windows is the risk of losing important and personal data.
If you ever have problems with Windows and need to reinstall the operating system, you won’t be able to save your data at that time. So, having more drives is the best option. In this article, we will guide you on creating a new partition on an existing disk in Windows.
Why do we need to create more than one partition?
- With multiple partitions, you can organize your data properly, making it easier to locate.
- Storing your important data in separate partitions will keep your data safe when reinstalling Windows.
- You can run multiple operating systems by creating a partition for each OS.
- Managing data will also improve system performance.
How to Create a New Partition on an Existing Disk
Here, we have mentioned step-by-step guidance to create a new partition on C drive, so make sure to follow each step properly.
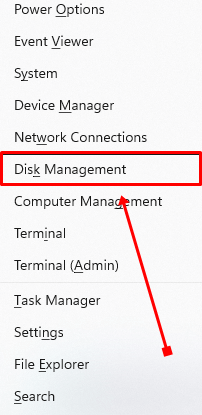
- Press Windows + X, then select Disk Management.

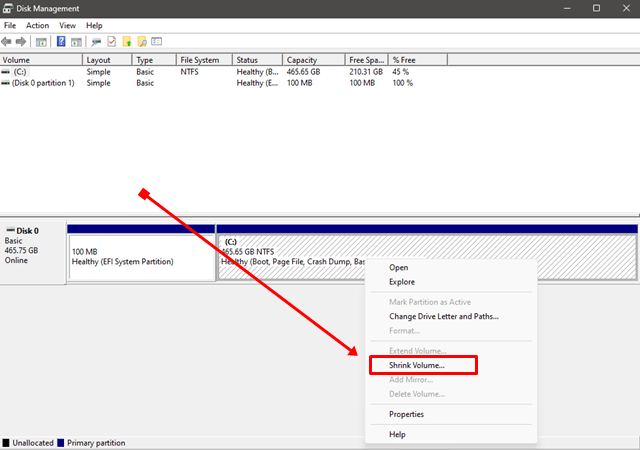
- Right-click on the drive you want to partition and select the Shrink Volume option.

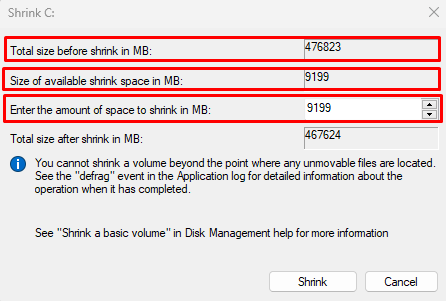
- In the Shrink window, you will see the current size, and space available to shrink, and in the third section, you need to enter the size of the partition you want.

- Now, enter the amount of space in MB you want to shrink.
For example, if you don’t want to shrink all the space that is mentioned by default, just fill in the amount you want. You can simply multiply the GB you want to shrink by 1024 because 1 GB = 1024 MB. - After completing the process, right-click on the unallocated space and select the New Simple Volume option.

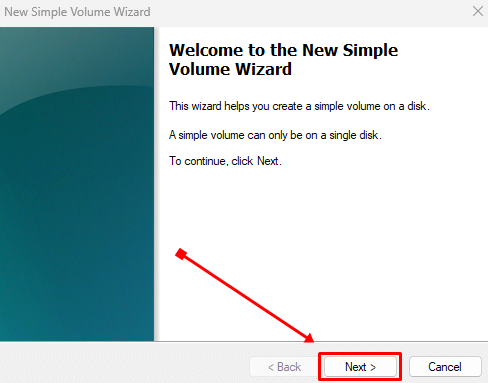
- Click on the Next button twice in the New Simple Volume wizard window.

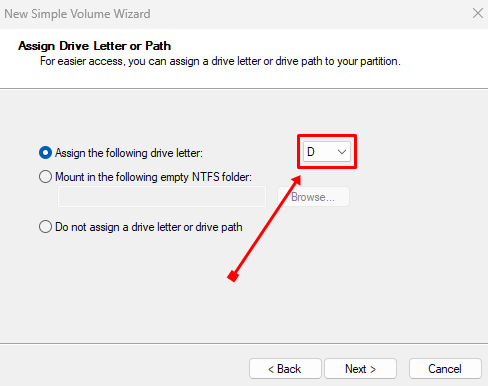
- Select the drive letter you want and click on the Next button again.

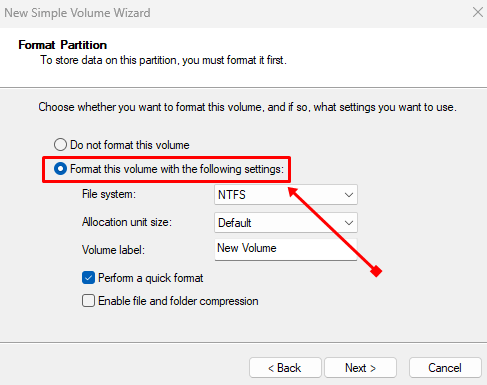
- Now, choose Format this volume with the following settings option and click on Next.

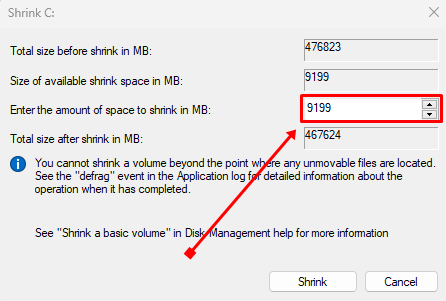 For example, if you don’t want to shrink all the space that is mentioned by default, just fill in the amount you want. You can simply multiply the GB you want to shrink by 1024 because 1 GB = 1024 MB.
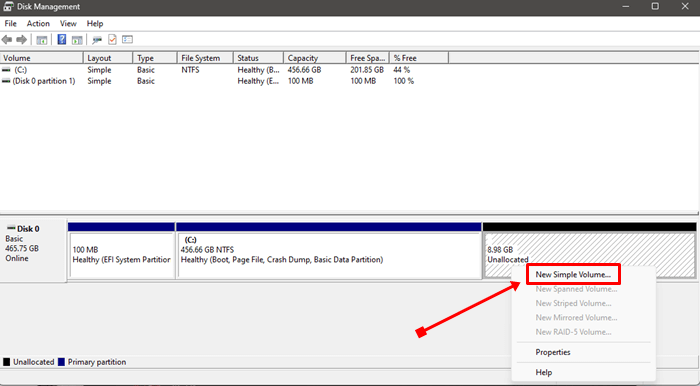
Conclusion
That’s all for this article. I hope you have successfully created a new partition on your existing drive. This is the easiest and most effective way to create a new partition.
If you face any issues while following these steps, feel free to comment below. We will provide you with the solution. If you found this article informative and useful then share it with others.


