Recently, on October 5, Microsoft officially released Windows 11 for the public. It fetches a host of aesthetic refinements, and some other performance-related improvements are on the way.
Nevertheless, it feels like a minor update of OS upgrades. But this update includes a redesigned store, Direct Storage for faster game loading, and a cleaned-up interface, which is appreciated.
But did you know that in this new OS update, there’s a feature using which you can lock the screen? Yeah! I know this is not a unique feature, i.e., offered in Windows 11. But, this time, it will be more secure than the previous version.
However, as everything changed in this update, some users found it challenging to locate and enable the lock screen in Windows 11. But don’t worry! You’ll get all the necessary information regarding this here. So, let’s get started then.
Best Ways to Lock Screen on Windows 11
You need to follow some steps to enable the lock screen feature on your Windows 11 PC. Therefore, make sure to follow them with care and one after the other. So, now let’s take a look at them.
1. Using The Start Menu
You can do this just by using the start menu. However, to do so, you can click on the Start Menu and click on your profile icon. Then, select the Lock. That’s it. Now, your Windows 11 screen will lock until you log in again.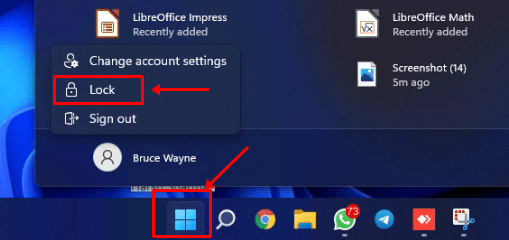
2. Using The Keyboard Shortcut
This is one of the fastest ways to lock your Windows 11 PC screen. Nothing to worry about because you can do so just by pressing Windows + L. That’s it. Now, it will hover you towards the login screen.
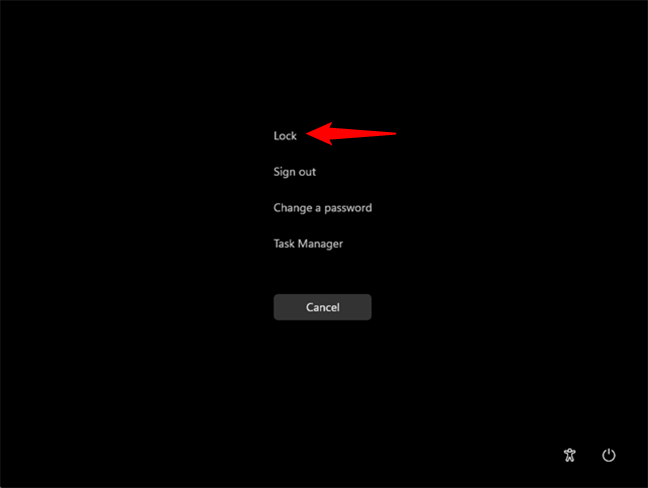
There is another shortcut key using which you can lock the screen on Windows 11. So, press the Ctrl+Alt+Delete screen to open the task manager and hit the Lock button.
3. Lock Windows 11 with Ctrl + Alt + Del Screen
Another easy way to lock your Windows 11 is with Ctrl + Alt + Delete keys. You just need to press these keys simultaneously; a black window pops up where you can see various options. you just need to click on the Lock option.
4. Utilize Task Manager to Lock Windows 11
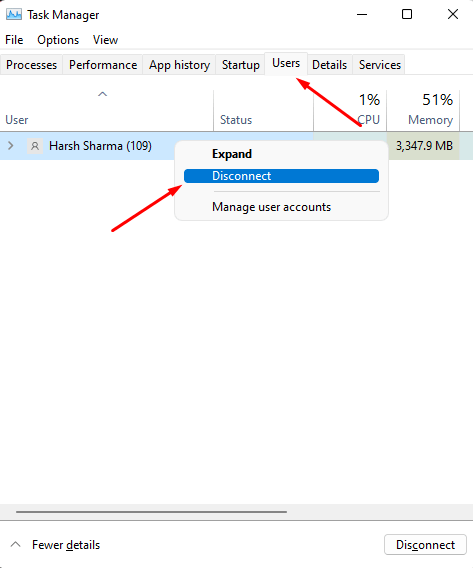
If you use Task Manager a lot, you can also use this method to lock your Windows 11. It can be handy for you.
- Press the Ctrl + Shift + Esc button simultaneously to open Task Manager.
- Go to the Users tab, and right-click on the user you want to lock. Click on the Disconnect option.

5. Using Command Prompt
Most of people prefer to use command prompt and run commands in windows to perform most of the tasks directly. So give it a try to this one.
- Press the Windows + R button to open the run dialog box.
- Type the below command and hit enter; it will directly lock your computer.
rundll32.exe user32.dll,LockWorkStation

6. Create a Lock Screen Shortcut
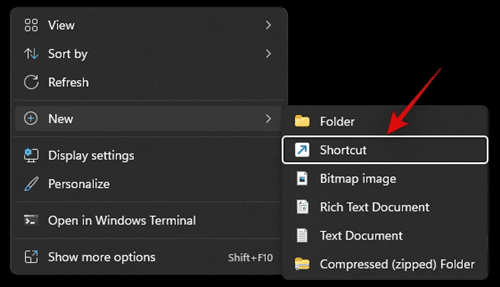
As you see, you can utilize a simple command to lock the computer; in this method, you can also create a shortcut for that command, you just need to double-click on it and it will lock your PC.
- Right-click on Desktop blank space and go to New > Shorcut.

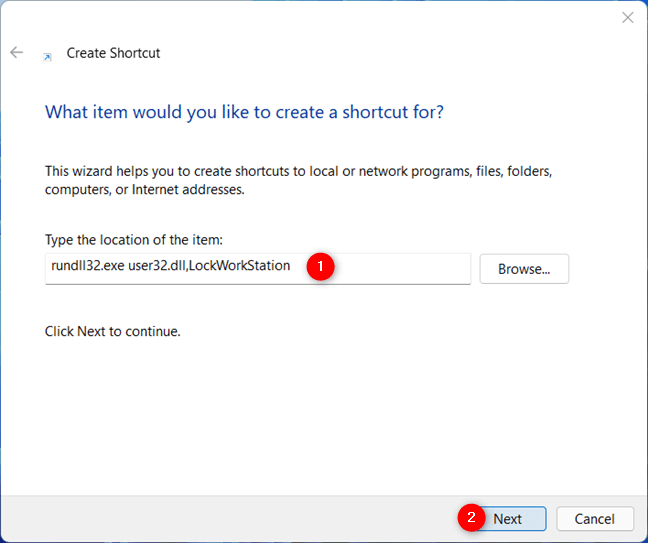
- On the next screen, they will ask you to enter the location. type the below path:

rundll32.exe user32.dll,LockWorkStation
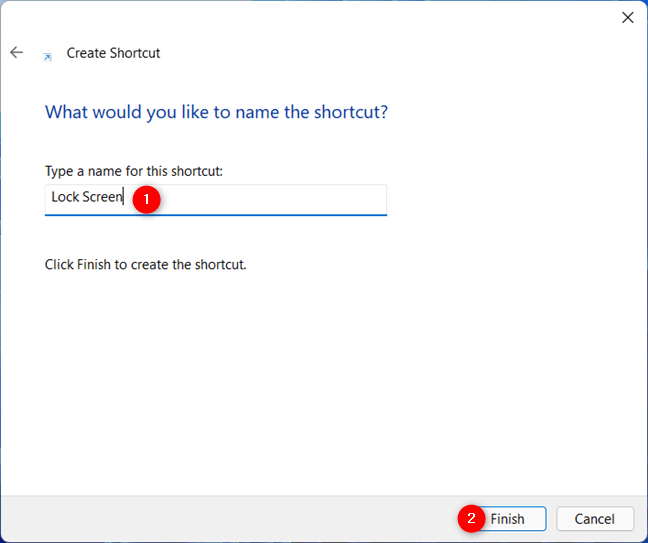
- Click on Next button and then enter the name for the shortcut and Hit on Finish button.
7. Automatically Lock the Screen with Screen Saver
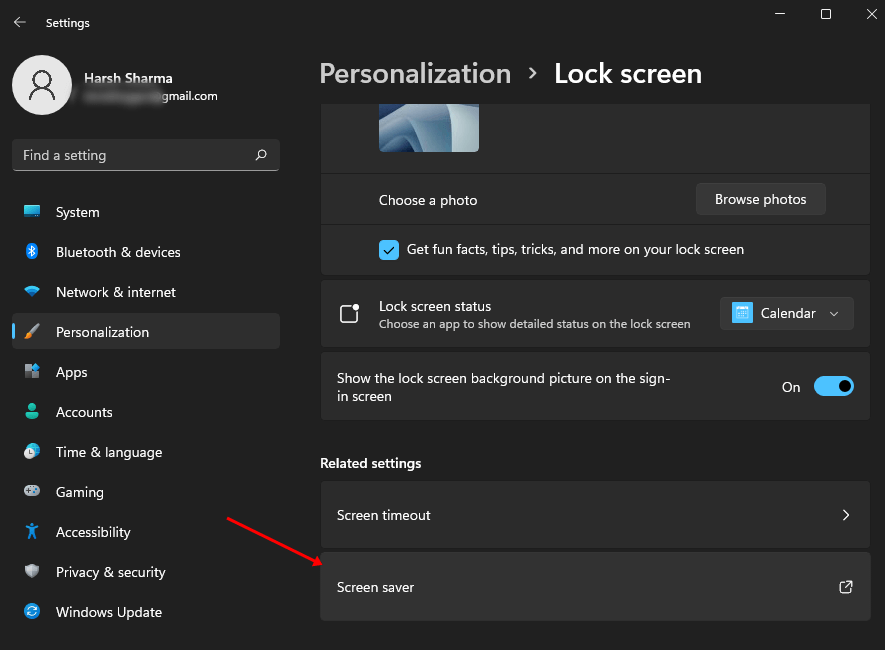
- Right-click on the empty space on the desktop and select Personalization.
- Click on Lock Screen > Screen Saver.

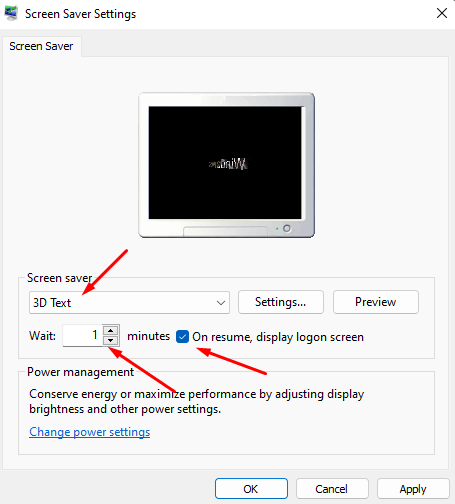
- Now on the screen saver settings window, Choose a screen saver from the dropdown menu and enter minutes, Tick the On resume, display logon screen option.

- Click on Apply and OK button to save it.
8. Lock Automatically Using Dynamic Lock
You can automatically lock your PC just by using Dynamic Lock. So, in case you don’t know how to do this, follow the steps given below:
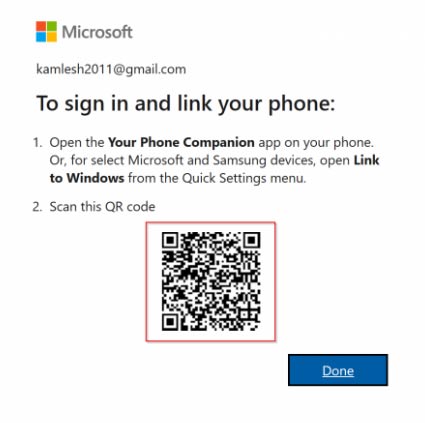
- First of all, you must have to pair your phone with your PC using Bluetooth. So here is the path that you need to follow: Press Win+I > Bluetooth & Devices > Your Phone > Open Your Phone.

- Then, select the Get Started option and hit the Sign In button.

- Now, sign in using your Microsoft account. Then, checkmark the box located in front of I have the Your Phone Companion.

- Finally, click on the Pair With QR Code option. Then, simply scan the code using your phone to pair it with your PC.

- Now, follow the path to enable the Dynamic Look: Settings > Accounts > Sign-in options.
- Now, select the Dynamic Lock and checkmark the box located in front of Allow Windows to detect when you’re away and automatically lock the device.


So, these are some methods you can use or enable the Lock Screen on Windows 11. We hope this guide has helped you. Furthermore, if we have missed something in the guide, please let us know in the comment section.


