Facing screen flickering issues on Netflix? Users have reported that when they try to stream content on Netflix, their screen keeps flickering and they are facing playback issues. Despite all the high-end hardware your PC is equipped with, you will likely face this issue.
This error can be encountered due to issues with your browser, malware on your system, insufficient power supply, a bug in the system, and others. This article will discuss how you can fix Netflix Screen Flickering issue in Windows and macOS.
Fix Netflix Screen Flickering Issue in Windows and macOS
If you have been facing Netflix Screen Flickering issues in Windows and macOS, then follow the steps given below to fix it-
1. Check Netflix Server Status
 Firstly, check for the server of Netflix. If the Netflix server is down, you may face issues with it. You can visit the Netflix server status page to check the server status of Netflix.
If the server of Netflix is experiencing downtime, wait for the servers to be up again. However, if there’s no issue with the server but you are still facing the issue, then move to the next step in this article.
2. Switch to a Different Browser
Another thing that you can try doing is switching to a different browser. Many times the issue may be with the browser you are using. Switch your primary browser and try using another browser. Now check if you are still facing the issue or not.
3. Select Maximum Power Output
Your PC will limit the power supply when the power output is low or balanced. This can also cause the Netflix Screen flickering issue on Windows and macOS. You can select the maximum power output setting to fix the issue.
Windows
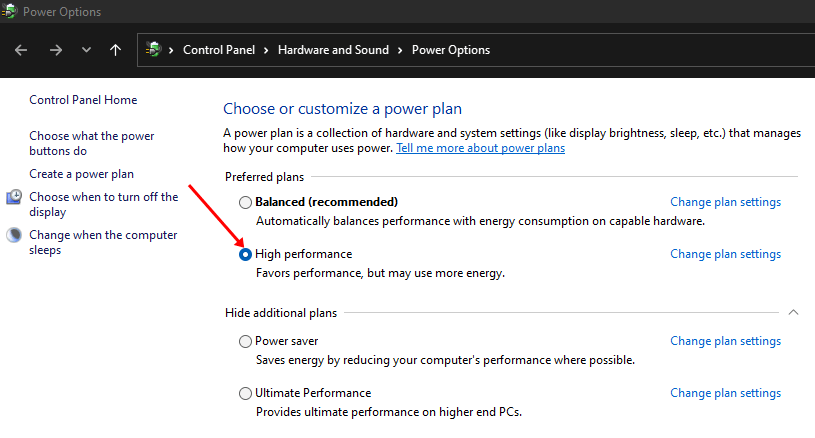
- Press the Windows key on your keyboard, search for Choose a Power Plan and open it.

- Here, select the High Performance plan.


In case you don’t see high performance plan here, then you will have to enable it. You can enable it by following the steps given below-
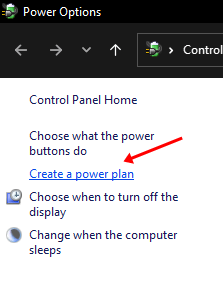
- Open the Start Menu, search for Choose a power plan and click on it.
- Here on the left sidebar, click on Create a power plan.

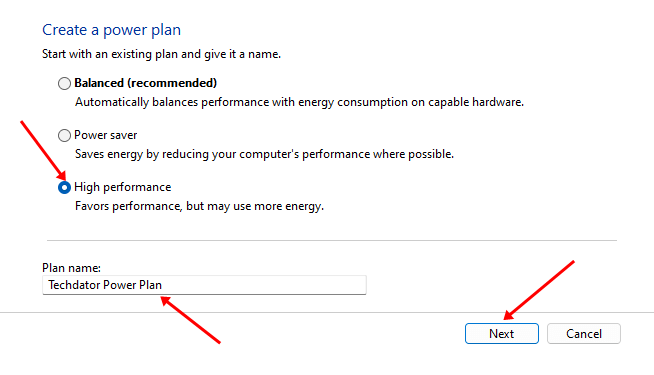
- Select the High-Performance option, set the Plan Name, and click Next.

macOS
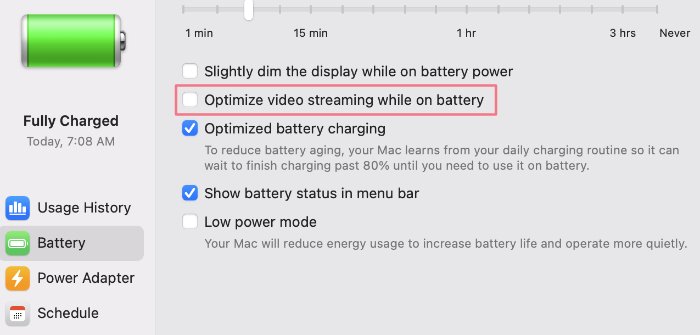
- Click on the Apple Logo on the menu and then on System Preferences.
- Now, click on the Battery option.
- Select the option for Optimize video streaming while on battery.

4. Disable Plugin
If you have been facing this issue with Netflix while streaming it on your browser, disable plugins and add-ons. You may face this issue due to plugins interfering with the browser. You can disable the plugins and that should fix the issue.
Edge
- Head to this address on Edge-
- edge://extensions/
- Here, turn off the toggle next to the plugin you think is causing the issue.
Firefox
- Press Ctrl + Shift + A key combo to head to the add-ons page on Firefox.
- Here, on the left sidebar, click on Extensions.
- On the right side, disable the toggle for the extensions causing the issue.
Safari
- Head to Settings/Preferences on the Safari browser.
- Here, click on the Extensions option.
- Now, uncheck the checkbox for the extension you want to disable.
5. Update the System
Another thing that you can do is update your system to the latest version. This method worked out for most people in fixing the Netflix screen flickering issue.
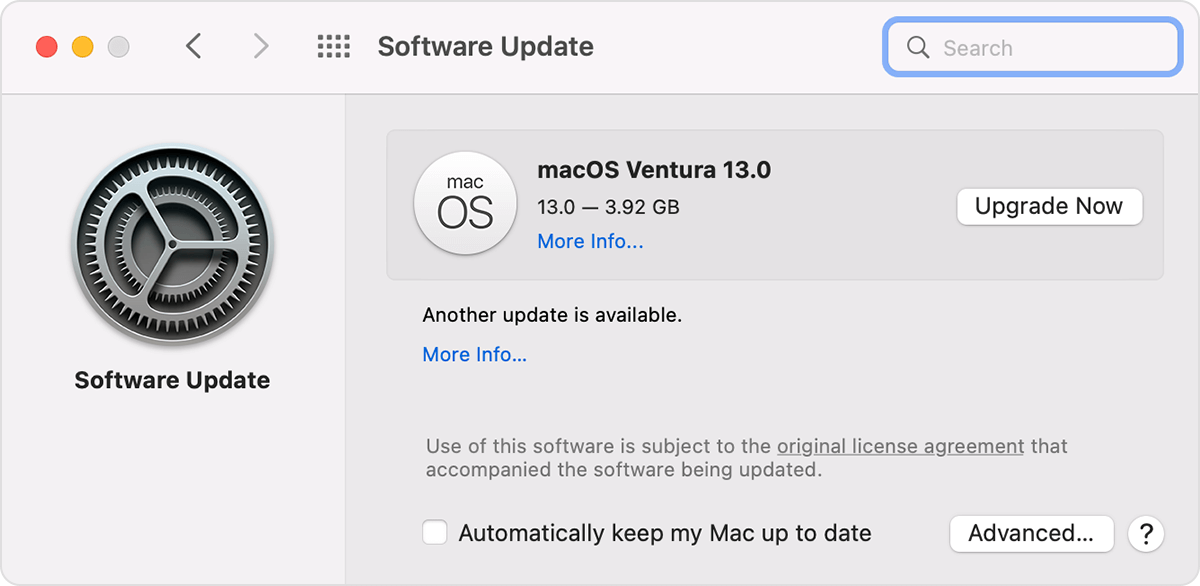
macOS
- Click on the Apple icon at the top right corner, and then click on System Preferences.
- In the System Preferences, click on Software Update.
- If there’s an update available, click on Update Now or Upgrade Now to update the system to the latest version.

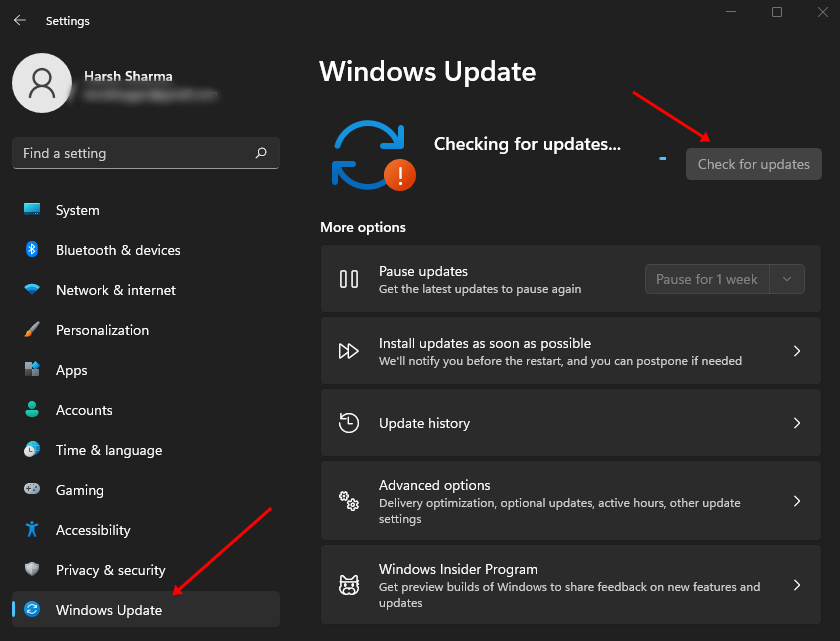
Windows
- Press Windows + I key combo to open Settings.
- Under the Windows Update section, click on Check for updates button.

- Now, download and install all the updates available here.
- Restart your PC to save the changes you made.
6. Update Graphics Drivers (On Windows)
You may also face this issue due to outdated graphics drives. Update your graphics drivers to fix the Netflix screen flickering issue. To do so, follow the steps given below-
- Press Windows + X key combo and then click on Device Manager.
- Here, double-click on Display Adapters to expand it.
- Right-click on the graphics driver, and then click on Update Driver.

- Now, click on the Search automatically for drivers option to install the latest version of the drivers.

7. Create a New User Account
If you are still facing the same issue, we recommend creating a new user account and signing into it. Try streaming Netflix with the new user account and you will no longer face the issue you have been facing.
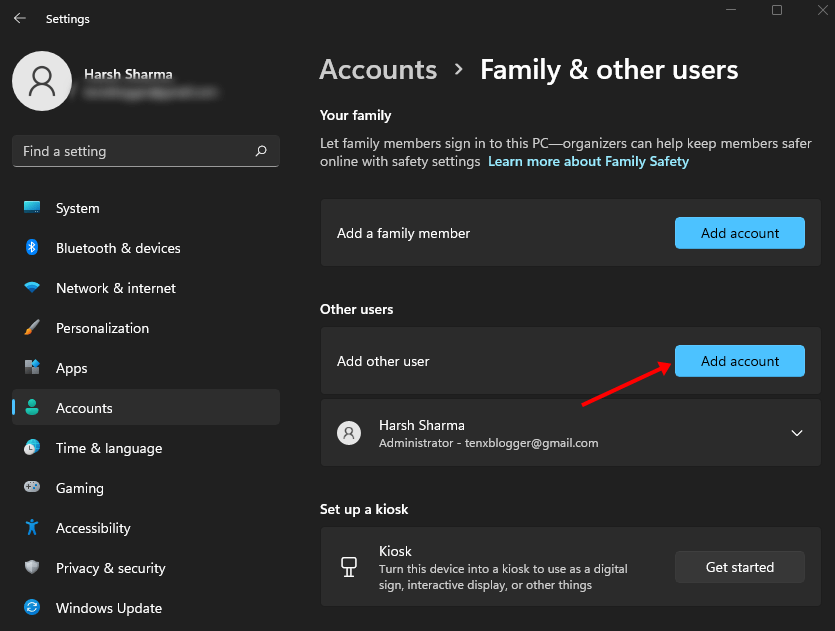
Windows
- Open Settings by pressing Windows + I key combo.
- On the left sidebar, click on the Accounts tab and Other Users.
- Here, click on Add Account button.

- If you have another Microsoft account, you can sign in using that. Else, click on I don’t have this person’s sign-in information.
- Now, click on the option to Add a user without a Microsoft account.
- Follow the on-screen instructions to create a new user account on your PC.
- Once done, click on the user account in the other user’s section.
- Now, click on the Change Account Type.
- Set the Account Type as Administrator and then click on OK.
- Sign into your new account and stream Netflix with it.
macOS
- Open the Apple Menu and then click on System Preferences.
- Here, click on Users & Groups.
- Click on the + icon to add a new user.
- Select the type of user as Administrator.
- Enter the account details (Full name and password), and click the Create User button.
- Next, select Allow user to administer this computer.
- Sign in to the new user account and stream Netflix.
Bottom Line
For those facing Netflix screen flickering issues on windows and macOS, this article will help you with it. We hope this article helped you fix the issue, and if it did, then tell us in the comment section below.
 in 2024")

")