Microsoft has officially overturned the statement that Windows 10 is being the last version of Windows with the announcement and upcoming release of Windows 11. However, one of the more notable parts of this release is that Microsoft has several new advanced features that you are already using in Windows 10.
So, today we are here in order to explain how to enable and use Voice Typing on Windows 11 PC. We are discussing this topic is because we’ve noticed that this feature is becoming more popular day by day and not many users are familiar with the feature and how it works. So, now, without hustling more, let’s dive into the guide.
Also Read: How to Disable Activity History in Windows 11
Steps to Enable Smart Voice Typing With Auto Punctuation in Windows 11
Before we start with the guide, let’s clear the fact that this guide is divided into two parts. The first part will explain how to use the built-in voice typing tool in Windows 11. However, the second part contains the process of using the built-in dictation tool in Microsoft Office apps. So, let’s get started.
How To Use Built-in Windows 11 Voice Typing Tool
This feature will help you voice typing in any application such as Notepad, Notepad ++, MS Word, etc. But, what are the steps to do so? The process is quite the same as you enable it in Windows 10. So, let’s see.
- Firstly, press the Win + H key to open the built-in voice typing tool.
- Now, tap on the mic button and start speaking. This feature uses the online Microsoft Speech Services and starts typing what you dictate.
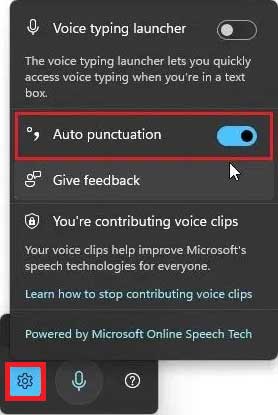
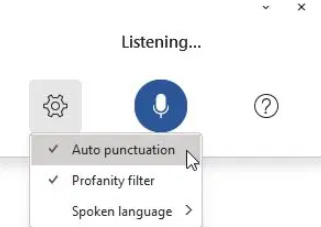
- Then, to enable the Auto Punctuation mode. Click on the Settings and toggle the Auto Punctuation button.

Suppose your PC doesn’t pick your language properly. Then, you have to change your speech-language. To do so, follow the given path: Settings > Time and Language > Speech. That’s it. Now, select your Speech-Language based on your accent.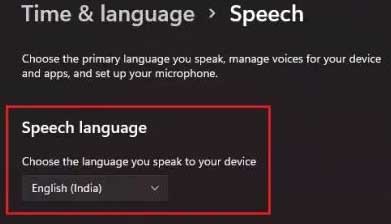
Now, in order to use this built-in voice typing tool in every application, you need to enable the Voice typing launcher from the voice typing overlay Settings. So, here is the path that you need to follow: Settings > Voice typing launcher.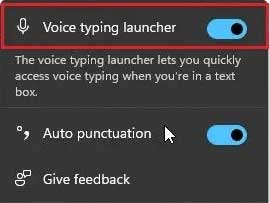
For example, if you want to use it on the Chrome browser. Then, simply click on the Text area. This will pop-ups the voice typing tool. So, click on the Mic button and start dictating. You can use this to write reviews on Google, commenting on YouTube, etc.
How To Use Voice Typing in Office Apps on Windows 11
Did you know that the Microsoft office tool also comes with a Dictation tool? Yes, you heard it right. But, I think not many of you are familiar with this. So, if you are also one of those, then follow the steps to enable it and use it on your Windows 11 PC.
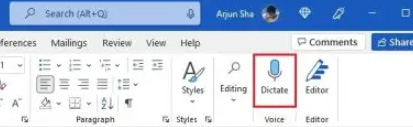
- Firstly, open Word or PowerPoint on your PC.
- Then, click on the Dictate option, as shown in the picture below.

- After that, from the Voice Typing tool, click on the Mic button and start speaking.
- Now, click on the Settings icon and enable the Auto punctuation option.

- You can also customize your preferred dictation language and accent.
Some Supported Advanced Dictation Languages:
Although currently, US English is officially supported by the Dicration tool, there are still many languages that support the basics symbols, texts, numbers, etc. Here is the list:
- English [US – Advanced Dictation Commands]
- Italian [Italy]
- Portuguese [Brazil]
- Simplified Chinese
- English [Australia, Canada, India, United Kingdom]
- French [France, Canada]
- German [Germany]
- Spanish [Mexico, Spain]
So, that’s all we have for you on this particular topic. We hope you enjoyed it and find this guide helpful. But, in case you get stuck in any of the mentioned steps, let us know in the comment section. Our team will get in touch with you as soon as possible.


