For the first time, Microsoft officially announces the Windows 11 stable build release date. This stable version features a new UI, including a new Action Center, Lock Screen, File Explorer UI, context menus, new Settings app, Microsoft Store, and much more.
But did you know there’s another feature that allows you to disable your activity history? Yes, you guess it right! This is the old feature you previously get in Windows 10 but is now totally revamped in Windows 11.
Nevertheless, not most of the users are familiar with this feature. Well, this is a feature that ensures easy access to the activities back and starts working from where your left. So, let’s learn about this in more detail.
Also Read: How to Fix Windows 11 Slow Startup Issue
What is Activity History?
Over the past few years, Microsoft changes many things in their operating software. However, they continuously added up many new features to enhance the user experience with every new update. So, this time, they added a few tweaks in the Activity History.
Basically, activity history is a feature that keeps tracking the activities that you do on your Windows 11 PC and saves them locally in your system. Moreover, if you are using a work or school account and give your permission on your device, it will send the data to Microsoft. After that, Mircosoft uses that data to provide you personalized user experience.
So, disabling this thing becomes more important if you don’t want to share your activity data with Microsoft. But, how to disable this option? Well, it’s very simple, but for that, you need to read the guide till the end.
Steps to Disable Activity History in Windows 11
In this era, preventing Windows 11 from storing your Activity history is the best option to secure your data and privacy from harmful threats. Don’t worry! Disabling this option isn’t rocket science at all. So, if you don’t know, then follow the steps mentioned below:
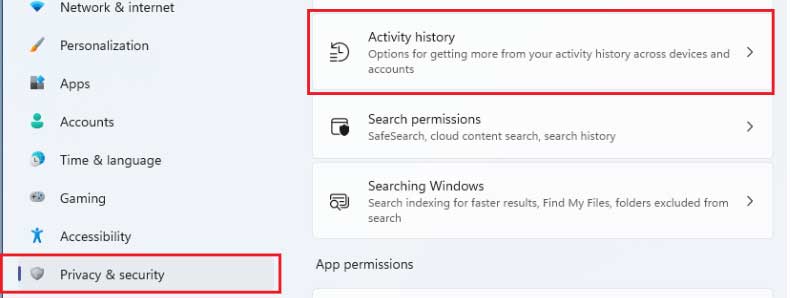
- Firstly, press the Windows + I key to open the Windows Settings.
- Then, switch to the Privacy & Security tab and click on the Activity History option.

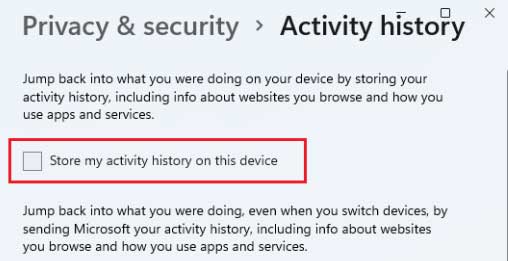
- Finally, uncheck the box located in front of Store my activity history on this device option.

Now, if you wish, you can also deselect the option to send my activity history to Microsoft. This will stop sharing your data with Mircosoft. Once you perform all these steps, the Activity History will not track your relics on your Windows 11 PC. 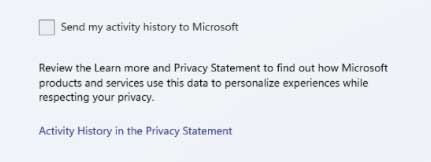
Meanwhile, follow the steps given below if you want to clear all your activity history that Microsoft stored previously stored.
- Again press the Win + I key simultaneously to open the Windows Settings app.
- Then, navigate to the Privacy & Security > Activity History
- After that, under the Clear Activity History section, hit the Clear button.

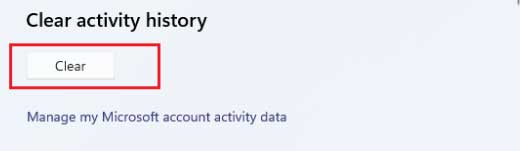
That’s it. Now, all your previously stored activity history will be deleted from your system as well as from your Microsoft account. So, you do not have to trouble anymore.
From Editor’s Desk
This is a good feature in enhancing the user’s experience, but sometimes it comes up as the main threat to our privacy and security. Therefore, in that case, disabling this feature will be a wise choice. However, you don’t need to worry if you don’t know how to disable this option because now, you know how to disable this feature.
So, that’s all we have for you on this topic. We hope this guide helped you. Nevertheless, if you doubt the activity history feature, feel free to ask us in the comment section.


