As we know, only a few weeks are left for the official launch of the stable version of Microsoft’s Windows 11. But, recently, Microsoft has said that old and unsupported hardware won’t get Windows Update. Well, this is a piece of bad news for people with old computer hardware, and for them, the only option now is to use Windows 10 till 2025 or buy a new computer.
Don’t worry! You can use the Windows Media Creation tool to upgrade your Windows 10 PC. But, it might be possible that most of our readers don’t know how to install or upgrade the Windows Media Creation tool. So, here we are to assist you to do so.
Also Read- How To Unblock Adobe Flash Player on Windows 11
List of Best Ways To Install / Upgrade Windows 11 Media Creation Tool
Windows 11 Media Creation Tool will be the best option for you if your PC is not supported by TPM or doesn’t have the TPM 2.0 chip. But, that doesn’t mean that no other ways are using which you can manually upgrade your PC from Windows 10 to Windows 11. So, let’s directly hover over to the methods.
Pre-Requisites For Creation Tool:
- Firstly, take a backup of your data.
- Make sure that you have a good and stable internet connection to download this tool.
- A USB drive with a capacity of at least 8GB.
- You must have a 5GB free memory.
Downloading Link: Windows Media Creation Tool
1.) Create Installation Media Using Media Creation Tool
You can simply download and install the tool. After that, launch the application and follow the steps:
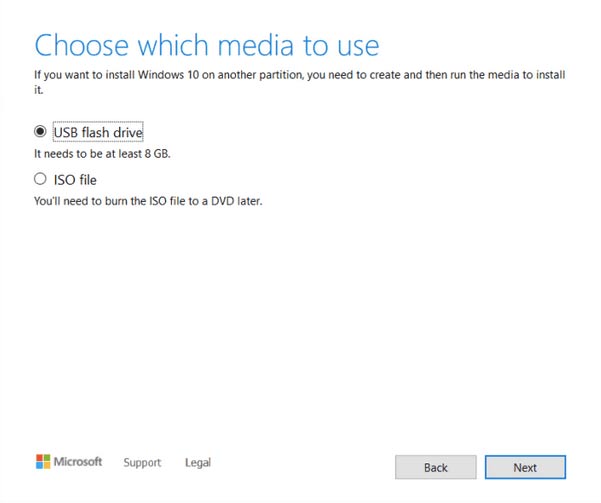
- Firstly, select the create installation media, select the language editions and architecture option, and hit the next button.
- After that, you’ll get two options: USB Flash Drive and ISO File. So, you can select one option as per your need.

- If you select the USB Flash Drive, you can see that it will start downloading version 1 and burn it automatically. But, before that, make sure that your USB drive should be at least 8 GB.
- On the other hand, if you select the ISO File, it will download the 11th version of the ISO file. But, later on, you have to burn it using any burner tool.
- Finally, when it gets burned in your USB Flash Drive, you can simply use it and boot your PC into BIOS and use the boot option to DVD.
2.) Upgrade Windows 10 to Windows 11
In case you’ve selected the upgrade to Windows 11 option, then you require to follow the below-mentioned steps:
- Firstly, once you select this option, it starts downloading Windows 11.

- Wait for it to get finished, and after that, you can easily install it on your PC. So, simply complete the installation process and enjoy Windows 11’s new features.
3.) Use Windows 11 Media Creation Tool
There is no rocket science or theory used while using the Windows 11 Media Creation tool. Instead, you can simply use it just by following some simple steps:
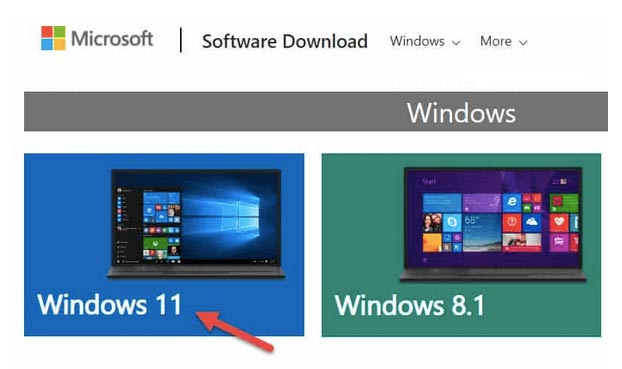
- First of all, use the given link to visit Microsoft’s official website and select Windows 11.
- After that, click on the download now button.
- Wait until it gets downloaded, and then open it. Afterward, Windows will ask you to accept their terms and conditions and accept it.
- Now, you’ll get a message on your screen, i.e., getting a few things ready.
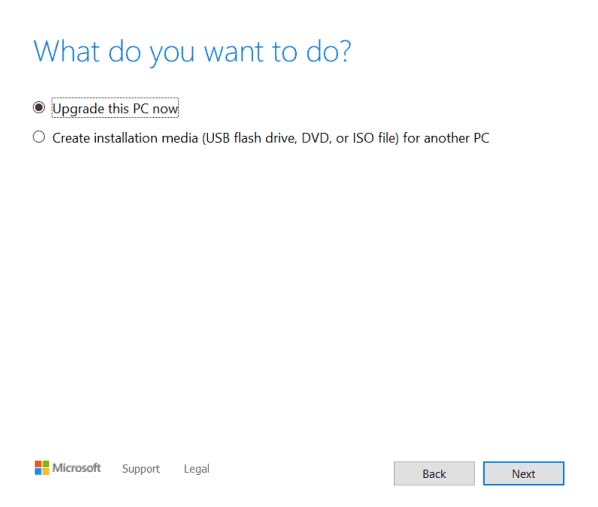
- Once done, a screen will appear with two options: Upgrade this PC and Create Installation Media.

- So, we recommend you select the Upgrade this PC because the other option we have already explained above.
- Now, wait until the installation gets finished, and that’s it. Now, enjoy Windows 11’s features.
So, that is for now on this guide. We hope you find this guide helpful. If you have any doubts, feel free to ask us in the comment section.


