Asus’s handheld gaming device is definitely powerful for its small design and is preferred by many gamers. Despite that, users have complained that their ASUS ROG Ally was stuck on cloud recovery. They were not able to get past the recovery screen and play their favorite games.
Upon looking into complaints from different users, we found that the common reasons behind this issue included incorrect date and time, outdated BIOS, and unstable internet connection. You can follow the steps given below to fix the Stuck on Cloud recovery issue on Asus ROG Ally-
1. Force Restart Asus ROG Ally
If you are stuck on the cloud recovery screen and unable to get past it, then force restart your device and try again. Here’s how-
- Press and hold the Power + Volume Down button together for 10 seconds.
- Release the keys after 10 seconds and this will force restart your device.
2. Set Correct Time
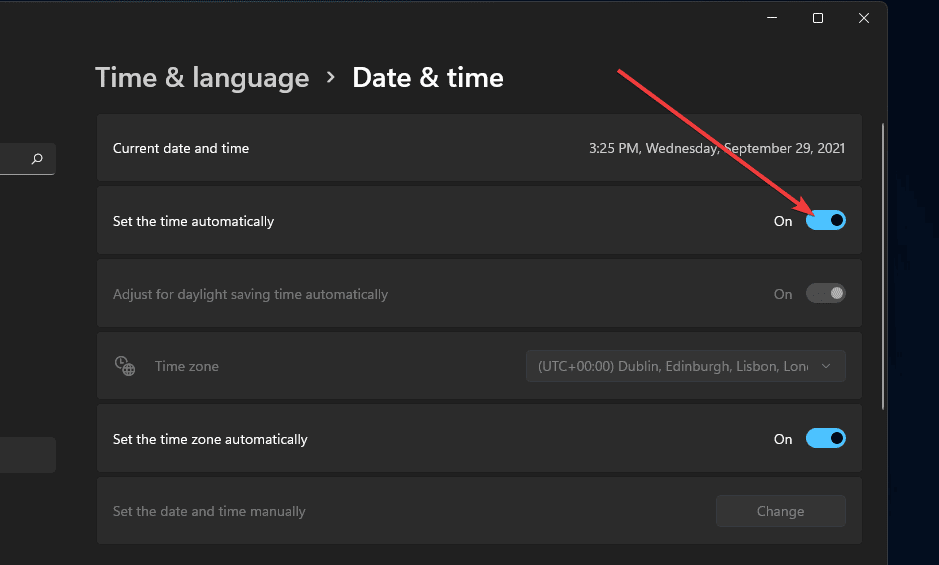
You must ensure the date and time are correct on the ROG Ally. Due to an incorrect date and time, the Asus ROG Ally can get stuck on the cloud recovery checking status page. Here’s how you can set the correct time-
- From the Start Menu, open the Settings app.
- Tap on Time & Language > Date & Time.
- Tap on the drop-down menu next to the Time Zone and set the correct time zone.
- Now, turn on the toggle next to Set Time Automatically.

3. Check for Stable Internet Connection
You need to connect your ROG Ally to stable internet for cloud recovery. You can check your internet speed through SpeedTest or Fast.com. If your internet is slow, then here’s what you can do to fix it-
- Connect to the 5GHz network over the 2.4GHz for stable internet.
- Ensure there’s no obstacle between the router and your ROG Ally.
- Bring your ROG Ally close to the router.
- Disconnect from the VPN if you are using any.
- Ensure no other application is running in the background on ROG Ally.
- Disconnect all other devices connected to your router other than ROG Ally.
- Connect to some other Wi-Fi network if you still face the issue.
4. Update BIOS on ROG Ally
Outdated BIOS is also a reason for this issue. You can update the BIOS of the ROG Ally to fix this issue. Below are the steps to do so-
- Tap on the Start icon, search for the MyASUS app, and open it.
- On the left pane, tap on System Update.
- Under the Latest tap the download button next to BIOS Installer/Update.
- On the next window, tap on Confirm.
- Select Desktop and tap OK to save the latest BIOS to the desktop.
- Head over to the desktop of your ROG Ally and double-tap on the BIOS update file.
- In the UAC prompt that appears, tap on Yes.
- Now, continue with the setup wizard to install the latest BIOS update.
- At the end, select Yes, restart the computer now, and click on Finish.
- After this, your ROG Ally will restart and boot into the BIOS screen.
- Now, connect the power adapter to the ROG Ally and tap on OK.
- You will be warned not to shut down the device or remove the power adapter; tap on Yes to continue.
- The BIOS upgrade will now start.
- You will see an upgrade successful message, and your device will restart normally.
5. Contact Asus Customer Support
If you are still stuck with this issue, you should try contacting Asus Customer Support. For assistance over the phone, you can head over to the Asus customer support page, where you will find the toll-free number to contact the team.
You can head to your nearest service center for device inspection. You can locate the nearest service center from the Asus Find Service Center page. Enter your PIN code and the page will look for the nearest service center.


