BlueStacks is the one-stop solution for using Android apps and games on Windows. However, it’s not all rosy when it encounters problems within the system or itself. In such cases, it may start throwing an incompatible Windows settings error when trying to open the app.
As such, if you’re coming across the same problem, this is the post all you need to read. Here we’ve discussed several methods to fix BlueStacks incompatible Windows settings error.
Several reasons could bring this trouble to your system, it can be a faulty Windows update, or enabling Hyper – V. Luckily, we have a solution for each, let’s explore.
How to Fix BlueStacks Incompatible Windows Settings Error
Even though the error occurs due to technical issues, it can be quickly resolved. However, it requires completing a super simple and easy method to fix the issue completely.
1. Disable Hyper-V
When it comes to virtualizing software, Hyper-V is often the first option that comes to mind. However, if it interferes with BlueStacks, the situation may not be as ideal as it seems. Moreover, it can reduce the app’s performance and even lead to serious issues such as incompatible Windows setting errors.
Although the latest version of BlueStacks is compatible with Hyper-V, if you have encountered an issue, then you should consider disabling it asap.
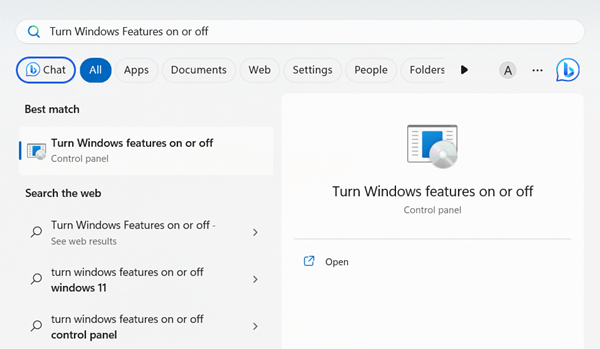
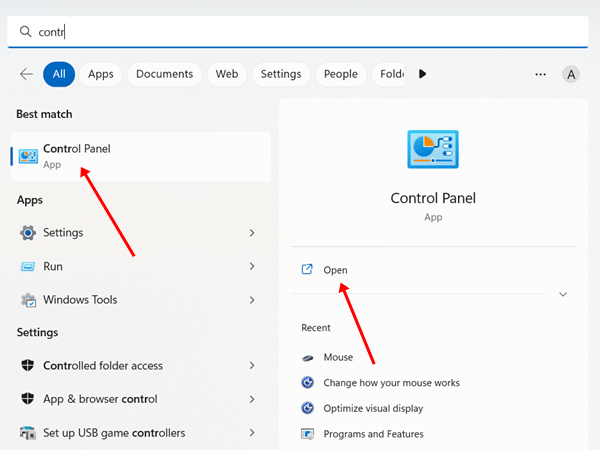
- Press Windows > search for Turn Windows Features on or off > click on Open.

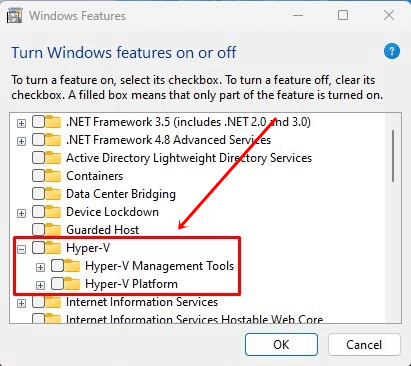
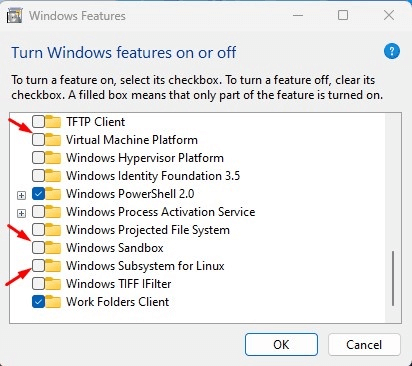
- Then scroll down, and you will get the Hyper-V option, click the tiny arrow to expand its subsidiary element.
- Next, uncheck all the boxes to disable Hyper-V and its functionalities. Now click on the Ok button.

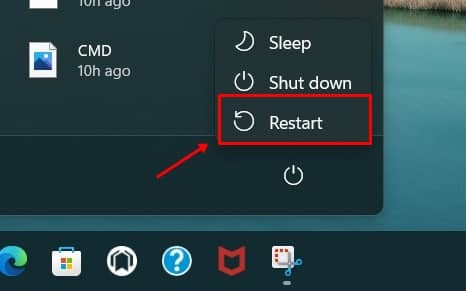
- After that, you need to restart the system and check whether BlueStacks is working fine or move down to the next method.

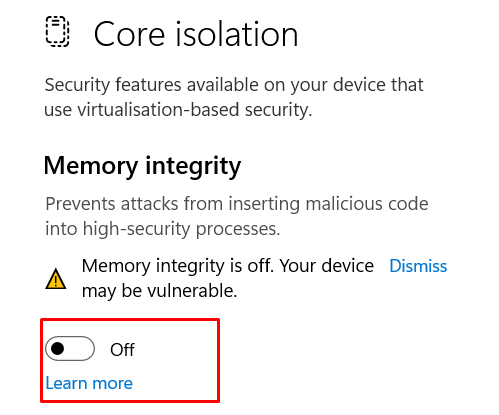
2. Disable the Memory Integrity
Memory integrity is a useful security feature that offers additional security during virtualization and is part of core isolation. However, it could be another reason that you are facing BlueStack incompatible settings error.
As a fix, you need to disable its services to enjoy BlueStacks on your system. Here’s what you need to follow.
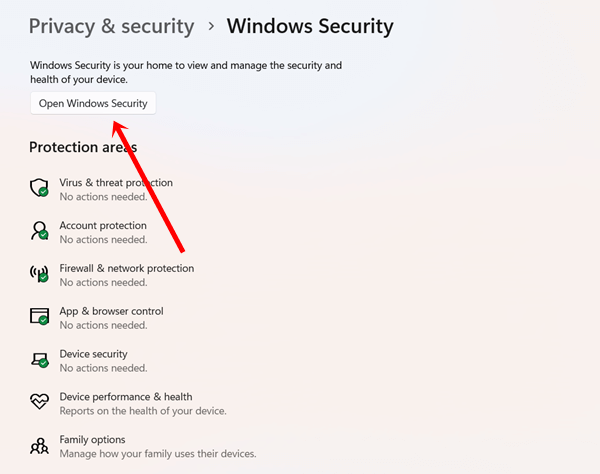
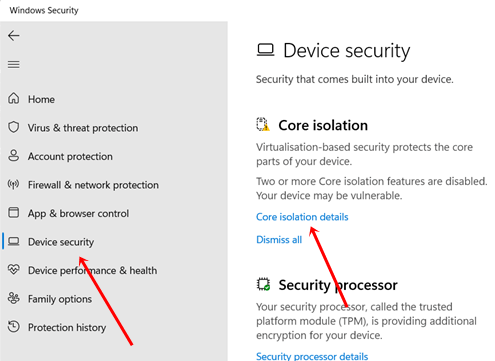
- Press Windows start > Settings > Privacy & Security.
- Next, click on Windows security > Open Windows security.

- Then click on Device Security and select Core Isolation details.

- Now simply disable the Memory Intergrity toggle button.

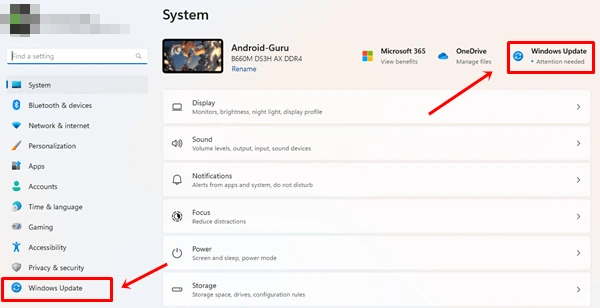
3. Uninstall Windows Update
Updating Windows is always good, but if it doesn’t compatible with BlueStacke. Therefore, we have to uninstall it. This is what you need to follow.
- Press Windows > Settings > Windows update.

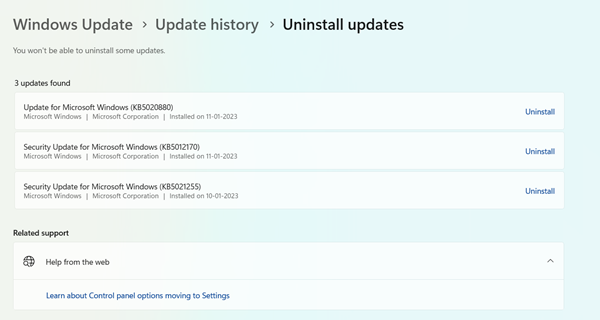
- Then click on Update History, and select Uninstall updates.

- Now you can see all recently installed updates that you can uninstall to make nice compatibility with BlueStacks. However, click on Uninstall updates.
4. Disable Windows Sandbox & Subsystem for Linux
If you have enabled Windows Sandbox, then chances are high that you can’t use Bluestacks. As a fix, you need to disable Windows Sandbox and Subsytem for Linux to run Bluestacks efficiently.
- Press Windows > search for Control Panel > Open it.

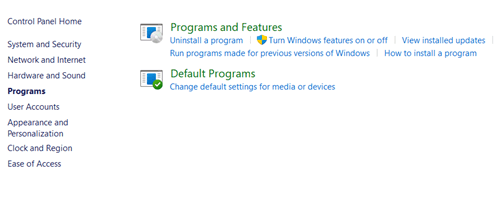
- Then click on Programs.
- Next, select Turn Windows features on or off.

- To disable Windows Sandbox, Windows Subsystem for Linux you need to uncheck boxes, just like the image shown below.

- Now restart the system and check whether BluStacks is running or throwing the same error.
5. Consider 32-bit BlueStacks
Bluestacks have many versions to install on our system. We have to cross-check everything before downloading the exact version that matches our system specifications for better compatibility. Although, each version has a different instinct.
Suppose, if you are considering downloading BlueStacks 64-bits, then you don’t need to disable the Hyper-V. In the recent update, BlueStacks 64-bit is compatible with Hyper-V.
However, if 64-bit is not working for you, then you should go with the BlueStacks Nougat 32-bit version. Also, you have to disable Hyper-V to use the 32-bit. Make sure you have uninstalled the previous version from the system.

6. Run BlueStacks as Administrator
So far we have discussed several issues and their solution. Here is another effective method that you should try when you are getting incompatible BlueStacks settings errors.
However, you need to run the app as an administrator. It helped a lot of users till now, hopefully, you can also get a solution. Just press Windows and search for BlueStacks, and click on Run as Administrator.
7. Disable Hyper-V Leftover using Custom .exe File
Even if you’ve disabled Hyper-V, still, it has some leftovers to interfere with virtualization. However, here is a process to disable it too.
- Download and install this custom .exe file to disable Hyper-V completely.
- However, you need to restart the system after installing it successfully. It will disable all Hyper-V features and functionalities.
Final Words
Even though BlueStack’s incompatible Windows settings error could occur for many reasons, these are the common fixes you should know and apply. However, if you have any doubts or questions, let us know in the comment section.


