Are you facing a cellular option missing issue on your Windows 11 PC? here we have multiple ways that can help you to connect your computer to the internet via mobile connectivity.
Earlier, it was common for computers to connect through the mobile to use the internet. However, as fiber cables and open WiFi networks became common, Cellular networks were sidelined. Nowadays, the policy with Windows 11 is that Cellular networks will connect automatically when you plug in the hardware.
However, the option is usually missing. If you need the option to add a Cellular network, then please read through this article for the solutions. The solutions are as follows:
1. Enable Cellular Network Via Settings
While the option for Cellular network is unavailable in the Quick Access menu, you can enable it through Windows Settings.
- Right-click on the Windows Start button and go to Settings > Network & Internet.
- Turn the switch ON for Cellular.


2. Enable Cellular Network Via Airplane Mode settings
Another option to enable a Cellular network is through the Airplane Mode settings.
- Go to Windows 11 Settings and tap on Network & Internet.
- Click on the forward-pointing arrow associated with Airplane Mode.

- Toggle the switch ON for Cellular under the Wireless Devices section.
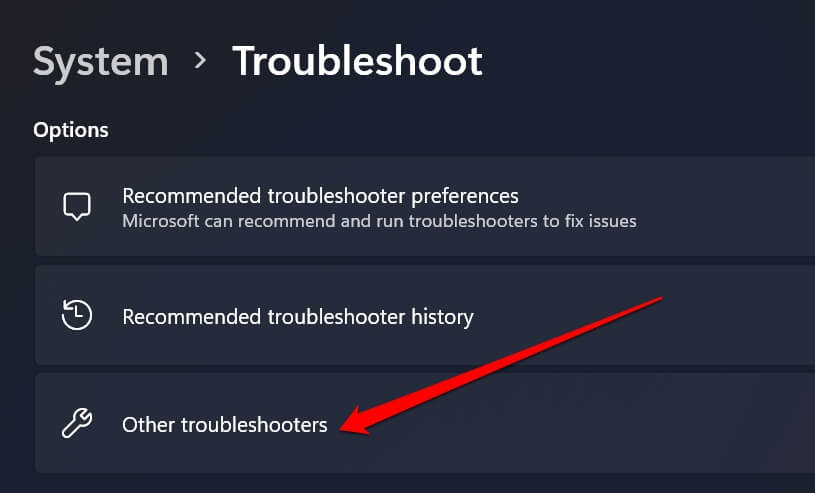
3. Run Network & Internet Troubleshooter
If enabling the Cellular network didn’t help, you can try running the Network and Internet troubleshooter. This troubleshooter checks for issues with the network and fixes them if possible.
- Right-click on the Windows Start button and select Settings.
- Go to Troubleshoot > Other Troubleshooters.

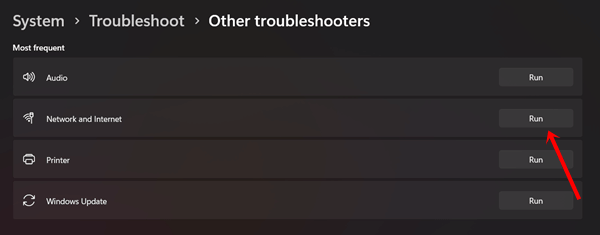
- Click on Run corresponding to the Network & Internet troubleshooter.

- Select Yes to allow consent.
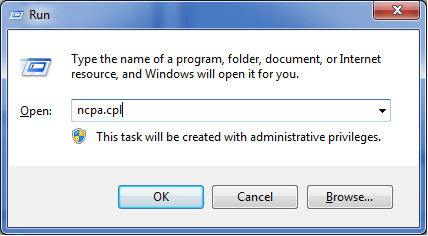
4. Enable the Cellular Adapter
If the Cellular adapter is disconnected in the Network Connections menu, then no other solution will work. Thus, it is important to verify that the Cellular Adapter is enabled.
- Press Windows + R to open the Run window.
- Type NCPA.CPL and hit Enter.

- Right-click on Cellular network and select Enable.
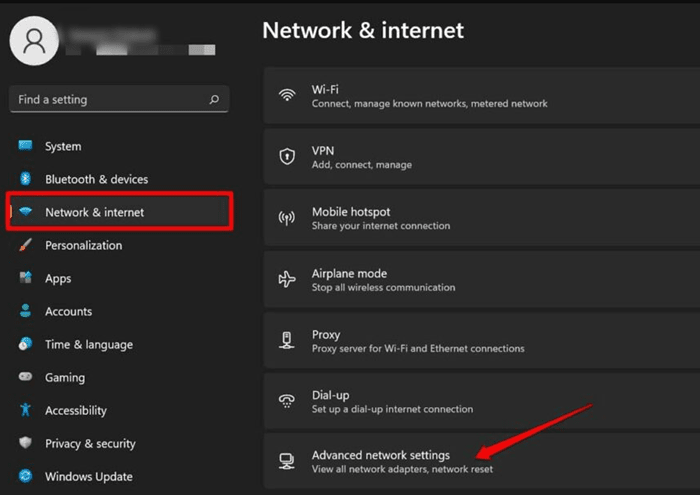
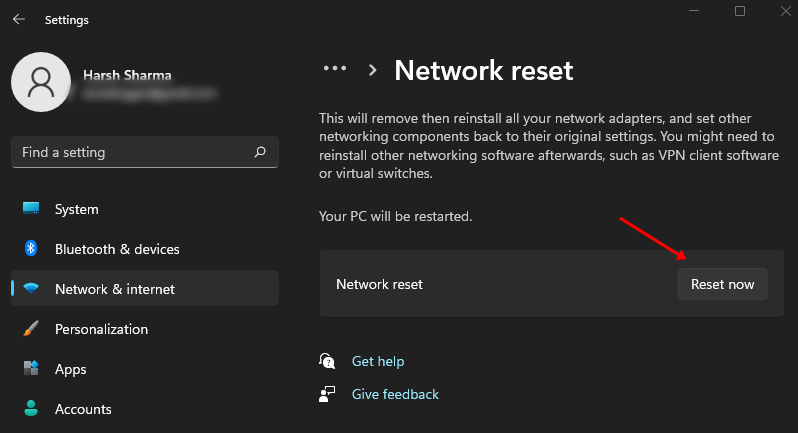
5. Reset Network Settings
If the Network Settings are messed up, then the Cellular Network might not work even after enabling the settings. In this case, you can reset the Network Settings to default.
- Right-click on the Start button and select Settings.
- Go to Network & Internet > Advanced Network Settings.

- Click on Network Reset > Reset now.

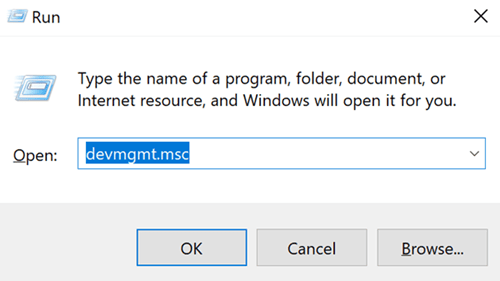
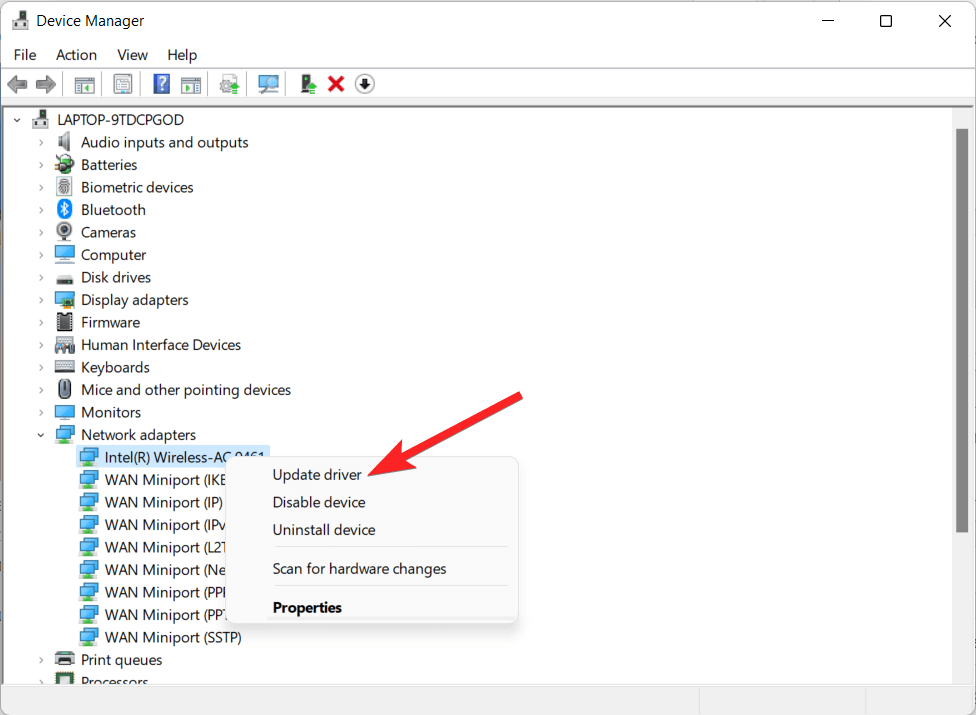
6. Update Cellular Drivers
Drivers are the connection between hardware and software. If the Cellular drivers are obsolete or corrupt, then you can consider updating them.
- Press Windows + R to open the Run window.
- Type DEVMGMT.MSC in the Run window and hit Enter.

- Expand the list of Cellular drivers and right-click on the Cellular driver.
- Select Update Driver > Search Automatically for Driver.

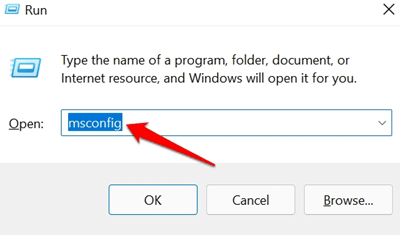
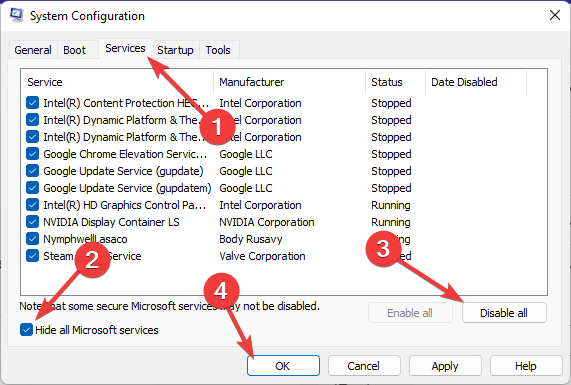
7. Disable All Services
Reboot your system in the Clean Boot state. In case any third-party software is interfering with the process, you can consider rebooting the system in the Clean Boot state. In the Clean Boot state, no third-party program will initiate upon rebooting the system, thus isolating the cause.
- Press Window + R to open the Run window, Type msconfig, and hit Enter.

- Go to the Services tab. Check the box associated with Hide all Microsoft Services.

- Click on Disable all, then hit Apply and then OK.
- Select Reboot system.
Once the system has rebooted, check if the issue has been fixed.
Conclusion
The missing cellular option in Windows 11 creates a significant gap in connectivity features. In an era where seamless internet access is crucial, especially for mobile users, this omission inconveniences those reliant on mobile data. These solutions will help you fix the issue of the Cellular network not working on Windows 11. Was this helpful? Please let us know in the comments section.


