When we download files from the Internet, the default download location is the Downloads folder, which you’re probably already familiar with. However, sometimes you want to change the download location but don’t know how to do it.
Luckily, Windows provides an easy option for this. If you want to know how to change the download location in your Windows 11, we have explained the best way to change the download location, including Microsoft Store downloads successfully.
Change Downloads Folder Location in Windows 11
Usually, whenever you download files, media, and other documents from the internet, they come in the Downloads folder by default. In this article, we have mentioned the best methods that you can use to change the download location in Windows 11.
Move The Downloads Folder To a Different Location
If your C drive is about to fill up and you are unable to download files due to insufficient storage, you can change the default download location to a different drive.
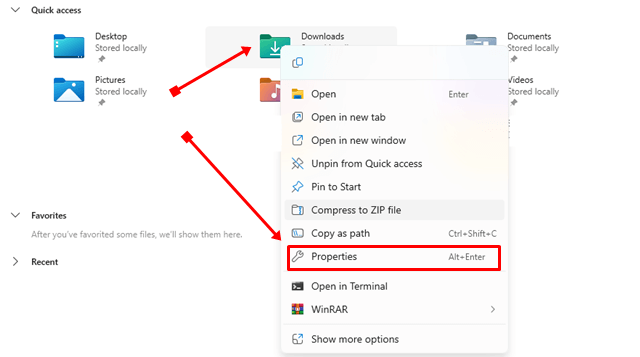
- Press Windows + E to open File Explorer, then right-click on the Downloads folder and select Properties.
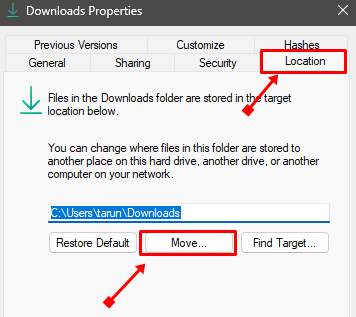
- Click on the Location tab, then click on Move.
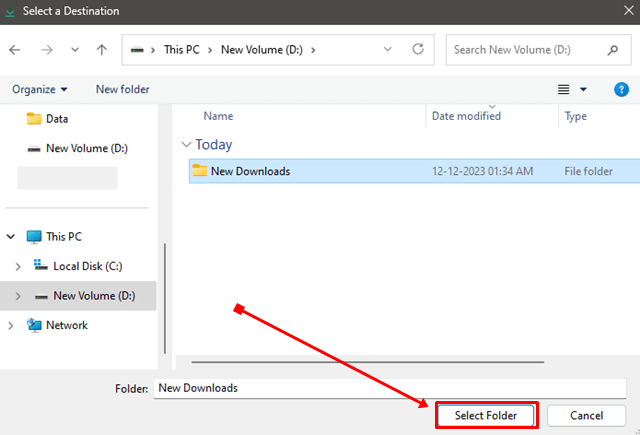
- Go to the drive where you want to move the default download folder, then click on the Select Folder button. You can also choose any other location you prefer.
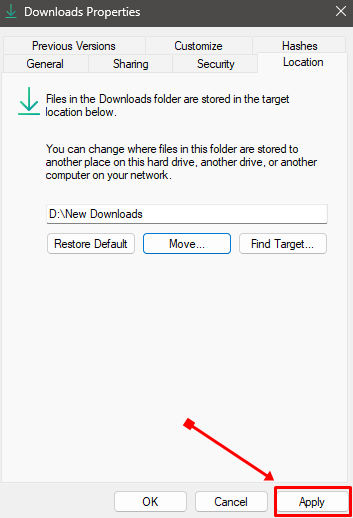
- Click on the Apply button to confirm.
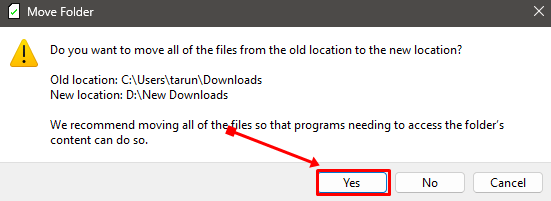
- Click the Yes button if you want to move all downloaded files to that location, Otherwise, tap No.
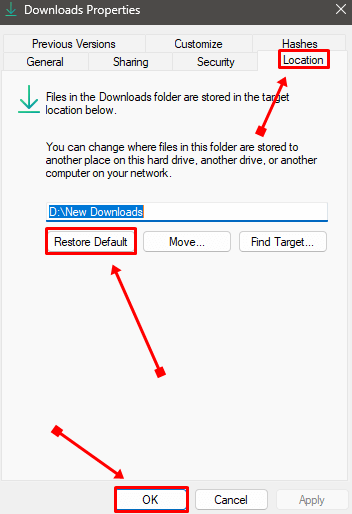
- To set the Downloads folder back to its old location, simply go to Downloads Properties, then tap Location and click Restore Defaults. It will ask you to transfer files again, Select accordingly and then press OK.
Change Downloads Location For Microsoft Store Apps
If you download apps from the Microsoft Store and want to change their download location, follow the steps below.
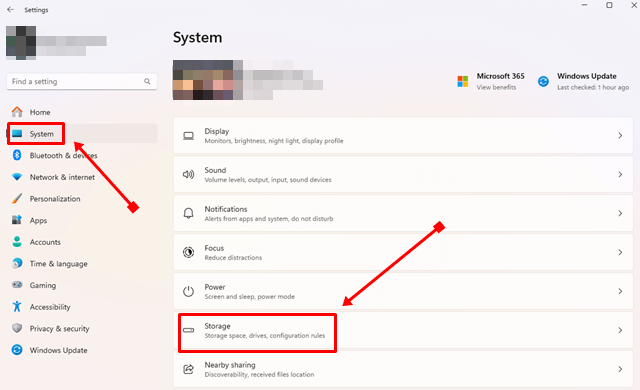
- Press Windows + I to open Windows Settings.
- Click on System > Storage.
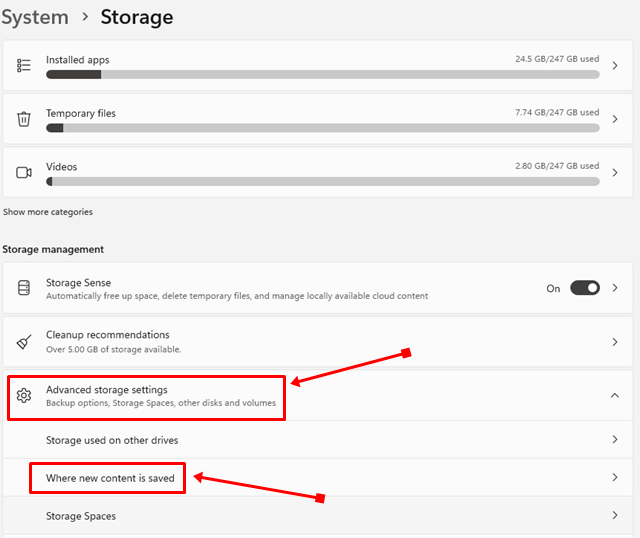
- Scroll down then click on Advanced storage settings > Where new content is saved.
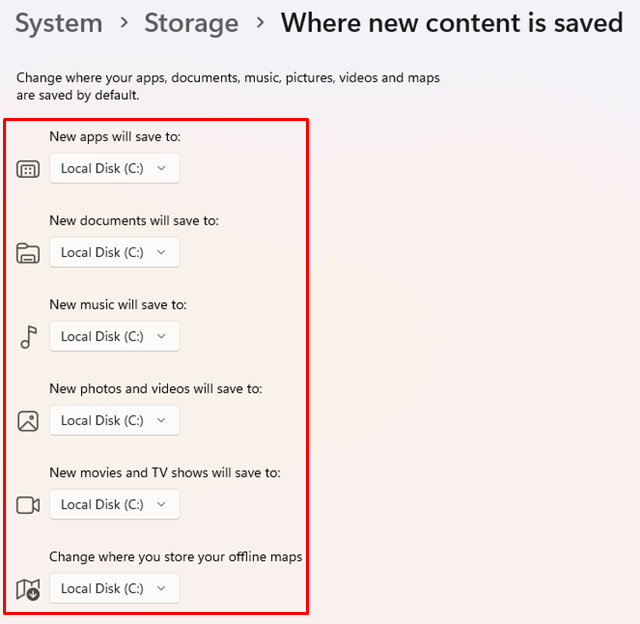
- You will now see the download locations of apps, videos, documents, music, and more.
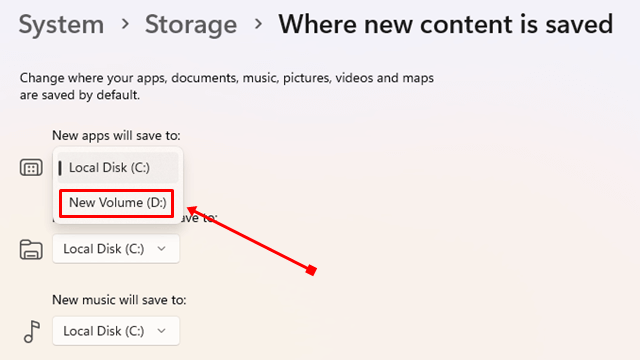
- Click on the dropdown menu and select the other drive to change the download location.
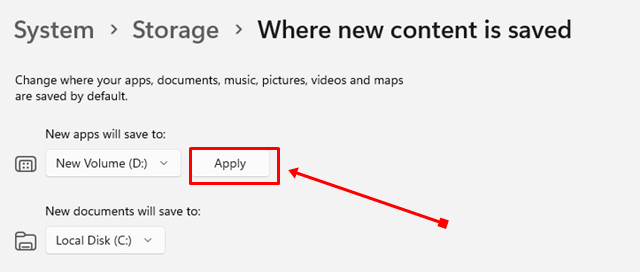
- Lastly, click on the Apply button to change the location.
You can change the location of each category (Apps, Music, Photos, Documents) if you want.
Conclusion
Here, we are wrapping up this guide. All the methods provided are perfectly working, and you can use these methods in any version of Windows.
If you get stuck on any step in this guide, feel free to comment below or contact us on social media, we will definitely provide you the solution as soon as possible. Share this article with others if you think it is informative.

