We all know about the Windows operating system and its dominance. But have we ever tried to know the secret behind it? Well, Microsoft was not always where it is today. Bill Gates has worked very hard to take this company so far.
However, one of the biggest bases behind the popularity of Windows, that it supports every language irrespective of the country. Meanwhile, we all know that recently Microsoft has launched its new OS version, Windows 11, and while installing it, the system always asks us to choose our language. But, what if we choose a language that we don’t familiar with?
As stated above, you won’t need to worry; you can simply change your user’s language. Therefore, if you don’t know how to do this, follow the steps mentioned in this guide to change the system language on Windows 11. So, let’s directly jump into it.
Also Read- How To Change Screen Resolution on Windows 11
Steps To Change System Language on Windows 11
So, follow these steps to change the system language on your Windows 11 PC. But, make sure to do not skip any steps. Therefore, now let’s take a look at them:
- Initially, you need to open the Windows Settings by pressing the Win + I button.

- After that, head towards the Time & Language. Then, click on the Language & Region.

- After that, hover over to the Language section > Add a Language and select the preferred language.

- Now, either choose a language from the pop-up list or simply search for the language as per your usage.
- Then, select the language and hit the Next button to proceed further.

- After that, to set up the language as your default language, checkmark the box located in front of the Set as my Windows display language and hit the Install button.

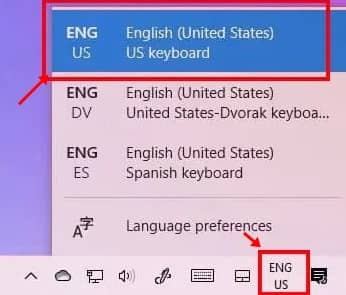
- That’s it. Now, to change the language, you can simply click on the Language button located on the Taskbar. Then, switch to the language you want to use.

- Now you can easily switch to multiple languages after installing new ones.


Steps To Change The Default Language
Changing the language to default isn’t a very tough task to do. You can do it by just following some simple and easy steps. But, for those who don’t know about this, here are some necessary steps for you to change the default language:
- First of all, you require to press Win + I to open the Windows Settings.
- After that, click on the Time & Language and select the Language & Region option.
- That’s it. Now, hit the Sign Out button and then sign in again. Then, you’ll see that your language settings will change into default.


So, that’s it from our side on how to change system language on Windows 11. We are pretty much sure that these steps definitely helped you do so. But, in case you have any doubt regarding the steps we have mentioned above, let us know in the comment box down below.


