With more people using remote servers, it is now easier for hackers to hack into the system through the RDP port. The default port number is 3389, and most people keep it the same without finding the need to change it. Now, this default RDP port is already on the hackers’ radar, and they always try to get access to the remote computers through it.
Once the hackers are in, your computer will be vulnerable to their attacks, and they may steal your data, track your activity online, and do things that one cannot even think of. You can change your default RDP port number for a Windows Server to something else to avoid it.
But what will changing the RDP port do? The hacker always considers the RDP port 3389 because it is the default. But if your RDP port is changed and set to some other free port, then it will be difficult for them to know what’s your RDP port and gain access to the PC. This article will guide you through how to change the RDP port for a Windows server.
Ways to Change RDP Port for a Windows Server
There are multiple ways to change the RDP port for a Windows Server. Though the process is quite easy, you will have to be careful while doing so. Follow the steps given below to change the RDP port-
1. Through Registry Editor
The first way to change the RDP port is through the Registry Editor. You can do it by following the steps given below-
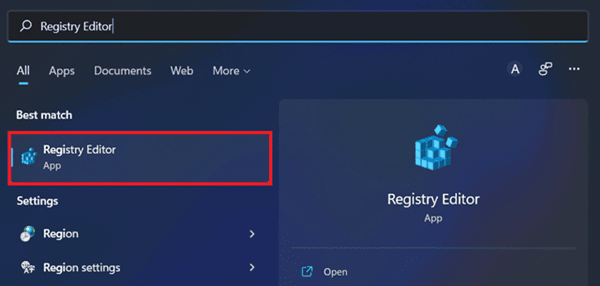
- Open the Start Menu, search for Registry Editor, and open it.

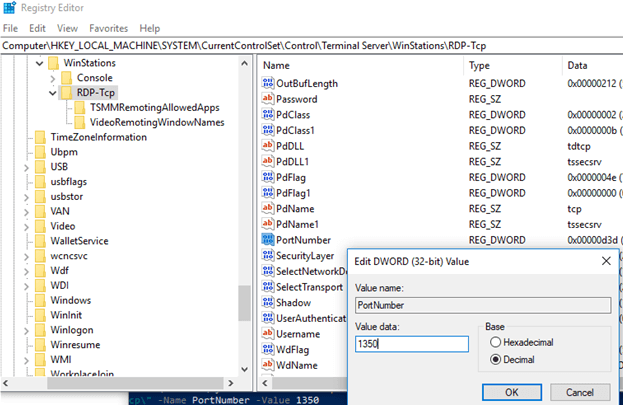
- Now, navigate to the following address-
-
HKEY_LOCAL_MACHINE\System\CurrentControlSet\Control\Terminal Server\WinStations\RDP-Tcp
-
- On the right side, double-click on PortNumber to edit it.
- Here, select Decimal under Base.
- Now, you will have to edit the Value Data. Set the Value Data to the RDP port you want to change to.

- Once done, click on OK to save the changes.
2. Through PowerShell
You can also run the PowerShell command to change the RDP port for the Windows server. To do so, follow the steps given below-
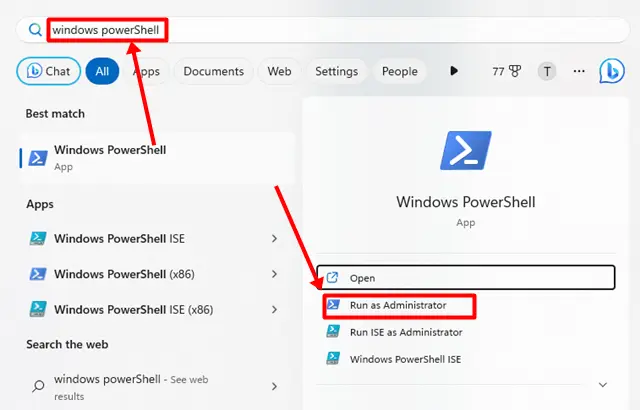
- Press the Windows key and type Windows PowerShell. Right-click on the Windows PowerShell and then click on Run as Administrator.

- When the UAC prompt appears, click on the Yes button.
- In the Windows PowerShell, execute the following command-
-
Set-ItemProperty -Path ‘HKLM:\SYSTEM\CurrentControlSet\Control\Terminal Server\WinStations\RDP-Tcp’ -Name ‘portnumber’ -Value [Port Number]
-
Note- You must replace [Port Number] with the port number you want to change.
Implement the Changes in the RDP Port
You must implement the changes once you have changed the RDP port through the above steps. Configure the Windows firewall for the latest Port and restart the remote desktop services. Here’s how-
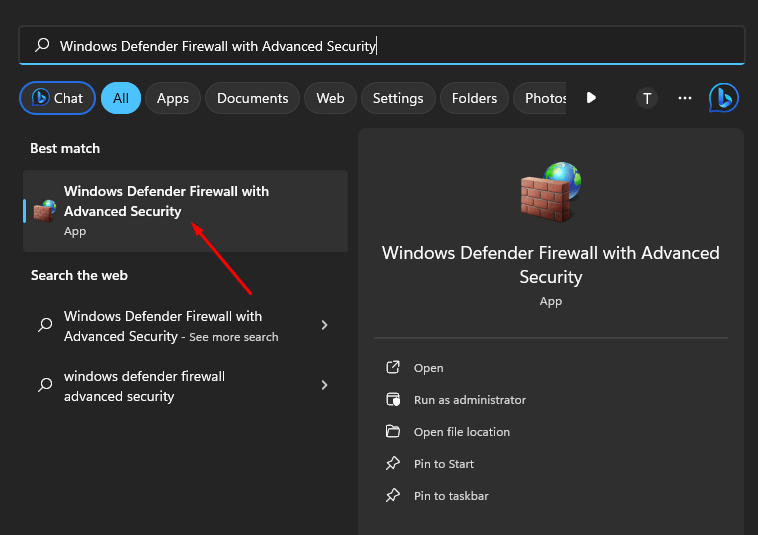
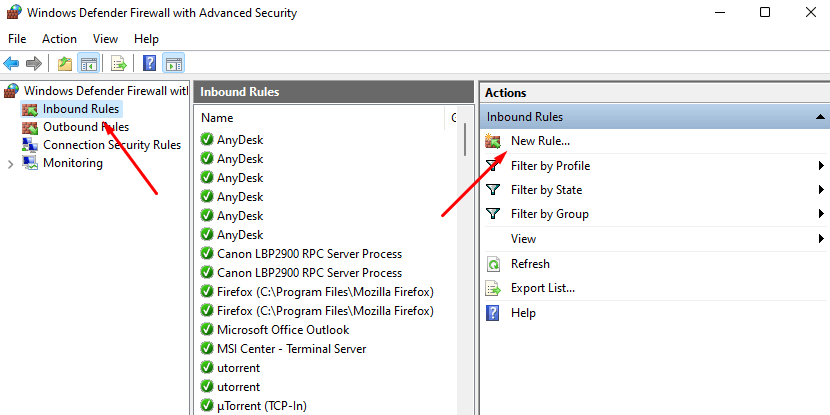
- Press the Windows key, type Windows Defender Firewall with Advanced Security, and press Enter.

- Click on the Inbound Rules and then click on New Rule.

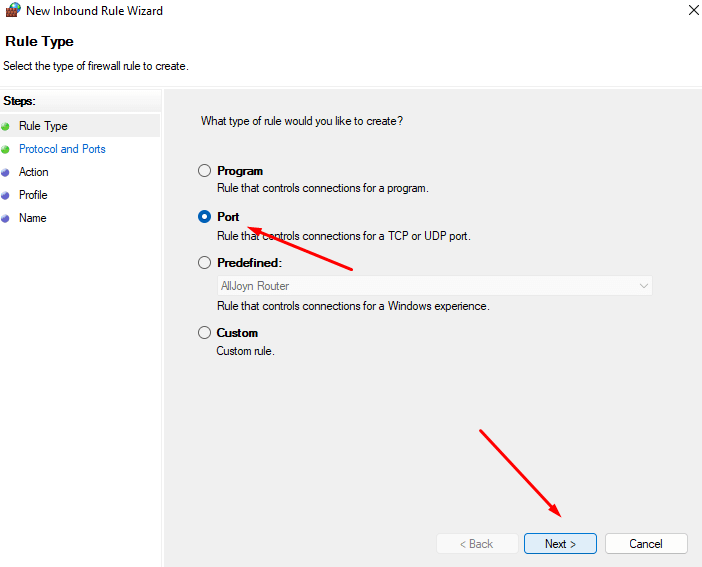
- For the Rule Type, select Port and then click on Next.

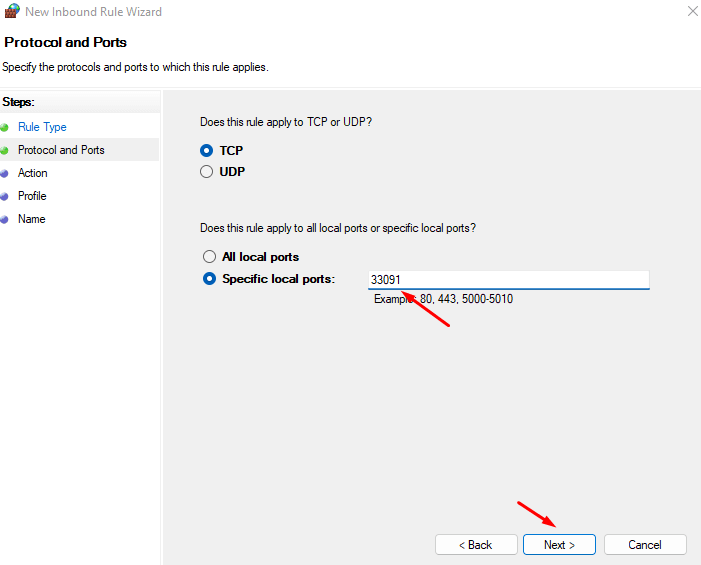
- When asked, ‘Does this rule apply to TCP or UDP?’ select TCP.
- Select Specific local ports, type the new RDP port you have set, and then click on Next.

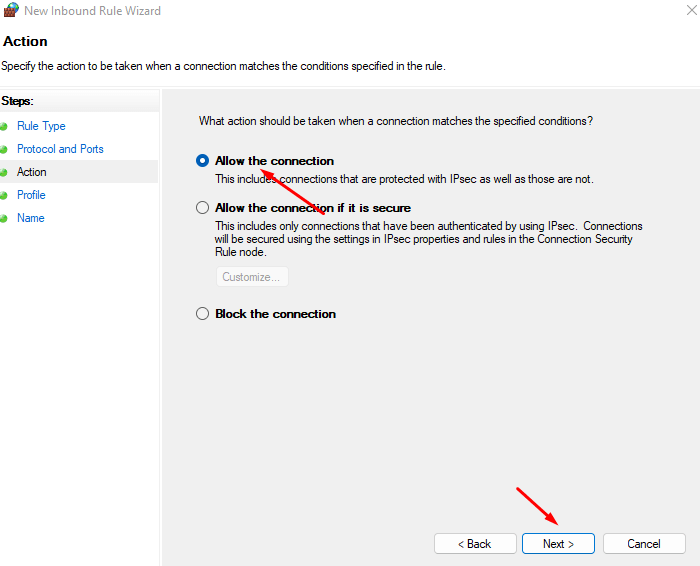
- On the next screen, select Allow the connection and then continue by clicking on Next.

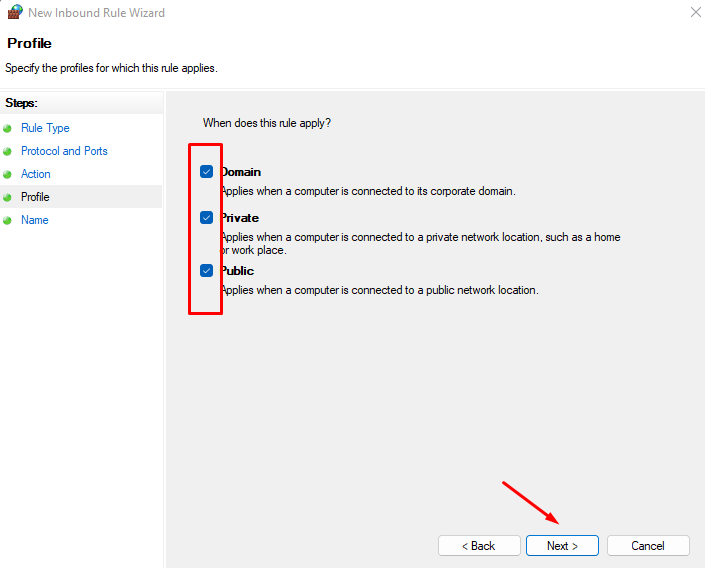
- Please select whether the rule applies to Domain, Private, Public, or all of them.

- You must now enter the Name for the RDP port and description (optional). Click on Finish once done.
- We selected TCP in the fourth step above; once you have set the rule for TCP, follow the above steps again, but choose UDP instead of TCP.
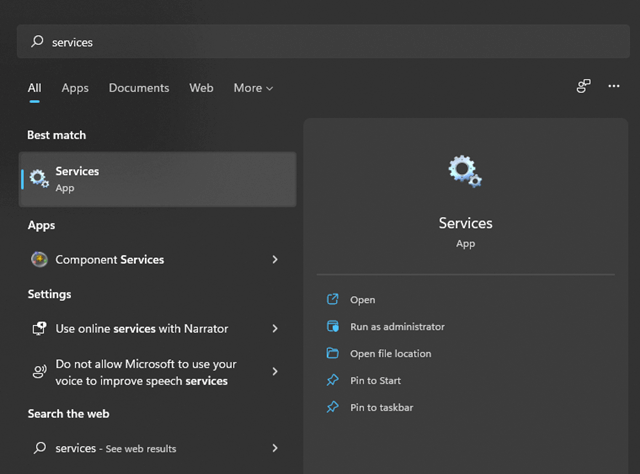
- Press the Windows + R key combo, type services.msc, and click OK.

- Search for Remote Desktop Services here. Right-click on this service, and then click on Restart.
How to Check the RDP Port on Windows Server?
Once you have changed the RDP port, it is important to check whether the changes have been made. You can do this by following the steps given below-
- Launch Windows PowerShell as Administrator on your PC.
- In the PowerShell, you must execute the command given below-
-
-
Get-ItemProperty -Path 'HKLM:\SYSTEM\CurrentControlSet\Control\Terminal Server\WinStations\RDP-Tcp' -name "PortNumber"
-
Note- Look for the PortNumber here. The PortNumber should be the one you have set using the above steps; if it is, you have successfully changed the RDP port.
Final Words
Once you have followed the above steps, the RDP port on the Windows server will be changed to the custom port instead of the default. Ensure you have followed all the steps carefully and not skip them. You can now use the new port to use the Remote Desktop Connection.


