In this growing cloud storage time, few people still follow the orthodox style of storing data offline in their local storage. While this can give them better security against online threats, any physical or virtual damage made to the storage device can result in unbearable cost.
This could be a random hit on a disk drive or malicious software corrupting the whole drive; losing important stuff and preferences can be heartbreaking. Thus, to avoid this from happening, we suggest you back-up whole data on your system regularly or when switching things. To do so, here’s an easy way in Windows 10;
Also Read- Best DLL Fixer Software For Windows
How to Create a Full Backup Using Windows 10 System Image
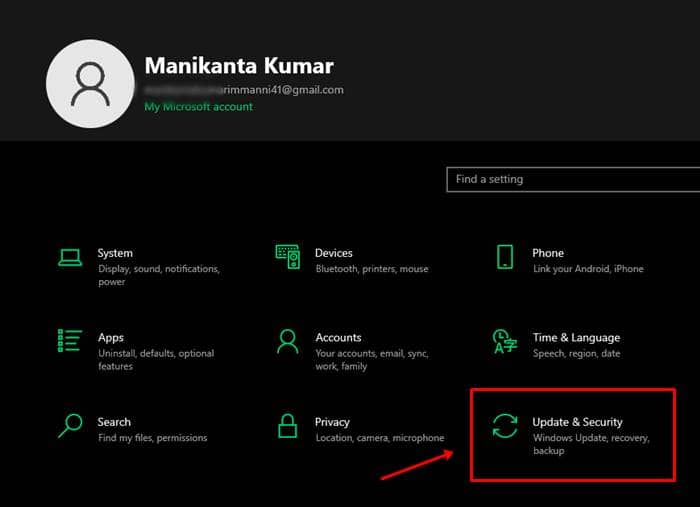
- Open Settings on your Windows 10 PC. For this, either search Settings in the search bar, open the app or try pressing Windows + I shortcut on your keyboard to access system Settings.
- On opening it, go to “Update and Security.”

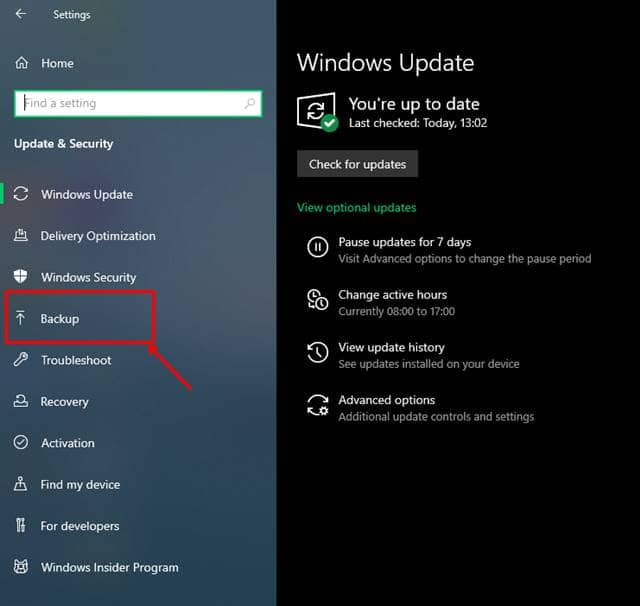
- Then, go to the Backup section in the left side menu and select the Backup option in the right-side panel.

- Now, click on the “Go to Backup and Restore” option, which will open a new Control Panel type window.

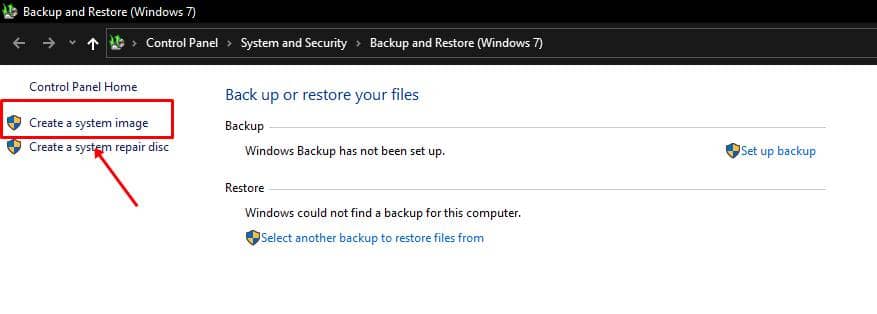
- In this, select “Create a system image” and select the location you wanted to store the backup data.

- Click Next and proceed to select the drives you wanted to backup.
- Later, you’ll see the “Start backup” button, clicking on which will start the process. And if you’re interested in backing up things to external storage, you can do so by selecting the storage type.

That’s it. Microsoft lets you use the system meanwhile the backing up is happening. This process will happen in the background and lasts on the storage type, speed, and amount you’re backing up.
Also Read- How to Full Scan Your Windows 10 PC Using Microsoft Defender


