Windows 11 has got a completely redesigned UI in many ways, including the Action Center, which houses a plethora of quick toggles like WiFi, Bluetooth, Accessibility, Airplane mode, and so on. In addition, Microsoft has revamped UI, which now looks flamboyant and streamlined than before.
This includes notifications that PC gets, which is quite intuitive. In addition, action Center on Windows 11 arrives with a tonne of toggles that you can customize according to your needs and here’s how you can do it.
Also Read- How To Get Moving Live Wallpaper in Windows PC
How To Customize Action Center Shortcuts on Windows 11 PC/Laptop
Here’s how to add, remove, modify, and alter the Action Center Shortcuts on Windows 11 using easy-to-use instructions.
Steps To Add a New Entry To Windows 11 Action Center Shortcuts
Here’s how you can do it.
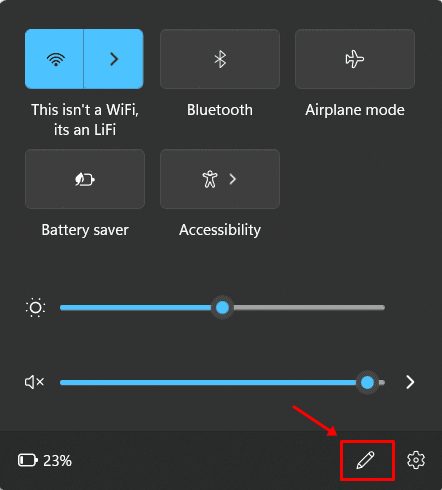
- First up, summon Action Center on your PC running on Windows 11. You can do so by tapping on the extreme right of the taskbar. To simplify it, you need to tap on the “WiFi, Volume, & Battery” icon.
- If you want to change the shortcuts on the Action Center, tap on the ‘pencil’ icon.

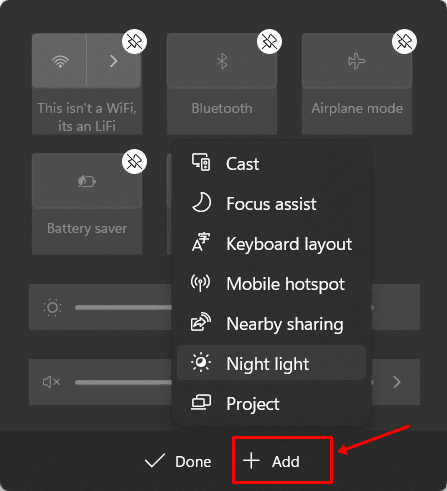
- All shortcuts will be greyed out and you can edit them now. Tap on the “Add” button since you want to make a new entry.

- From the dropdown menu, select an item you want to add and tap on it. Finally, tap on “Done,” and this process is done.
Steps to Remove an Entry from Windows 11 Action Center
Here’s how you can remove an entry on Action Center on Windows 11.
- First up, invoke Action Center on Windows 11 PC by tapping on the “WiFi, Volume, and Battery” icon on the extreme right corner of the taskbar.
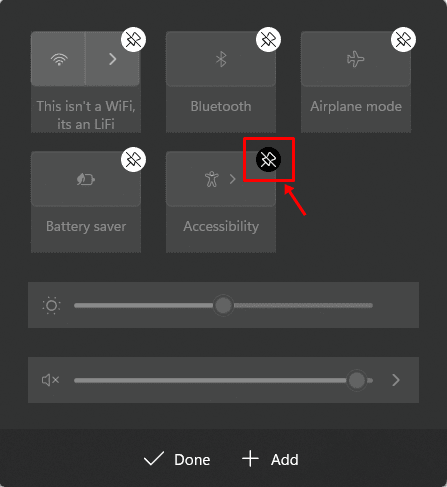
- Once the Action Center is visible, tap on “Edit.”
- If you want to remove an entry, tap on the “Unpin” button raised above the shortcuts.

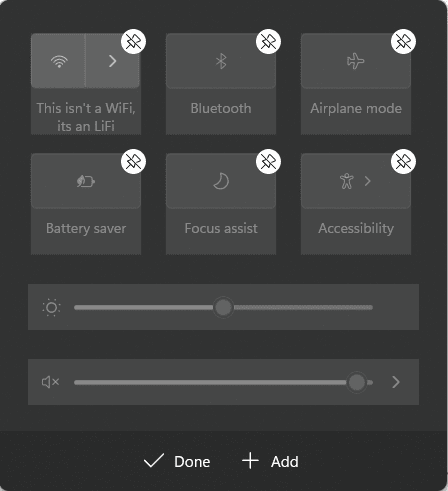
- Once it is removed, click on “Done,” and the process is done.
Steps To Rearrange Action Center Shortcuts on Windows 11
Sometimes, people want shortcuts on Action Center to be in a specific order, such as most used shortcuts on the right and barely used shortcuts on the left. Windows 11 gives you a feature to change and rearrange the tiles according to your requirements and here’s how you can perform it.
- The first step is to go to the taskbar and access Action Center by hitting the “WiFi, Volume, and Battery” icon.
- Next, click on “pencil-shaped” icon located at the bottom side of the panel.
- Now that all shortcuts have turned grey in color, you can pick one and drag it to the favorable position. Shortcuts will automatically swap positions once you drag one tile on top of another.

- After you are done, hit “Done” button at the bottom portion and you are good to go.
Steps To Customize Transparency Settings on Windows 11 Action Center
Windows 11 gives you a lot of personalization features and transparency on Action Center is one of them. So let’s see how you can customize its transparency.
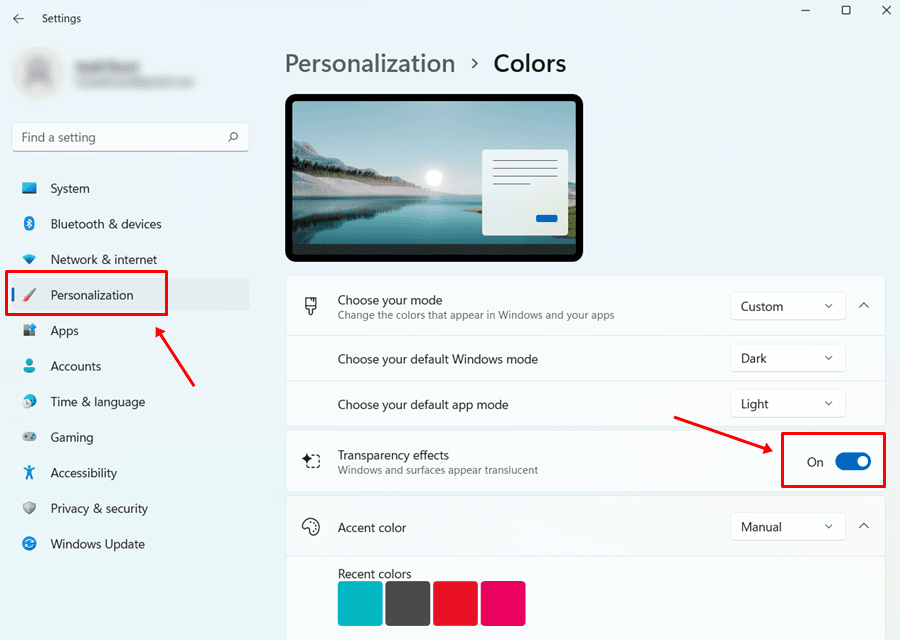
- Open Settings on your PC (Windows + I).
- Proceed to “Personalization >> Colors” and toggle off “Transparency effects.”

- If you toggle it again to turn it on in case you aren’t satisfied with the previous transparency changes you made to the Action Center.
Closing Words
This is all you need to know about customizing Action Center on Windows 11 PC. Using the instructions mentioned above, you can add a new entry, remove an existing one, and re-order if you want. Windows 11 will keep updating itself with new features, so you will see more features and customization options along the way.


