Debloating refers to removing apps and services from your device that are useless or unnecessarily present. Too many unnecessary things can occupy a large amount of storage, cause your device’s performance, and make it run slow.
In that case, debloating helps remove that app from impacting your Windows 11 device and making it run slow. Debloating Windows 11 is easy; if you don’t know how to do it, this article will help you with it. In this article, we will be discussing various ways to increase speed and performance by debloating Windows 11.
Also Read- Fix Windows 11 Update Stuck or Failed
Debloat Windows 11 to Increase Speed and Performance
There are different ways to debloat Windows 11 and make your device run smoothly. You can easily do it by following the steps given below-
1. Manually Uninstall Unnecessary Apps
You can uninstall the apps permanently, which are useless on your device and contains a large amount of storage. For that, the steps are given below-
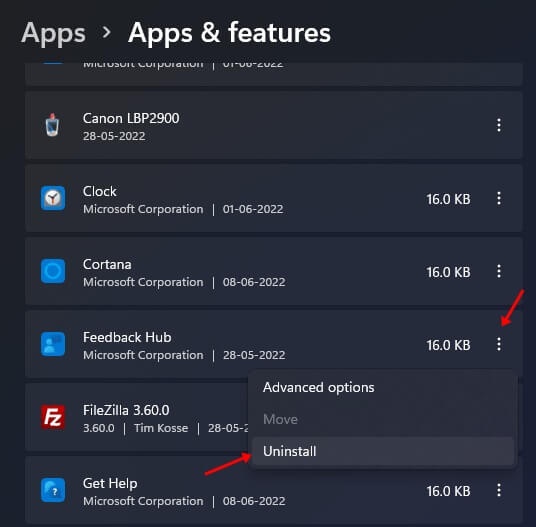
- Press Windows key + X on your keyboard, and then click on Apps & Features from the menu.

- Now look for the app you don’t use much and want to uninstall.
- Click on the three dots next to the app you want to uninstall and then click on Uninstall option.

- Do the same for all the apps you want to uninstall.

2. Use Windows 11 Debloater From GitHub
Debloating Windows 11 can also be done by a third-party tool from Github. All you need to do is follow the given steps-
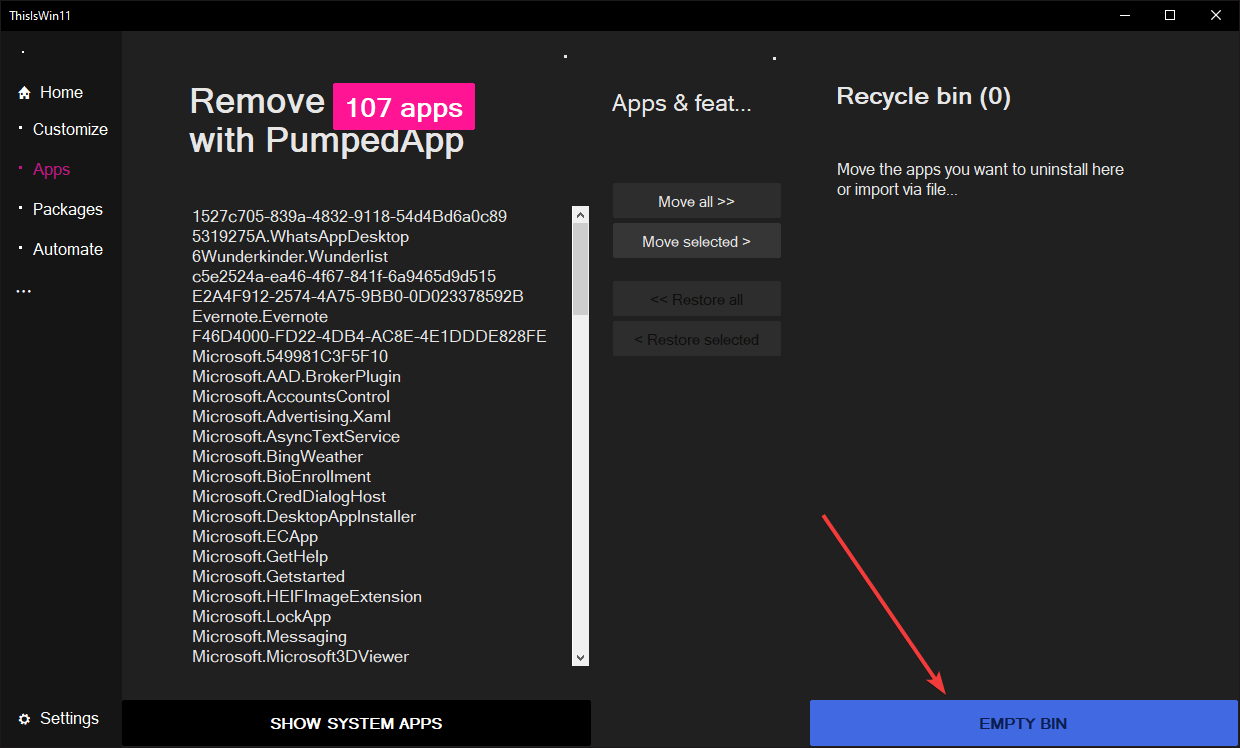
- Go to the ThisIsWin11 Github page on your browser.
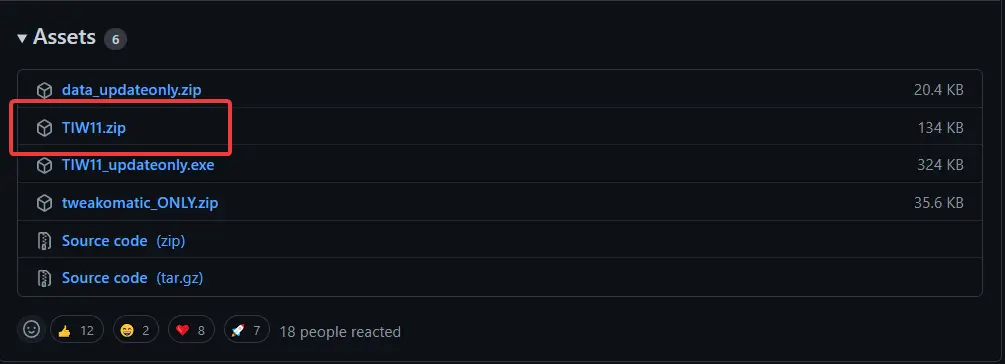
- Then, go to the Assets section and click on the option TIW11.zip. This will download the TIW11.zip file.

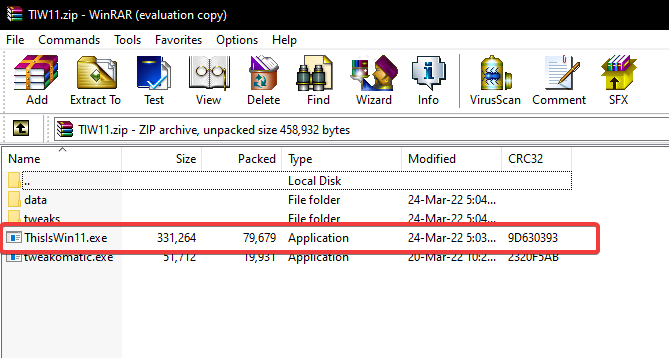
- Open File Explorer, head to the location where you downloaded the file, and run it. When you get a warning, click on the Run anyway option.

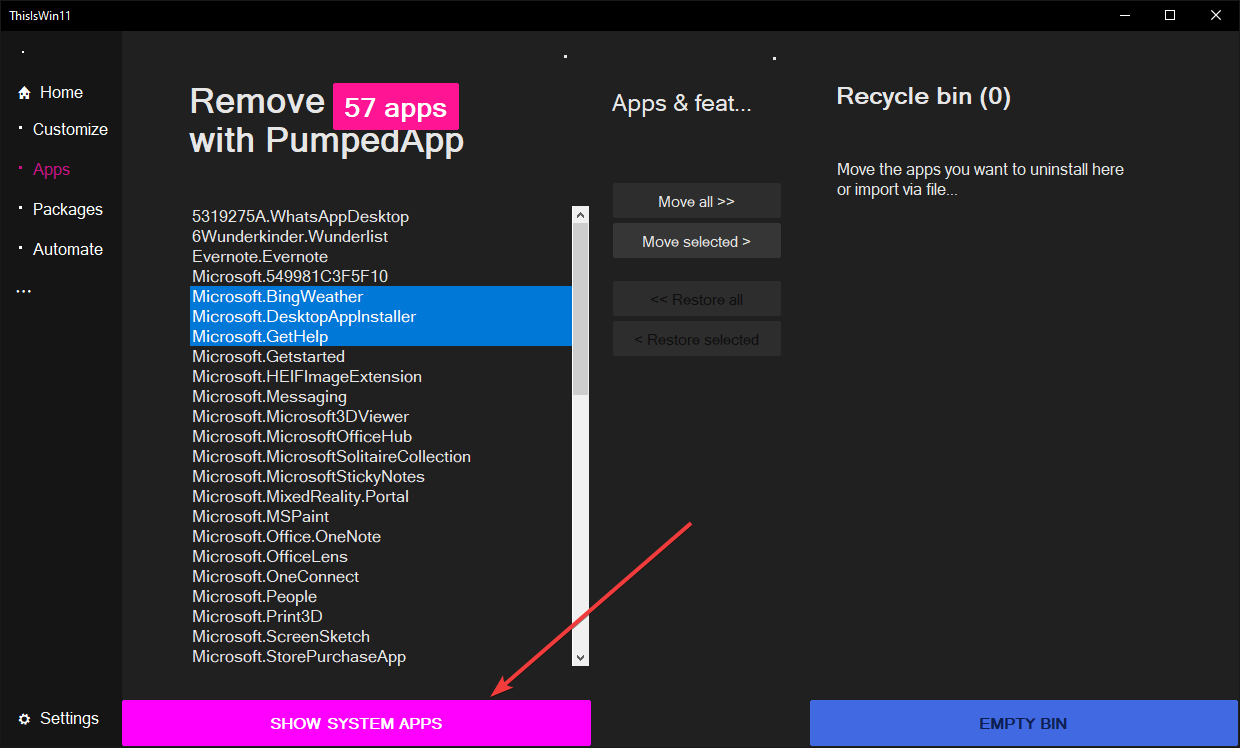
- Click on the Apps option from the left sidebar. It will show you a list of all apps present on your device.
- Press and hold the Ctrl key on your keyboard and select the apps you want to remove.
- Then, click on the Move selected option to move the app to the recycle bin.
- Note- You can also select the Move all option to move all the apps together to the recycle bin.

- Note- You can also select the Move all option to move all the apps together to the recycle bin.
- Click on the Show System apps to see all the system apps.
- Again, press and hold the Ctrl button and select the apps you want to remove.
- Click on the Move selected option coming on the screen
- Click on the Empty Bin option to empty the recycle bin.

3. Debloat Windows 11 Using Windows PowerShell(Admin)
You can also Debloat your Windows 11 by using Windows PowerShell. To do so, follow the given steps below-
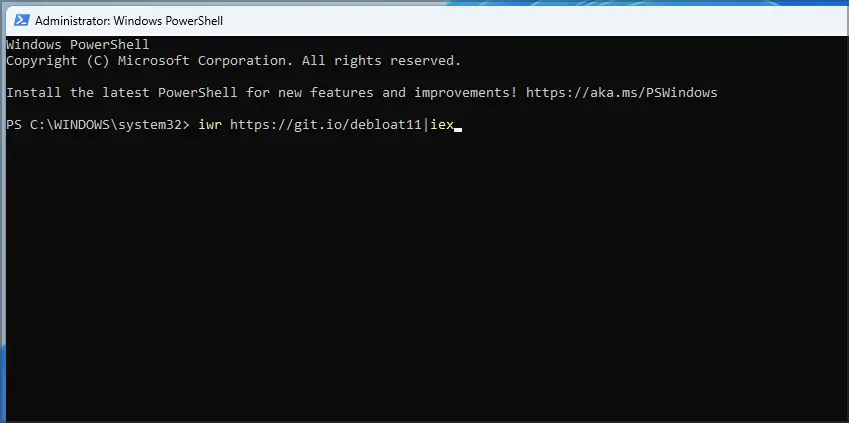
- Press the Windows key on your keyboard, and search for Windows PowerShell. Run the Windows PowerShell with administrative privileges.
- Execute the following command-
- iwr https://git.io/debloat11|iex

- iwr https://git.io/debloat11|iex
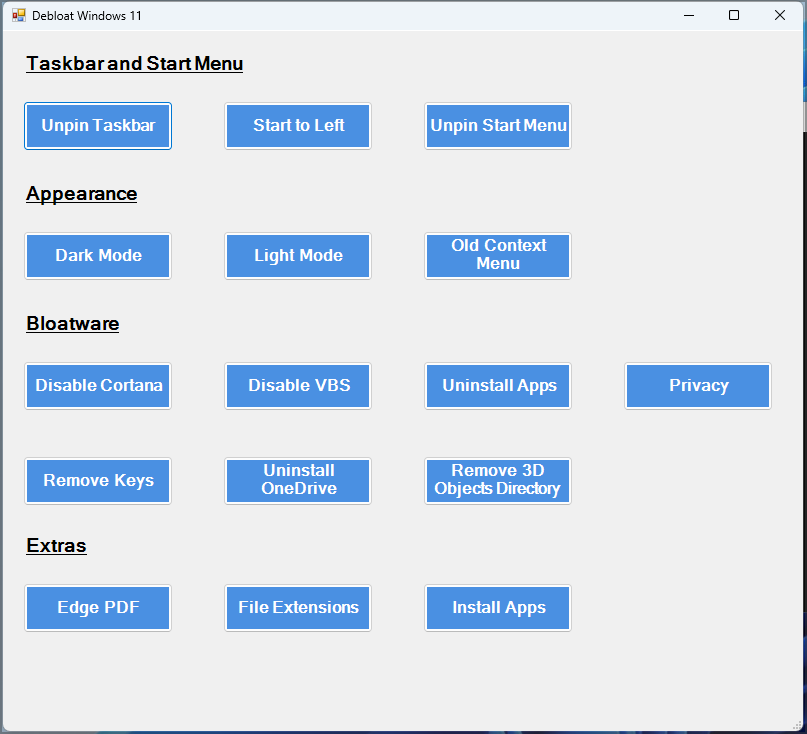
- You will be headed to Debloat Windows 11 screen.
- In the Bloatware section, click on the component you want to remove or disable. Follow the on-screen instructions to continue ahead.

- Restart your PC, and the Windows 11 PC will be Debloated.
4. Use DISM to Debloat Windows 11
You can also use the DISM command to debloat Windows 11. To debloat Windows 11 using DISM, follow the steps given below-
- Open Start Menu, type Windows PowerShell and run it as administrator.
- Now, type and execute the following command-

-
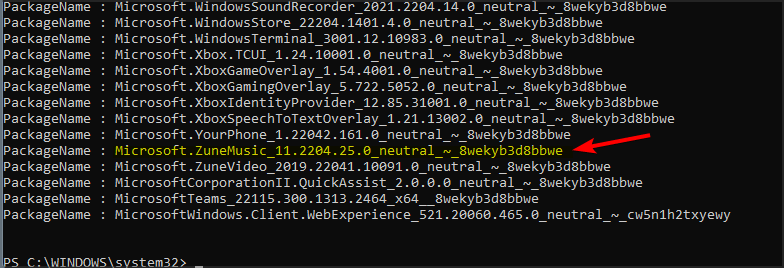
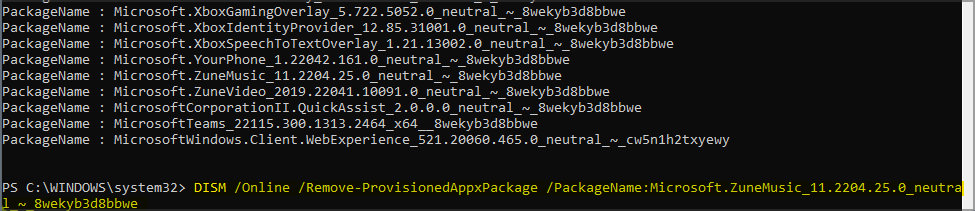
DISM /Online /Get-ProvisionedAppxPackages | select-string Packagename
-
- It will show you all the installed apps on your PC.
- Search for the app you want to remove. Highlight the app and copy it by pressing the Ctrl + C key combo.

- Now, run the following command-

-
DISM /Online /Remove-ProvisionedAppxPackage /PackageName: Name_Of_The_Package - Note- Replace Name_Of_The_Package with the package name you copied.
-
- This will remove the app from your PC. Similarly, you can remove other apps as well.

Conclusion
These were some ways to help debloat Windows 11. You can easily remove all the unnecessary apps present on your device by following the steps in this article and increasing your PC’s speed and performance.


