Organizing storage is an important aspect of any Windows PC. Though you’ll be getting a single or multiple physical drive for storage, you may be splitting it into various parts for easier access. These could be divided and renamed for movies, games, photos, or work; parting them could let you access the specific folder more quickly than browsing through the whole at once.
Parting drives can also make up searching for the desired folder quickly since there would be fewer files stored accordingly. While you realize the importance of disk partitions, you may also want to remove some of them to equip more space for other drives sometimes. And if you’re into it, here’s how to do it;
How to Delete Drive Partition in Windows 10?
While there are many ways to reorganize or delete the parted drives, we explain a simple process using Windows PowerShell. Follow the steps below to learn how to do it;
- Open the Windows PowerShell as Administrator. For this, go to the Windows Search bar and type “PowerShell” in it to see the Windows PowerShell showing up in the results. Set the pointer on it and right-click to open options. Here, click on Run as Administrator.
- This opens the PowerShell window, where you should be typing Get-Volume.
- Now, you’ll be presented with the option to remove a partition of your choice. For this, type as below;

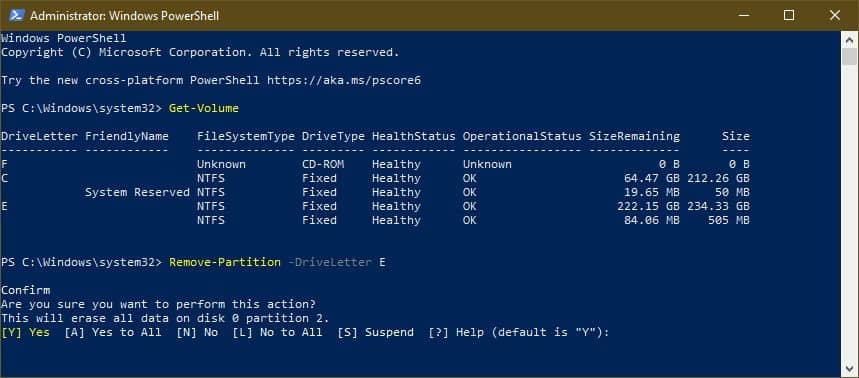
Remove-Partition -DriverLetter x
While typing this, replace the letter x with the drive (partition) you wanted to remove. For example, assuming that you wanted to remove partition E, type as below.
Remove-Partition -DriverLetter x
You’ll then be asked to confirm the action by pressing Y and hitting the Enter key. That’s it; removal of the selected partition will be done.


