You might be familiar with creating a System Restore Point in Windows 11 PC will help us reset the whole operating system to a normal state. However, if we ever encounter any issues with our PC, it hardly takes a few minutes to create a Windows 11 system restore point, but it awards from a big mess later for sure.
Meanwhile, the old file still exists when we create a new restore point for our Windows 11 PC. So, we need to delete it first to ensure that everything is going smoothly while using the new restore point.
But, as we know that Microsoft changes a lot of things in Windows 11, and that’s the reason many users from all around the world find it quite challenging to delete the restore point. Therefore, this is why we are here; in this guide, you will learn how to do so. So, make sure to continue reading this guide till the end.
Also Read- How to Start Windows 11 in Safe Mode
Steps To Delete Restore Point in Windows 11
If you are looking for easy and quick steps that helped you to delete a restore point in Windows 11 PC, then my friend, your search is over now. However, here are the necessary steps that will surely help you.
- First, you can press the Win+I button simultaneously to open the Windows 11 Settings. Alternatively, you can click the Start menu and select the Settings option.

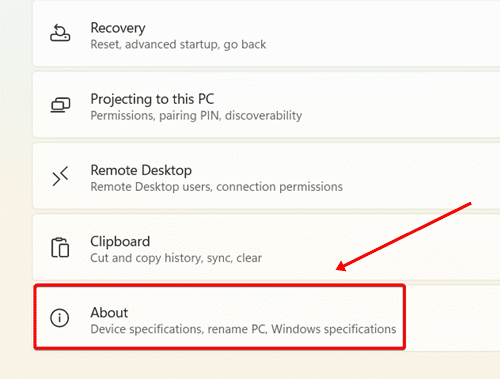
- After that, switch to the System tab and click on the About section.

- Then, under the About section, click on System Protection.

- After that, the System Properties window will open; you need to switch to the System Protection tab.
- Now, select the Local Disk C located under the Protection Settings. Then, hit the Configure button.

- After that, the System Protection for Local Disk (C:) settings pop-ups will open. Therefore, as shown in the picture below, you can slide the slider in front of the Max Usage and hit the Delete button.
")
- That’s it. Now, click on the Continue button on the confirmation dialog box, and you’ll get a message that the restore points were deleted successfully.


")

So, that’s how you can easily delete your restore point on your Windows 11 PC. We hope that this guide has helped you. Furthermore, if you have any doubt regarding this topic, feel free to ask us in the comment section.


