OneDrive is a cloud storage service by Microsoft that allows you to save files securely and sync all files to your device. It provides 5 GB of free storage to keep our data, which is good. But the obsession is the automatic pop-up and sync in the background that took all internet service alone without knowing it.
Want to free yourself from this by default OneDrive automatic pop-up? Then you are not alone. In the beginning, I faced this issue as well. But Windows allows you to disable it. But you don’t know what to do. Here’s the complete guide on how to disable Microsoft OneDrive in Windows 11.
How to Disable Microsoft OneDrive in Windows 11
We have shared several methods, from removing Windows start-up services to uninstalling the app. Considering your problem, you can disable OneDrive in Windows 11 by following these simple tutorials.
1. Disable OneDrive Startup Service
Startup service apps are annoying, not only with OneDrive but also with other apps. You can disable the startup app service to prevent the OneDrive pop-ups.
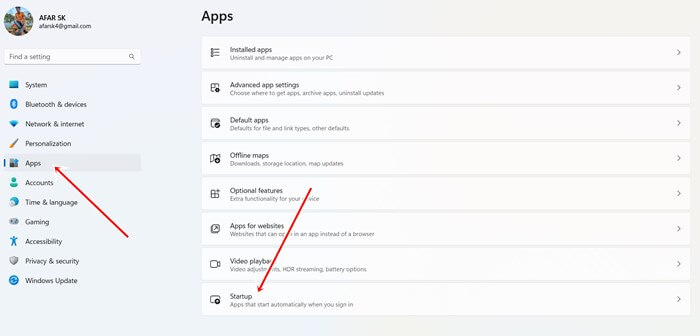
- Press Windows start > Settings > Apps.
- Then Click on the Startup option.
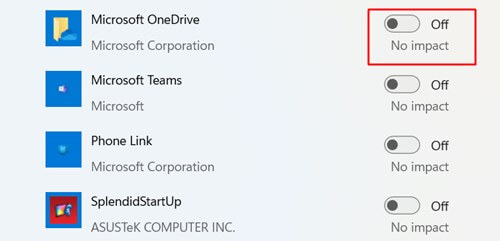
- Find the OneDrive app from the list, turn off the toggle to stop on every boot.
2. Unlink OneDrive from Windows
Unlinking the OneDrive account from Windows could be a simple way to get rid of the app. You can link Windows with the app any time you want. Here’s how you can unlink OneDrive from Windows.
- Click on the OneDrive icon on the taskbar or open the app.
- Then click on the Settings icon and select Settings once again.
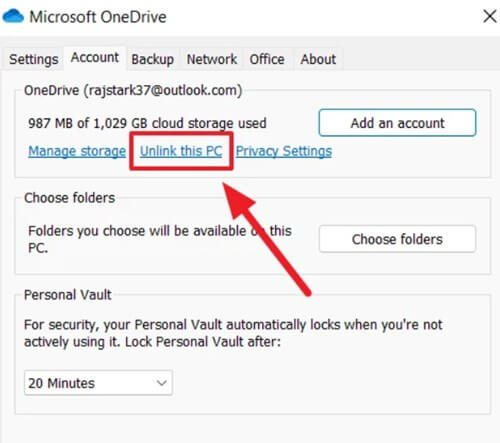
- Now go to the Account tab, and click on Unlink this PC.
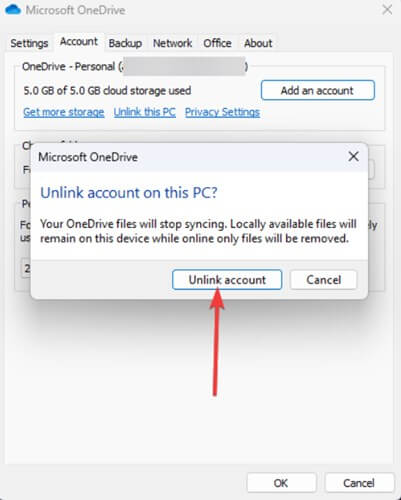
- A dialog box will open for confirmation of unlinking this PC. Click on Unlink this PC.
3. Uninstall OneDrive
Uninstall OneDrive is the ultimate and straightforward to kill the root cause of every problem. Follow these simple steps to uninstall OneDrive from the system.
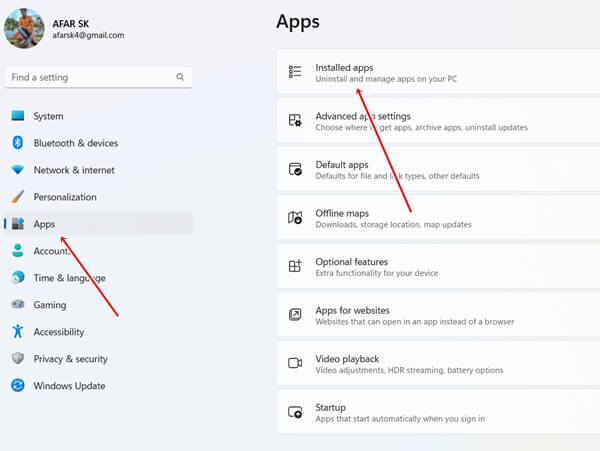
- Press Windows start > Setting > Apps.
- Now click Installed apps.
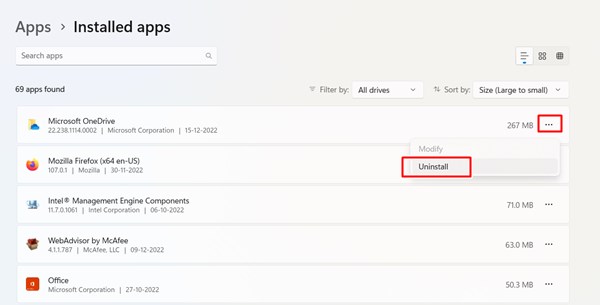
- Find OneDrive from all installed app lists. Tap on the vertical three dots and click on Uninstall.
- For confirmation, click on Uninstall once again. All saved information and data will be removed.
4. Disable OneDrive using Group Registry Editor
Windows allows users to customize everything. Registry Editor is the tool to accomplish any customization of the system. Disabling OneDrive using Registry Editor is also an effective way. Always remember to perform all steps correctly. Otherwise, you may get inappropriate functions on the system.
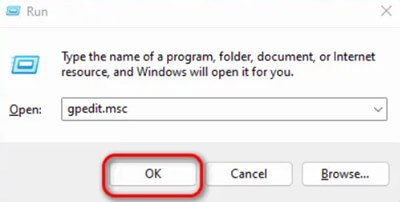
- Press Windows Start and R button altogether to open Run.
- Now type gpedit.msc on the search bar of the Run tool and hit enter.
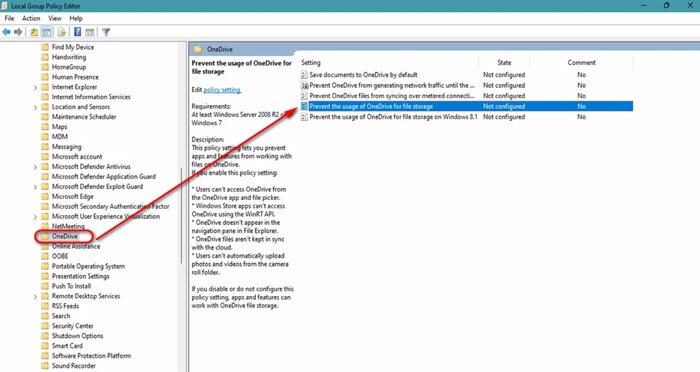
- Here is the navigation path to follow carefully:
Computer Configuration> Administrative Templates> Windows Components> OneDrive
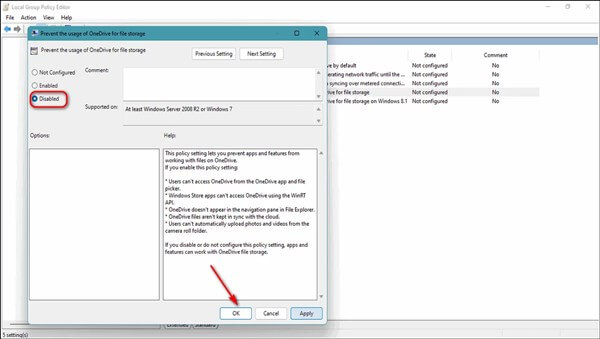
- Now double-click on Prevent the usage of OneDrive for File Storage.
- A dialog box will open next to you. Select Disabled and click on the Ok button.
5. Disable OneDrive using PowerShell
Since PowerShell is used for task automation and configuration management, you can easily disable OneDrive using PowerShell.
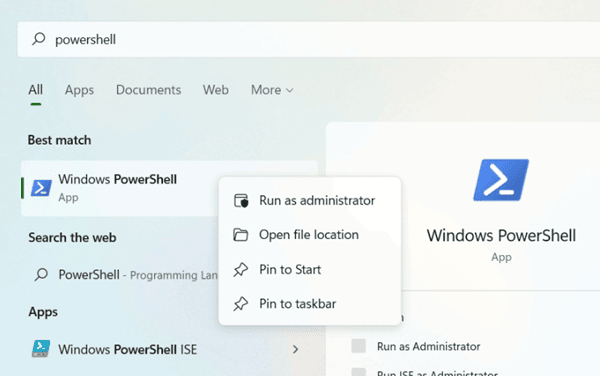
- Click on the Windows start button and search for PowerShell, and Run as administrative the PowerShell app.
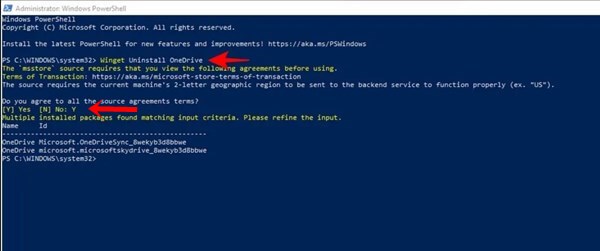
- Then type Winget Uninstall OneDrive and hit the enter button.
- Now PowerShell will come to ask for confirmation on disabling OneDrive. Type Y for confirmation and agreeing on all terms and conditions. Now close the PowerShell, and your changes will start performing.
6. Disable OneDrive through Registry Editor
Performing Registry Editor to disable OneDrive is one of the genuine methods that you can follow.
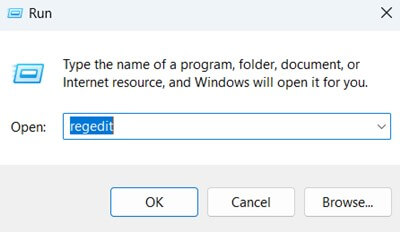
- Press the Windows Start button and R button all together at the same time. Run tools will open in front of you.
- Now type Regedit, and hit enter.
- Here is the navigation path to follow:
Computer>HKEY_LOCAL_MACHINE>SOFTWARE>Policies>Microsoft>Windows>OneDrive
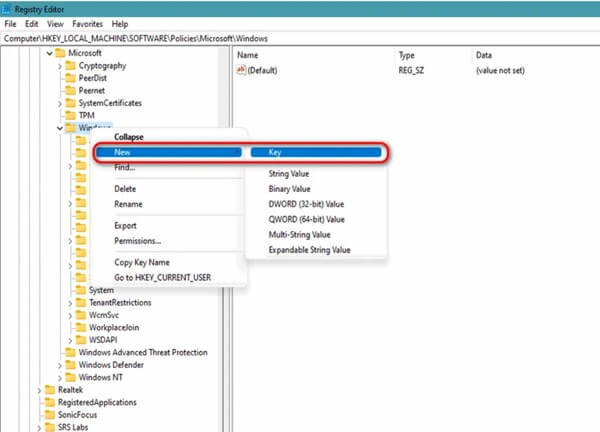
- Now create a OneDrive folder if you can’t find any. Follow this to create a folder.
- Right-click on Windows > New > Key > rename the key as OneDrive.
- Right-click on Windows > New > Key > rename the key as OneDrive.
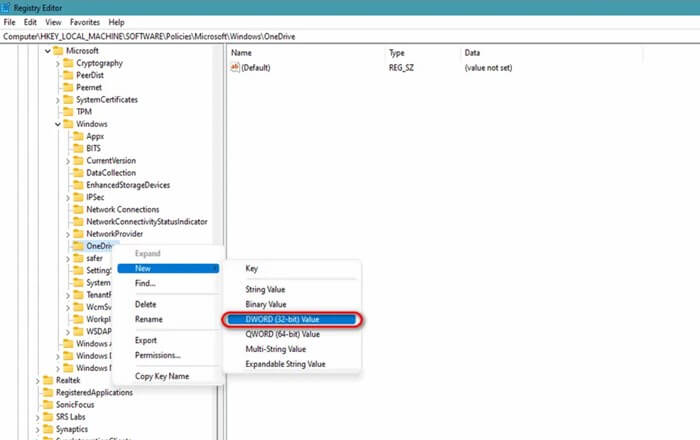
- Now right-click the OneDrive folder which you have created now. Then click on New and select DWORD (32-bit value).
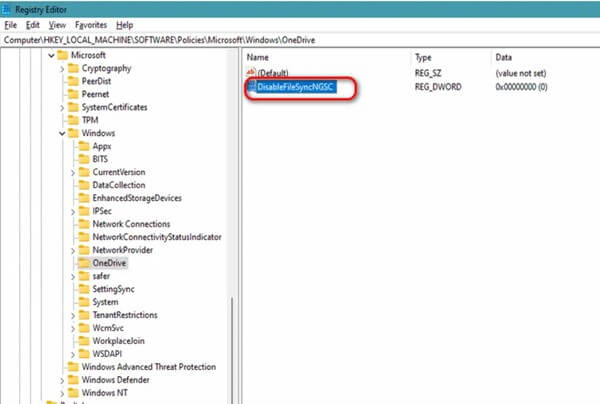
- Therefore, use this DisableFileSyncNGSC to rename the DWORD value under OneDrive folder.
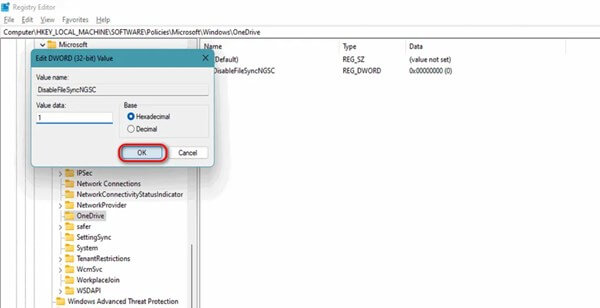
- Now double-click upon it to change its value. Type 1 in the value data field.
Now you are good to go without OneDrive in Windows 11.
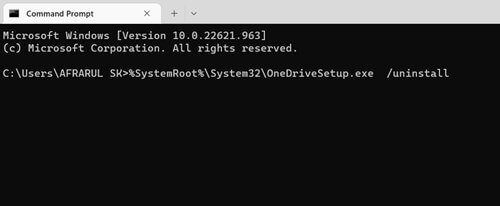
7. Force Stop and Uninstall OneDrive through Command Prompt
Regardless of the simplicity of Command Prompt, you can perform every function. Let’s see what to do with Command Prompt.
- Open Run just like before, and type CMD on the search bar and enter.
- As usual, you need to type the command. Here are two commands for two different systems. The first command is used to force-stop the app. And next, one can uninstall the app from the system.
- For 32-Bit System:
taskkill /f /im OneDrive.exe
%SystemRoot%\System32\OneDriveSetup.exe /uninstall
- For 64-Bit System
taskkill /f /im OneDrive.exe
%SystemRoot%\System64\OneDriveSetup.exe /uninstall
- For 32-Bit System:
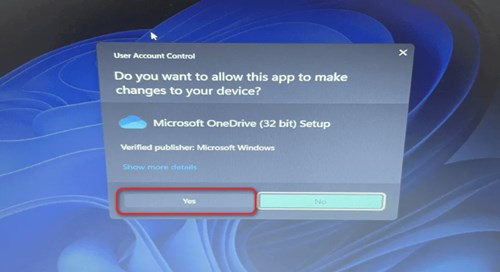
- Copy this command and paste it on CMD, then hit enter. When you close the app, confirm the changes.
Final Words
Wrapped up – that’s everything you need to know about how to disable Microsoft OneDrive in Windows 11. If you feel disturbed by OneDrive, you can unlink and disable the startup, which is very practical. Don’t forget to share your issues with the comment regarding the tutorial.

