Microsoft Defender SmartScreen guards the security of your Windows 11 system against potential threats and malware. It does this by analyzing the content on the internet and downloading files on your computer. When you open a potentially dangerous or unreliable downloaded file, it will display an alert.
This ensures that your system is secure if Microsoft Defender SmartScreen is enabled. But sometimes, it’s annoying for users, so we came up with the best ways on how to deactivate Microsoft Defender SmartScreen!
This article will find out the easiest methods to disable Microsoft Defender SmartScreen in Windows 11. Then, look at the options provided below to turn off this feature easily!
Also Read- Best Portable Antivirus Software For Windows
What is Windows Defender SmartScreen?
SmartScreen Filter is a cloud-based security feature that is anti-malware and anti-phishing. It’s part of Windows Security designed to automatically conduct a security check on websites you visit by using a cloud-based, dynamic list of known phishing and malware-related websites.
In addition, it performs an assessment of the reputation of all downloads you download on your system by looking at digital signatures associated with these Files or Apps that you want to download onto your computer.
Best Ways to Disable SmartScreen in Windows 11
1. Using Windows Security
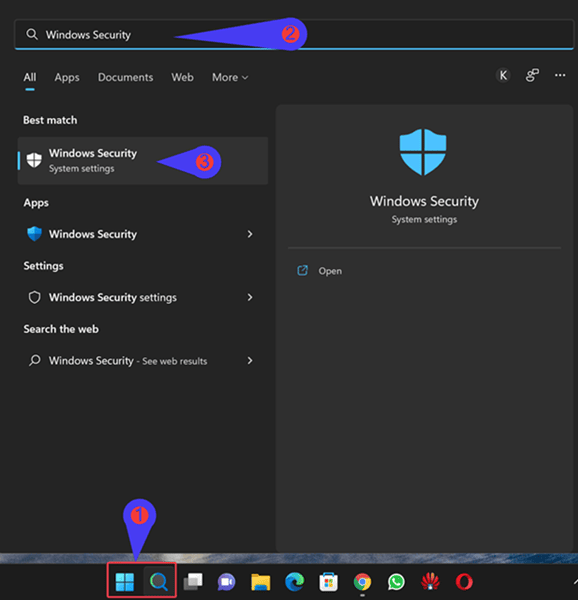
- Click on the start menu button and search for Windows Security.

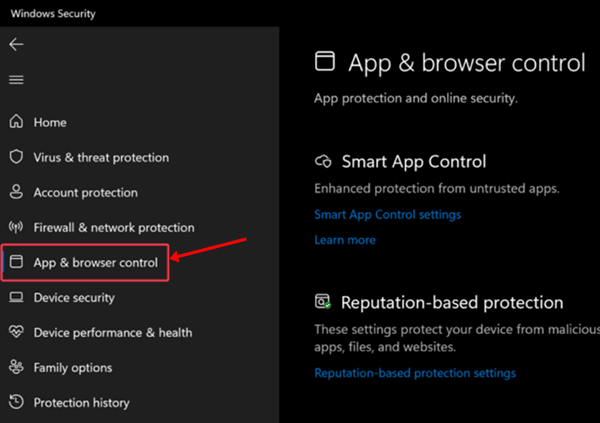
- After opening the Windows Security page locate App & browser Control in the left pane. Click on it.

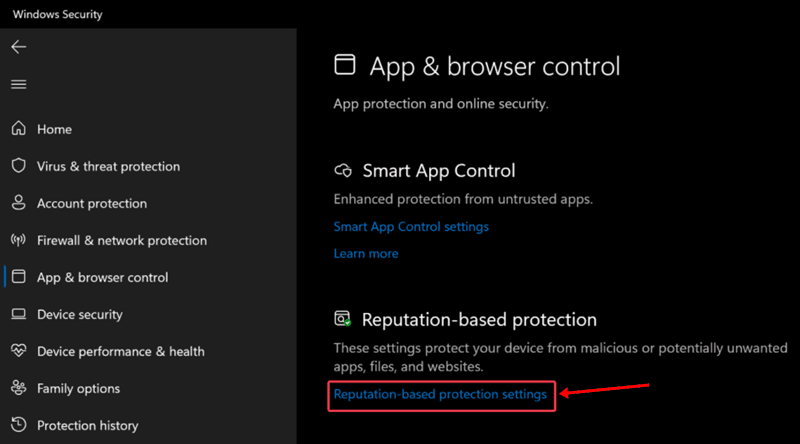
- Now Click on the Reputation-based protection settings link. It will expand some of the options.

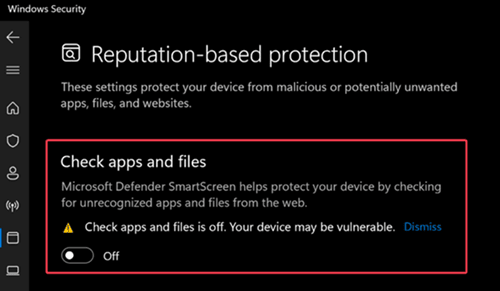
- You can see various options where you can disable SmartScreen for various services such as Check apps and files, Microsoft edge, etc.
- Just toggle to OFF beside Check apps and files. that’s it now you successfully disable Disable Windows Defender SmartScreen on your windows system.

2. Using Local Group Policy Editor
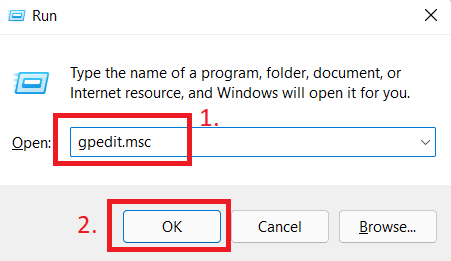
- Press Windows + R button to open run dialog box and type gpedit.msc and hit enter button.

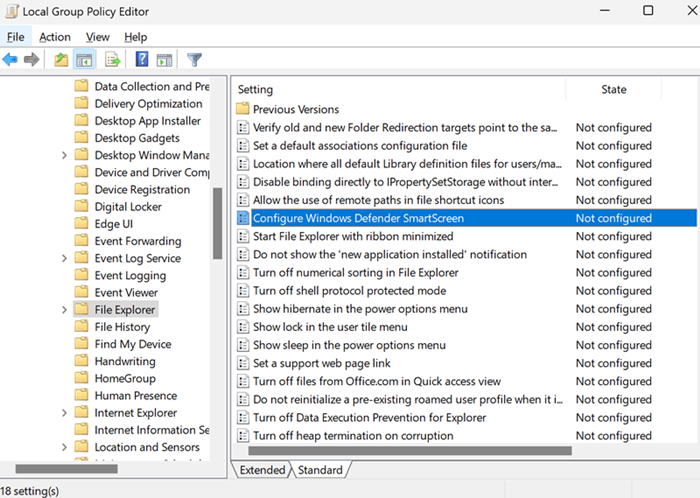
- It will open the Local Group Policy Editor window now you need to locate the following path:
Computer Configuration > Administrative templates > Windows Components > File Explorer
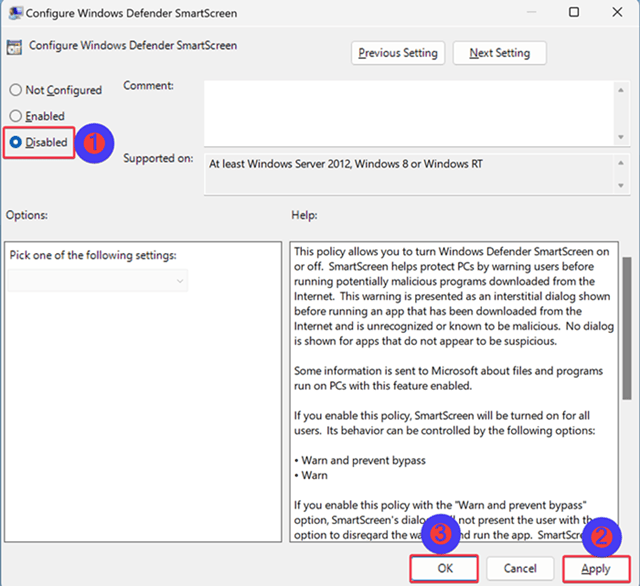
- On the right side locate and double click on Configure Windows Defender SmartScreen. It will open the SmartScreen settings.

- Now click on Disable button and hit Apply > Ok.

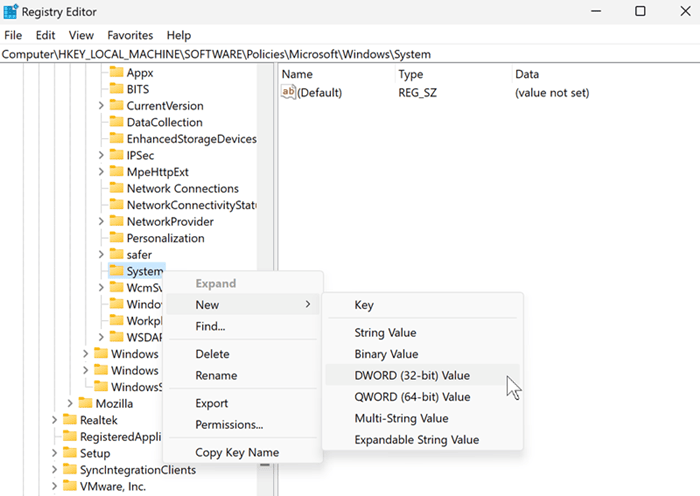
3. Using Registry Editor
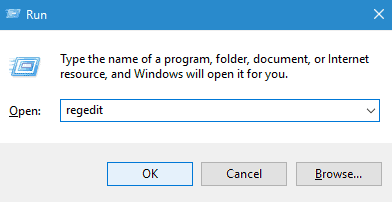
- Press Windows + R key to open run dialog box and type regedit and hit enter.

- When it will open just copy the below path and paste into the address bar of registry editor or locate it manually.
HKEY_LOCAL_MACHINE\SOFTWARE\Policies\Microsoft\Windows\System
- After that right-click on the System folder and create New > DWORD (32-bit) Value from the context menu.

- Name this newly created DWORD Value as EnableSmartScreen and set its “Value data” to 0.

- Click on the ok button to save the registry.

That’s it! There are a few ways to disable the SmartScreen filter in Windows 11 and Microsoft Edge. Be aware that if SmartScreen messages aren’t bothering you, and you’d like to enjoy all the security advantages of Windows 11, keep it in place. If your children, parents, grandparents are using Windows 11, keep it on your desktop and within Microsoft Edge.
If you know the risks involved and are aware of the risks, not show SmartScreen when installing software that you’re sure is secure. Particularly open-source software and other software. If you believe you’ll need it, you can open it again at any time.


