Have you recently uninstalled the AMD graphics driver and encountered issues while reinstalling it? This may happen due to unsuccessful uninstallation. Most of the time, uninstalling drivers from your Windows may leave some files on your computer that can cause problems.
To deal with this problem, AMD Cleanup Utility software helps users remove all the previously installed graphic and audio driver files. This AMD cleaner also removes registry entries and files that improve your new driver performance.
If you are experiencing similar issues, try using the AMD Cleanup Utility software for Windows 11/10, as mentioned in this article. You can download it by going to their official website or clicking on the provided link, which will redirect you to their official download page.
Features Of AMD Cleanup Utility
- It helps users clean all unwanted files from the computer with one click.
- Clean and easy-to-use interface that anyone can navigate.
- Users can select the specific items they want to remove.
- It ensures that the removed files are only associated with graphics and audio drivers during the cleanup process.
- It also updates automatically whenever an update is available.
- As it is official software from AMD, users need not worry about the security of their computers.
- It removes all previous installation files that provide a smooth experience with the latest AMD drivers.
- AMD Cleanup also provides 24/7 free support to its users.
Download and Install AMD Cleanup Utility for Windows 11/10
If you have never used the AMD Cleanup utility before, follow the steps below, where we guide you on downloading and installing the AMD Cleanup software.
1. Downloading AMD Cleanup Utility
Click on the link below to download cleanup software for Windows 10/11. You can also use it in Windows 7 and above. To learn the cleaning process, continue reading the steps.
- Software Link – AMD Cleanup Utility
2. Create a Restore Point
Before starting the cleanup process, you must create a restore point on your computer. This is necessary because the restore point will help you return to the current state if an error occurs on your computer.
Also, back up your important data, which is optional. Although the cleanup process does not delete files not associated with AMD drivers, creating a backup will keep you safer.
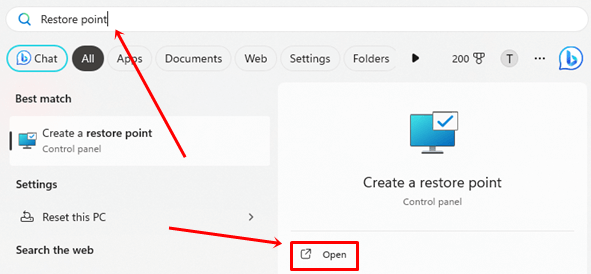
- Press the Windows key, type Restore Point in the search bar, and click Open.

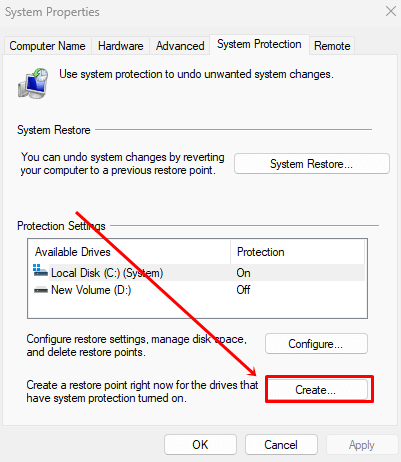
- Click on the Create button.

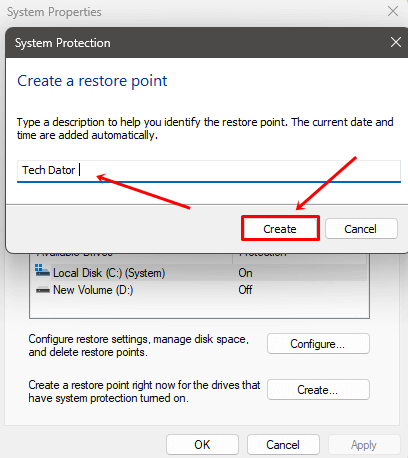
- Type your preferred name, then click on the Create button again.

3. Using the AMD Cleanup Utility Tool
It is recommended to use AMD Cleanup software in Windows Safe Mode, you can run safe mode through this software by just following the below steps properly.
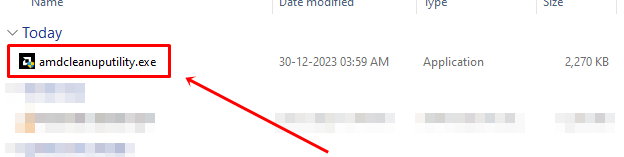
- Go to the Download folder and double-click on the AMD Cleanup Software.

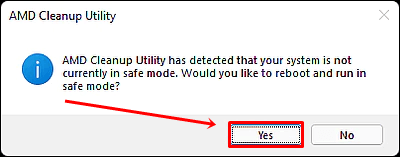
- It will ask you to run your computer in Safe Mode. Click on the Yes button to restart your computer and run in Safe Mode.

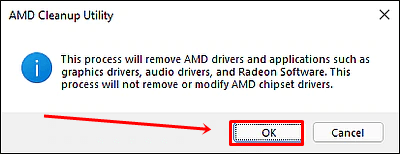
- Now click on the OK button to start the process.

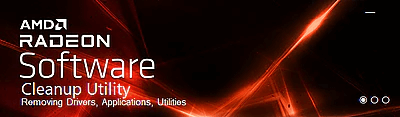
- Wait until the cleanup process is done. The process will run in the background, but you will see only this banner on the screen.

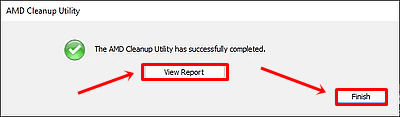
- When the process is complete, it will prompt you to view the report or simply click on the Finish button.
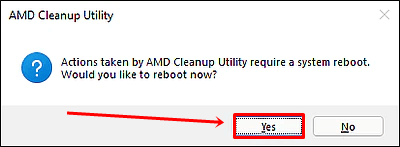
- Click on the Yes button to reboot your computer.

Troubleshooting Tips – If AMD Cleanup Utility Fails to Remove Drivers
The chances of encountering problems while running the AMD Cleanup Utility are very low. However, if AMD Cleanup Utility fails to remove drivers from your computer, we have provided some tips that you can follow.
- AMD Cleanup may stop running if Windows Update is running in the background. To resolve this, either stop the Windows Update process or let it complete before running the AMD cleanup tool.
- If you feel like the AMD cleanup tool is stuck, don’t worry. Due to the large number of files, the cleaning process may take more than 15-20 minutes, so be patient and wait for it to complete.
- If you encounter any errors after using the AMD cleanup software, simply use the Windows System Restore Point, which we have already mentioned in the above method.
Conclusion
That’s all for this article; I hope you found this guide informative and useful. After the AMD Cleanup Utility process is completed, you can install the latest AMD graphics drivers and enjoy a smooth experience.
If you have any questions about this article, you can discuss them with us on our social media handles or in the comments section.


")