Microsoft has continued adding new features to Windows 11 and it seems like there’s no end, at least at this moment. Talking about new features, Windows 11 has added the functionality to add stickers on the desktops as the feature has arrived on Windows Insiders program carrying build number 22H2.
Microsoft is now paying just as much attention to the ways you can customize Windows as it is to the ways it works. Personalizing your computer makes your Windows OS experience better as a whole. Now, in Windows 11, you can put stickers on the background of your desktop.
To be exact, this feature is only available in Windows 11 version 22H2, so it is not yet available on the stable channel. So, if you want to try out these new stickers right now, you must be subscribed to the Insider Dev channel or the Beta channel.
Since the feature is still being tested, you have to turn it on before you can use these stickers. Today, we’ll show you how to turn on desktop stickers and add them to a Windows 11 computer.
Also Read- Fix Windows Defender Service Not Starting on Windows 11
How To Enable and Add Stickers on Windows 11
Thinking about adding the stickers on your desktop? Well, let’s look at exactly how you can do it. The instructions are bifurcated into two parts, so do follow the same in the correct order.
Part 1: Enable Stickers
The first part enables stickers using the Registry Editor on Windows 11. Registry Editor is a graphical interface where users can change, delete, add, and alter the registries on Windows OS with ease.
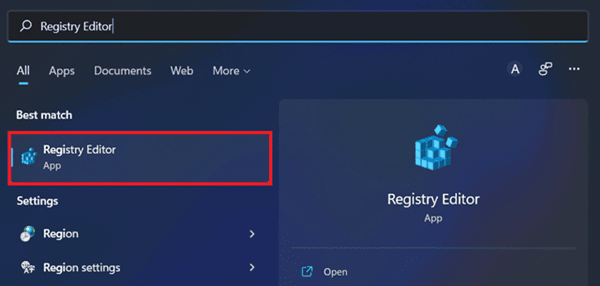
- First up, press Windows + S on the keyboard and search for “Registry Editor.” Launch it by tapping on “Run as administrator.”

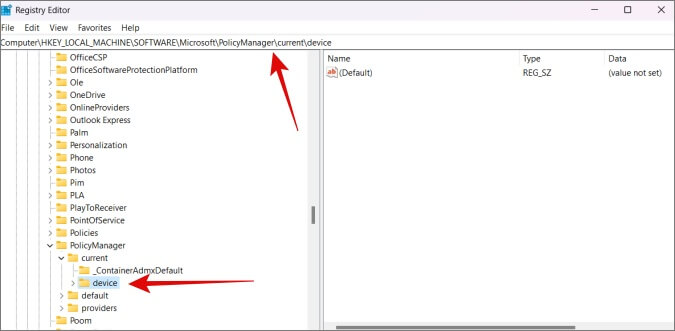
- Next, copy the path mentioned below and paste it onto the search bar, and hit enter –
HKEY_LOCAL_MACHINE\SOFTWARE\Microsoft\PolicyManager\current\device

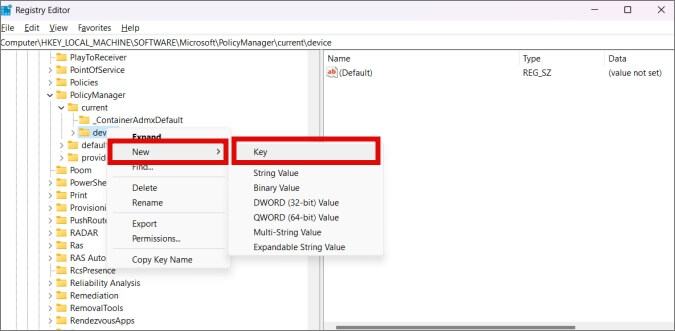
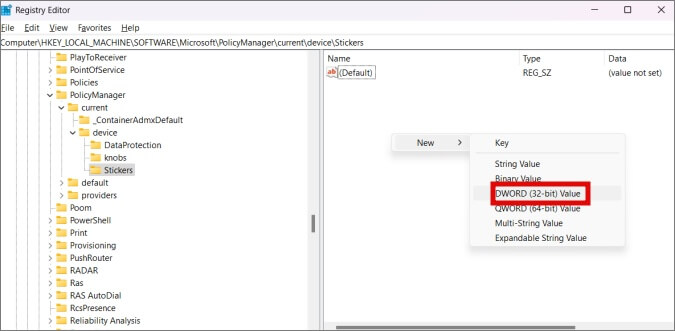
- You will see two sections of screens divided vertically in the middle. The left side consists of folders and the right side shows content. You need to right-click on “Device” to open a dropdown menu and select “New >> Key.”
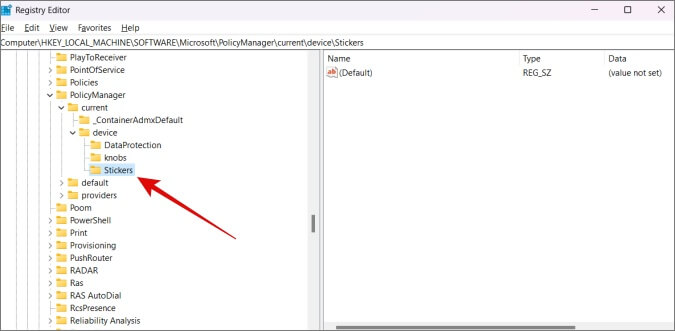
- You need to rename the key as “Stickers” and double-tap on it to open it on the right side of the screen. It will show a value called “(Default)”.
- Hover on the empty side of the right side of the screen, hit the right-click button on your mouse, and select “New >> DWORD (32-bit) Value”.
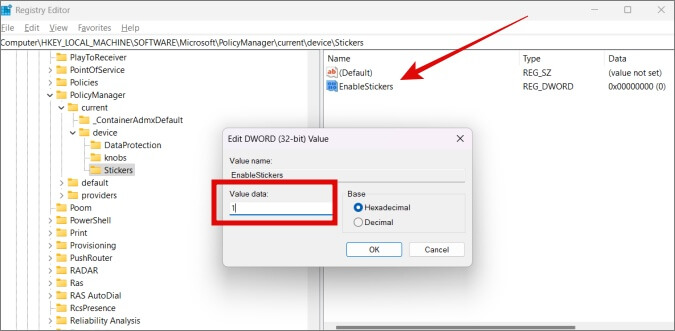
- You need to rename the value as “EnableStickers” and double-click on it to open a dialog box.
- Next up, enter the value as “1”, select the base as “Hexadecimal,” and hit “OK” this concludes this part.
Part 2: How To Add Stickers to Windows 11
This is part 2 of this particular technique on how to enable and add stickers. Let’s see how it goes.
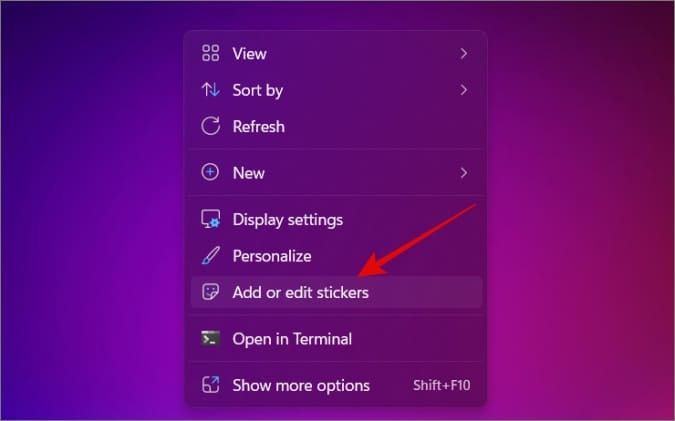
- Press Windows + M on your keyboard to take you to the desktop minimizing all the windows open.
- Right-click on any empty desktop section and select “Add or edit stickers” from the drop-down menu.

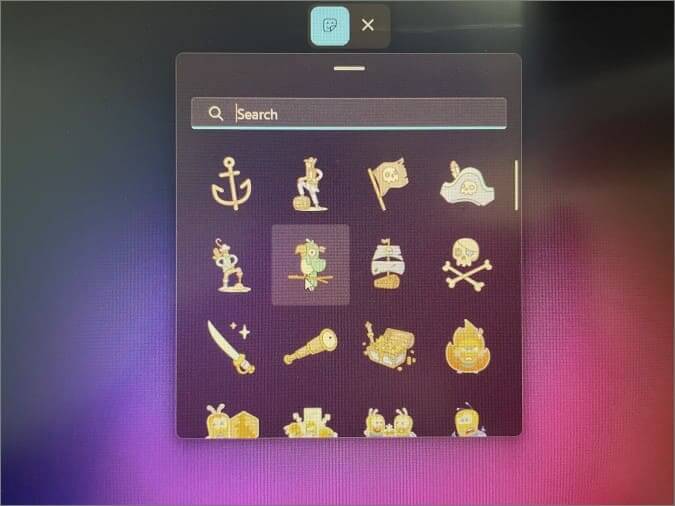
- You will see a menu of stickers that you can add. You can search for new ones using the “Search” bar. Double-tap on any sticker of your show and add it to the desktop right away.

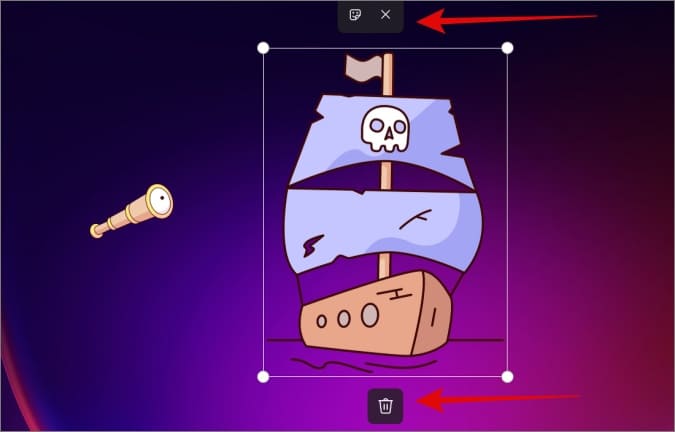
- It is much easier to resize the sticker according to what you need. You can move it around with ease, although you need to keep the stickers panel enabled as you won’t be able to do anything without it.

- You can delete the said sticker in question and edit or remove it as per the available buttons.
- Additionally, you can also add stickers by digging into “Settings >> Personalization >> Background >> Add Stickers”.
Wrapping Up
You can edit, remove and delete any stickers from the desktops. And with that, you have successfully added stickers on your desktop that will stay put unless you delete them manually. Microsoft hasn’t added the functionality to add your stickers yet, so let’s keep that on the side of the burners.


