When the Epson printer goes offline, it won’t print anything. The Epson printer must be online to print. There can be various reasons why Epson Printer can be offline, such as connectivity issues between the Epson Printer and PC, hardware/software issues, printer not set as default, outdated driver, spooler service-disabled, etc.
If you have been facing this issue due to which your printer isn’t printing, this article will help you solve it. Here are some troubleshooting steps to help fix Epson Printer going offline on windows and mac computers.
Fix Epson Printer Going Offline
As we discussed above, there can be multiple reasons for facing this issue. If you want to fix this issue and get your printer back online, then follow the steps given below-
1. Uncheck Use Printer Offline (On Windows)
Firstly, you should uncheck the ‘Use Printer Offline’ option if your Epson printer keeps going offline. Given below are the steps to do so-
- Ensure your printer is turned on and connected to your PC. Ensure your printer has network connectivity.
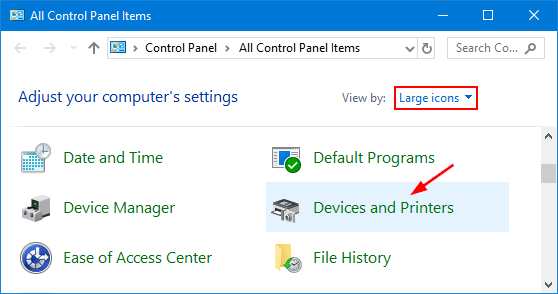
- On your PC, open Start Menu, search for and open Control Panel.
- Here, search for Devices and Printers and click on the first option.

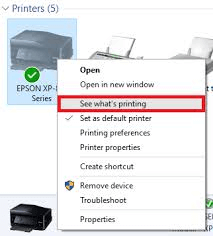
- Right-click on your Epson printer from the list of printers and click on See what’s printing.

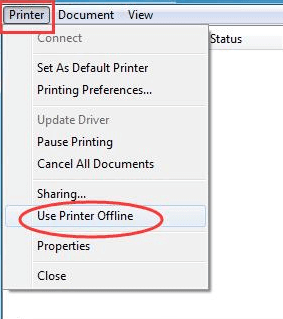
- Next, click on Printer and uncheck the Use Printer Offline option.

2. Set Epson Printer to Default (On Windows)
Another thing that you must do is set the Epson Printer to default. You will likely face this issue if your printer is not set to default. To set the Epson printer to default, follow the steps given below-
- Open Control Panel on your PC.
- Here, click on Devices and Printers.
- Right-click on your Epson printer and check the Set as default printer option.


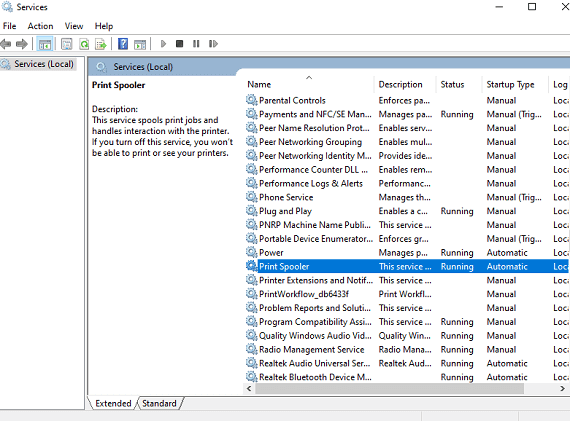
3. Ensure Print Spooler Service is Running (On Windows)
Print Spooler handles the printing queue on your PC. If the service is not running, then that might cause the issue. To check whether the Print Spooler service is running or not, follow the steps given below-
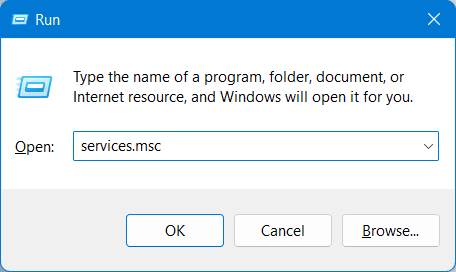
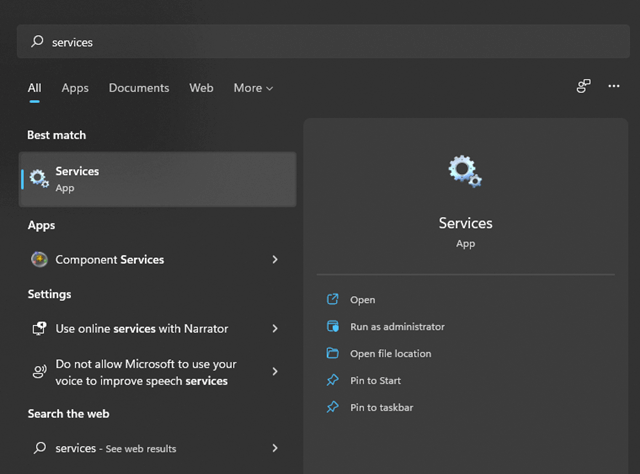
- Press Windows + R key combo, type Services.msc, and press Enter to open the Services app window.

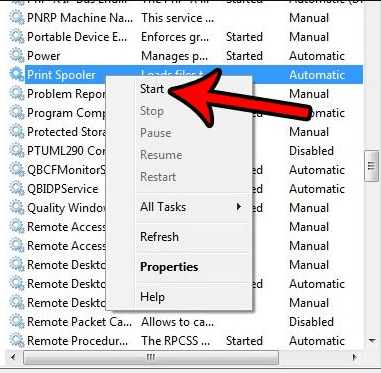
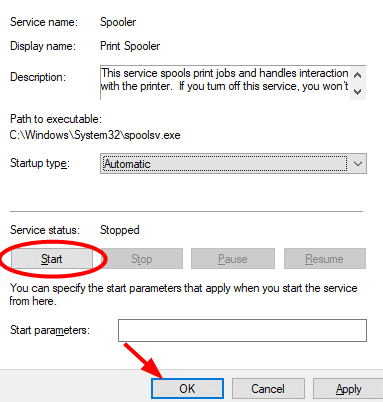
- Search for Print Spooler service here. Check the status of this service, and ensure it is set to Running.

- If the status of the service is not set to running, right-click on the service, and click on Start. This will start the service.

4. Clear Printing Queue (On Windows)
Another thing that you must do is clear the printing queue. To do so, follow the steps given below-
- Press the Windows key on your keyboard, search for Services and open it.

- In the Services, search for Print Spooler. Right-click on it and then click on Stop.

- Now, press the Windows + E key combo to open File Explorer.
- In the address bar, copy and paste the address given below and press Enter.
- %windir%\System32\spool\PRINTERS
- Select all the files and folders in the Printer folder and delete them.
- In the Services window, right-click on Print Spooler service again and click on Start.


5. Reinstall Printer (On Windows)
If you are still facing this issue, then try reinstalling the printer. The issue may be due to corrupted Printer drivers; reinstalling the printer should fix this issue. Given below are the steps to do so-
- Open Control Panel on your PC, and click Add or remove programs.
- Click on your Epson printer software, and then click on Uninstall. Confirm uninstalling the software.
- Now, in the Control Panel, head to Devices and Printers. Right-click on your Epson printer, click on Remove Device and follow the on-screen instructions to remove the device.
- After doing so, click on Add Printer option.
- Now, click the Add a network, wireless or Bluetooth printer option.
- Now, follow the instructions to add your printer to your PC.
6. Reset the Printing System (On Mac)
If you are using Mac to connect to your printer, try resetting the printing system. To reset the printing system, follow the steps given below-
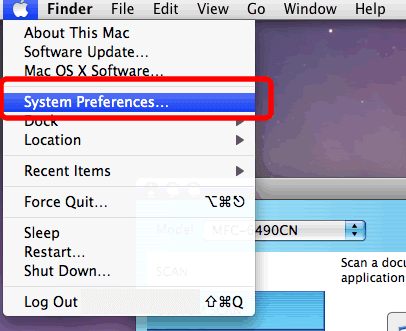
- Click on the Apple logo at the top right corner, and then click on System Preferences.

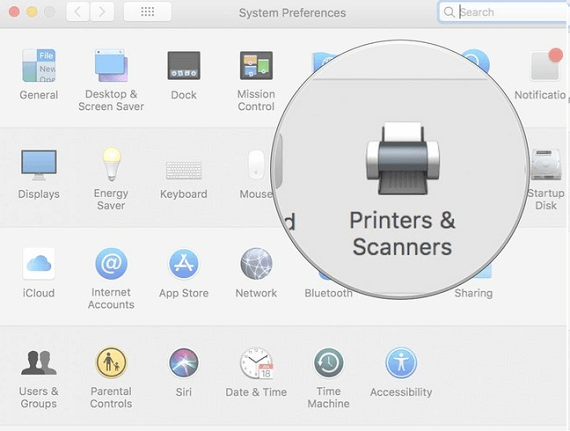
- Here, click on the Printers & Scanners option.

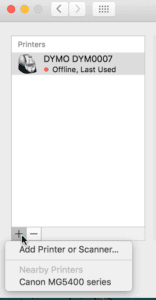
- Right-click on your Epson Printer on the next screen and then click on Reset Printing System.

- You will be asked to enter your username and password. Once done, click on OK.
- Wait till the printer list appears. Select your Epson printer and click on the + icon.

- This will add the printer, and you can print now.

7. Remove Other Printers On Mac
Other printers connected to your PC can also cause this issue. Try removing other printers from your Mac and see if you still face the issue. To do so, follow the steps given below-
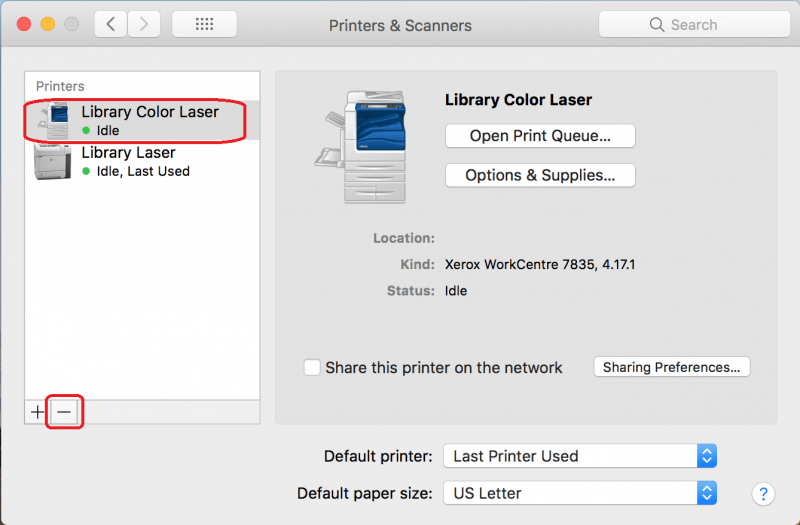
- Click on the Apple Menu and then on System Preferences.
- Now, click on the Printers & Scanners option.
- Select a printer other than the Epson printer from the list and click on the – icon to delete it.

- Do this for all the printers on your Mac except for the Epson printer.
- Click on the drop-down menu next to Default Printer and select your Epson Printer.
Bottom Line
This is how you can fix Epson Printer going offline. This issue can be encountered due to issues with drivers or connectivity issues. The above steps will help you solve the issue you have been facing.


