I was a little surprised when the lock screen timeout on my Windows 11 system didn’t execute as configured for the first time. I thought it could be a minor bug and it would be fixed automatically without taking any action from my end.
But when the lock screen timeout not working on Windows 11 as usual several times, I realized it couldn’t be a minor bug. It’s occurring because of system misconfiguration, and outdated driver. Therefore, diving deep into it, I’ve come up with some fixes that surely help to perform lock screen timeout.
How Do I Fix Lock Screen Timeout Not Working on Windows 11
Lock screen timeout is an essential feature to lock the system when inactive after an allotted time to maintain security and save power. If the feature doesn’t work efficiently, it’s obvious look into it. To fix that, we discovered some workaround to follow.
1. Turn on Screen Saver on Group Policy Editor
First, ensure that the screen saver is enabled to perform lock screen timeout accordingly Following these steps, you can turn on the screen saver and execute when needed.
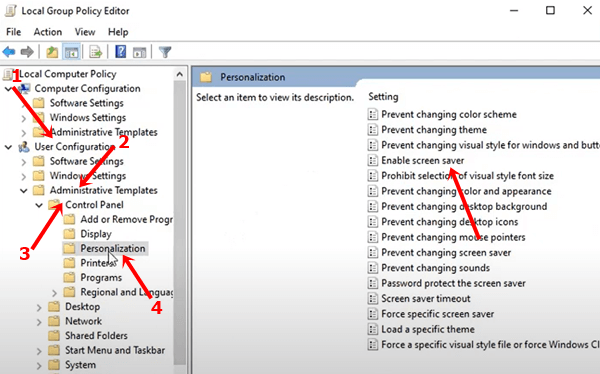
- Open Run, type gpedit.msc on it, and hit enter to open Group Policy editor.

- Then open the folder according to this path.
User Configuration > Administrative Templates > Control Panel > Personalization
- Then, double-click on Enable screen saver.

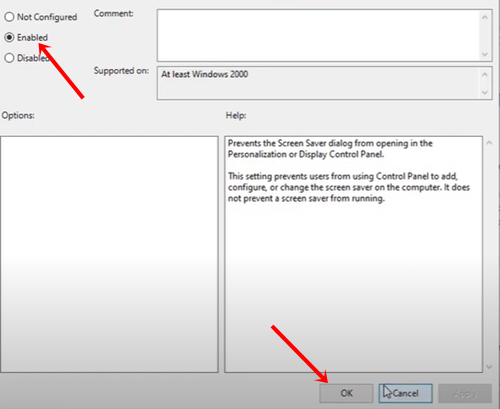
- Screen saver enabling windows will appear. Now select the box of Enabled and click on OK.


2. Set Lock Screen Timeout using System Settings
If you haven’t set the lock screen timeout, then before any other troubleshooting method you should set the lock screen timeout. Here’s what you need to follow.
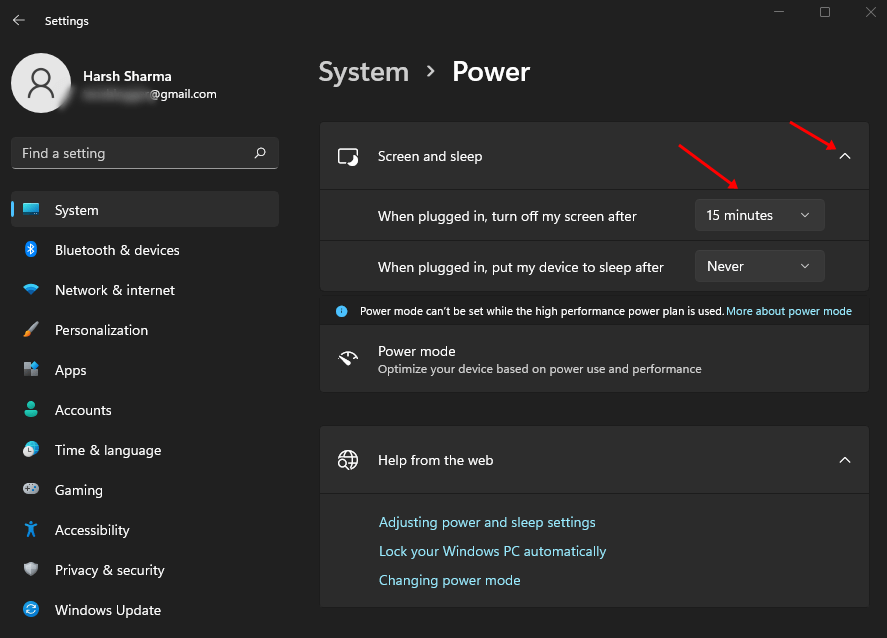
- Click on the Windows start icon > All apps > Settings.
- Then select System > Power and Battery.

- Next, click on Screen and Sleep to get its all options.
- Now select the module to set the lock screen timeout accordingly.

- When all modules are set to perform, close Settings, and wait patiently to perform screen timeout accordingly.

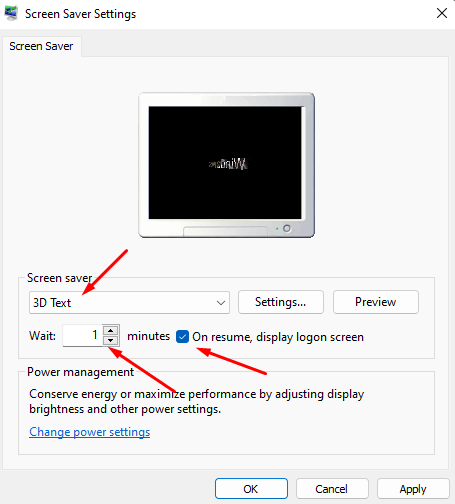
3. Enable Display Logon Screen
Have you enabled the display logon screen on the screen saver setting? If not, then the possibility is high that you could face the Windows 11 screen timeout not working error. Let’s follow this:
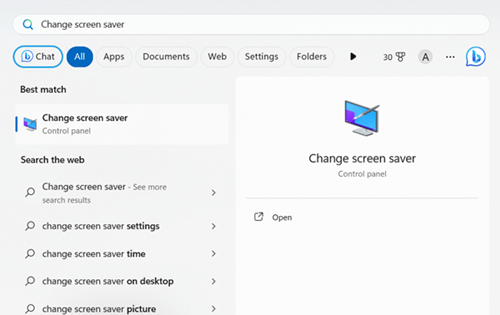
- Press the Windows key > type Change screen saver on the search bar > click on Open.

- Now tick the box of On Resume, display logon screen. Here you can play with different types of screen savers and time.

- Once everything is set; click on Apply and hit OK.
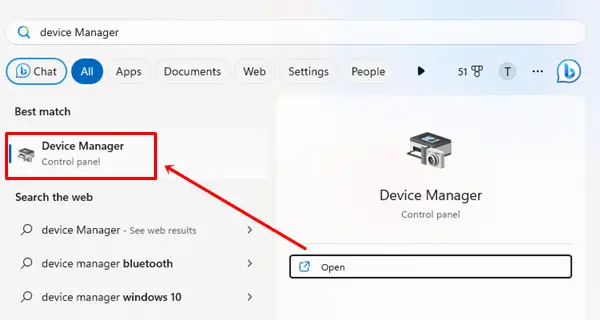
4. Get the Latest Graphics Driver
The graphics driver determines what to display on your Windows interface. Outdated and corrupt graphics drivers can lead to various problems including lock screen timeout not functioning. This is why you need a working and updated graphics driver.
- Launch the search console by clicking the Windows start icon.
- Next, type Device Manager and open it.

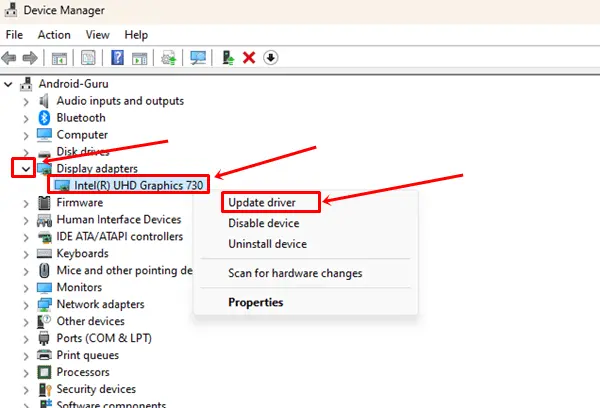
- Click on the arrow of Display Adapter to expand its option. Then, right-click on the Graphics, and select Update driver.

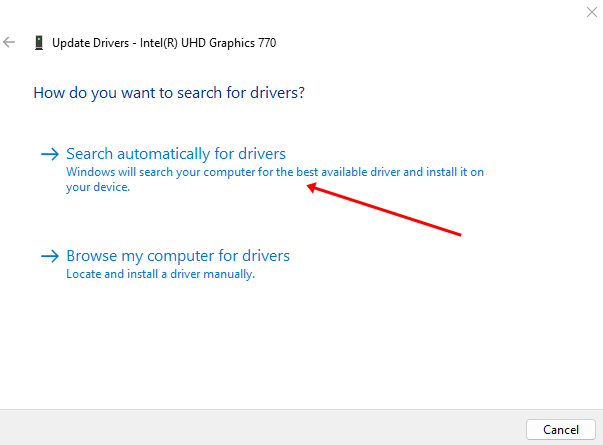
- Now click on Search automatically for drivers.

5. Restart the System with the Clean Boot
We never know which third-party apps or services are causing the problem of screen saver timeout. As a fix, we should restart the system with a clean boot. It will boot our system only required driver, apps, and service.
- Press the Windows + R keys together to launch the Run dialog box.
- Type msconfig and hit the Enter button to open System Configuration.

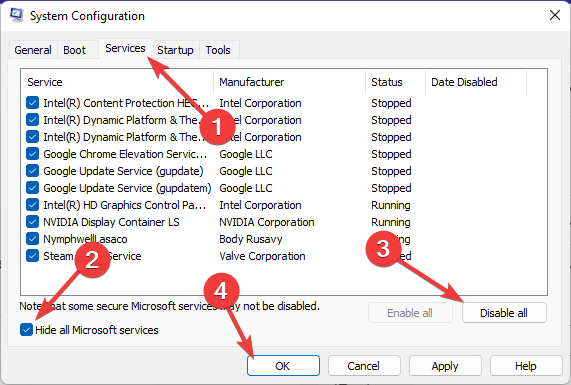
- Go to the Service menu, and tick the box of Hide all Microsoft services.
- After that, click on Disable All and select OK.

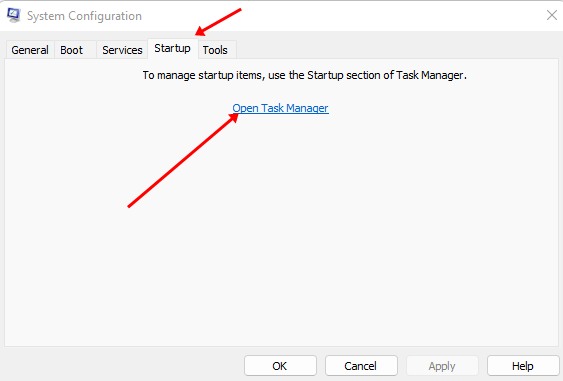
- Next, head over to the Startup menu, and click Open Task Manager.

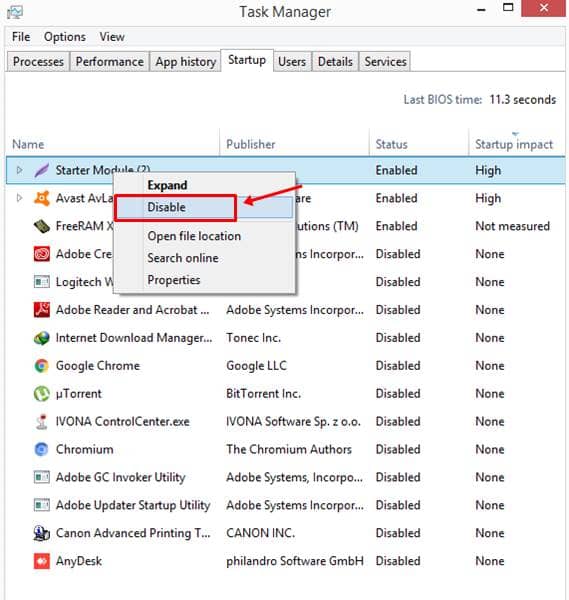
- On Task Manager, right-click on any third-party app and select Disable. Here you need to disable all third-party apps and close Task Manager.

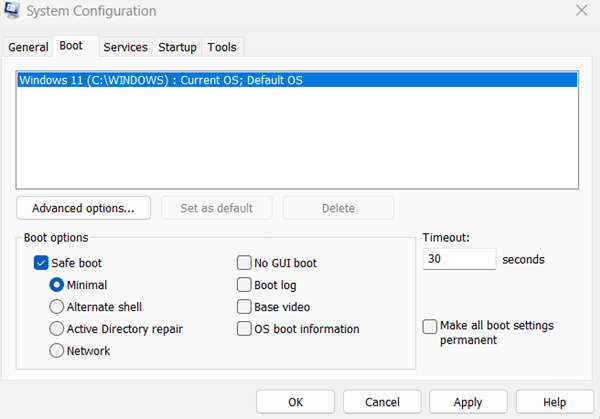
- Now back to System Configuration and go to the boot menu. Here select the tick box of Safe Boot, and apply.

- Thereafter, restart the system, it will remove all third-party apps except only the required ones.

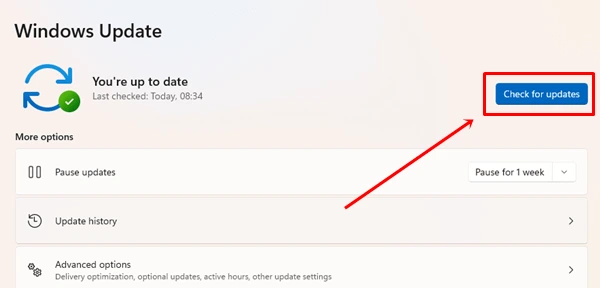
6. Update Your Windows
Updating Windows is an easy solution to fix the functionality of lock screen timeout. As it helps to remove bugs and glitches.
- Open the Settings app > Windows Update.
- Now download and install the update if have any. Otherwise, click on Check for Update to make it available to download.

Conclusion
A malfunctioning lock screen timeout can introduce several problems, system security is the most important as it locks the screen automatically in your absence. However, if you’re experiencing such a problem, our easy-to-follow fixes surely help you to make it work.


