You can put your PC to sleep to save power when not working. When you put your PC to sleep, all the apps and services on your PC will go to sleep and you will be able to resume the work when you get back to your PC. This will save you the hassle of turning on your PC and starting all the applications again while saving the battery of your PC.
Many users have reported that their Windows 11 PC keeps going to sleep randomly. This can be frustrating when your PC goes to sleep automatically while you are in the middle of something important. There can be various reasons that can cause this issue, such as misconfigured power plan, pending updates, outdated graphics driver, etc.
Such issues are common with Windows 11 and as common are the reasons for facing these issues, so are its fixes. Here are some troubleshooting steps to fix this issue.
Fix Windows 11 PC Going to Sleep Randomly
Frustrated with your PC going to sleep mode automatically? Let’s discuss how you can fix this issue.
1. Change Power Plan
If you have been facing this issue, it is likely due to a misconfigured power plan. You can change your power plan to more sleep time to fix this issue. To do so, follow the steps given below-
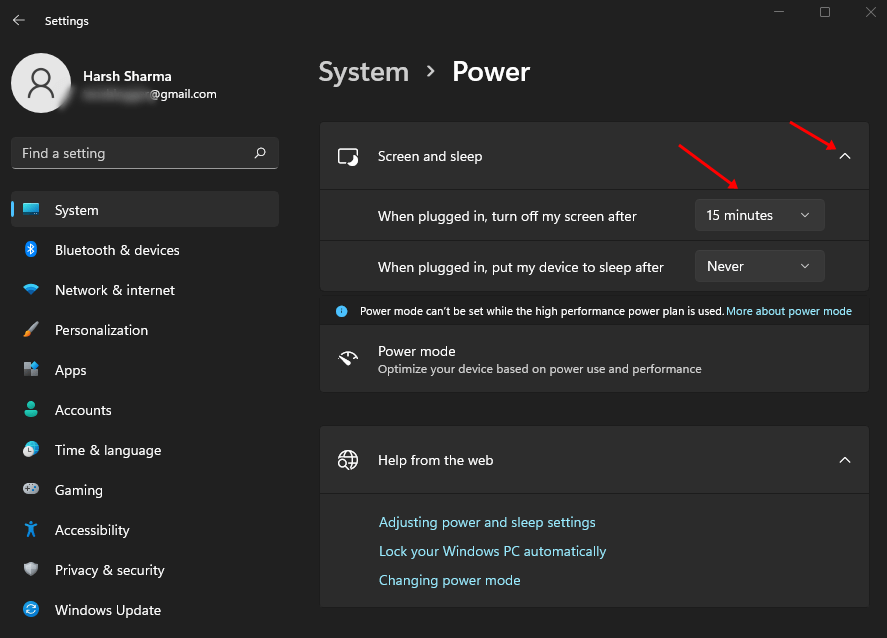
- Press the Windows + I key combo and this will open the Settings app.
- Click on System and then on Power & Battery option.

- Expand the Screen and Sleep section by clicking on the arrow next.
- Click on the drop-down menu next to ‘On Battery Power, put my device to sleep after’ and select 10 minutes or 15 minutes. Do the same for ‘When Plugged in put my device to sleep after.’


2. Update Windows
Pending updates may also cause this issue. Updating your Windows should help solve this issue.
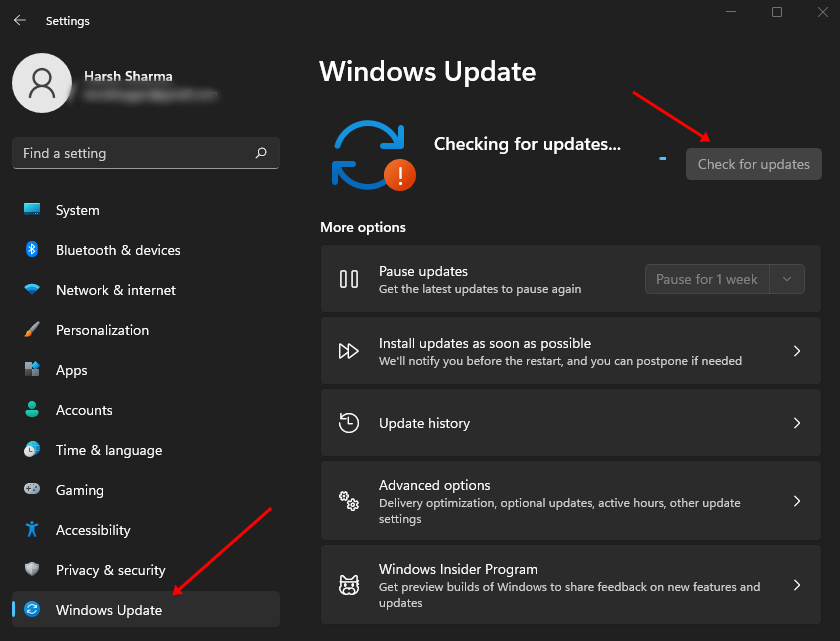
- Press the Windows key, search for Check for Updates, and open it.
- Here, click on the Check for Updates button to search for updates.

- Download and install all the updates available here and then restart your PC.
3. Run Power Troubleshooter
If you have been facing any power issues on your PC then you can try running the power troubleshooter to fix it. Given below are the steps to run the power troubleshooter-
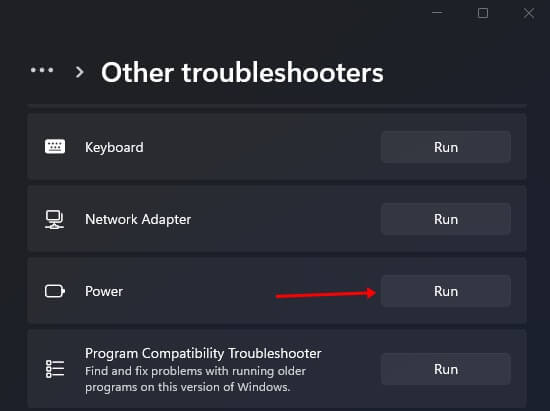
- Press Windows key and click on the Settings icon.
- Under System, click on Troubleshoot option, and then click on Other Troubleshooters.

- Next, click on the Run button next to Power, and follow the on-screen instructions to run Power Troubleshooter.


4. Disable Hibernation
If hibernation is enabled on your PC then that may also cause this issue. Disable hibernation to fix Windows 11 PC going to sleep randomly. To do so, follow the steps given below-
- Press the Windows key, search for Edit Power Plan, and open it.
- Here, click on the Change Advanced Power Settings option.
- Double-click on Sleep to expand it, and then expand Hibernate after.
- Set On Battery and Plugged in to Never.
5. Update Graphics Driver
Outdated graphics drivers can also cause this issue. Updating the graphics driver should fix the Windows 11 going to sleep randomly.
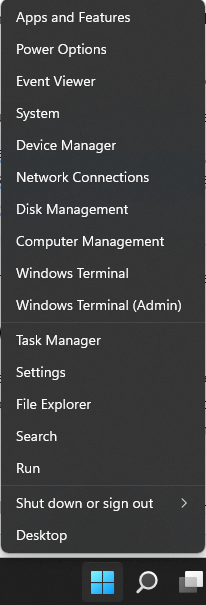
- Right-click on the Start icon and then click on Device Manager.

- Expand Display Adapters by double-clicking on it.
- Right-click on your graphic driver and then click on Update Driver. Now, click on Search Automatically for Drivers to update the driver.

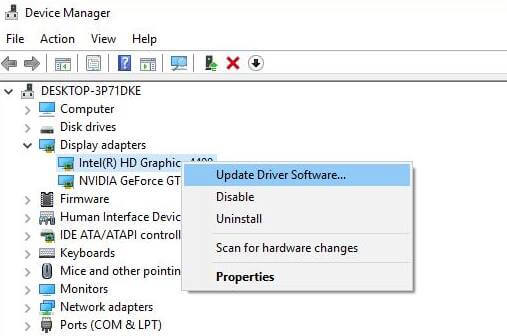
Note- If there are two drivers here, then update both of them.
6. Change your Screen Saver Settings
Another thing that you do is change the screen saver settings. Follow the steps given below to do so-
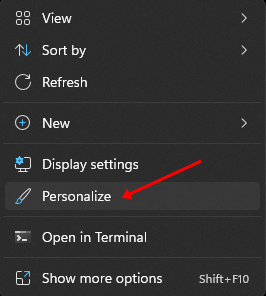
- Right-click on your desktop and then click on Personalize.

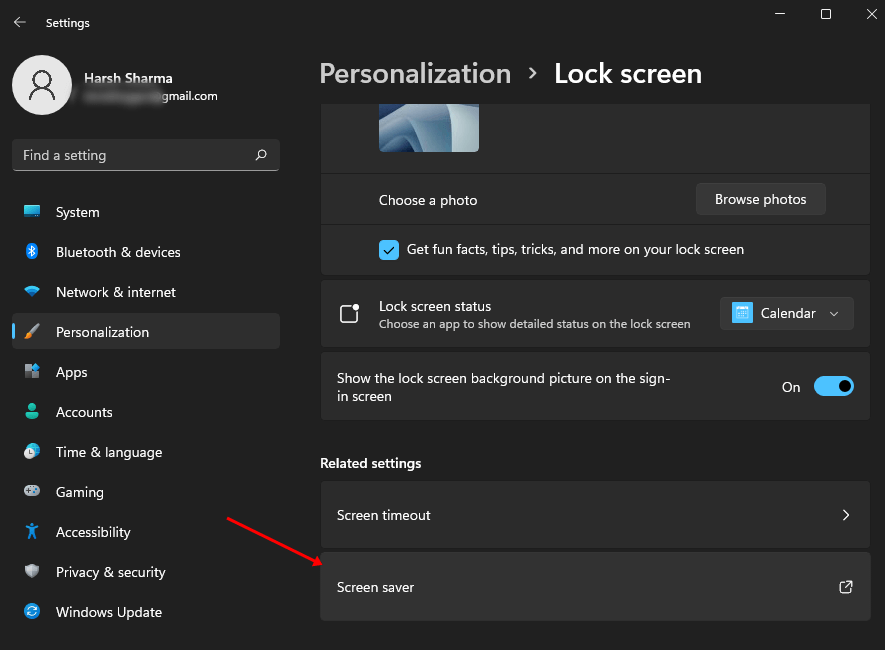
- Click on Lock Screen and then click on Screen Saver.

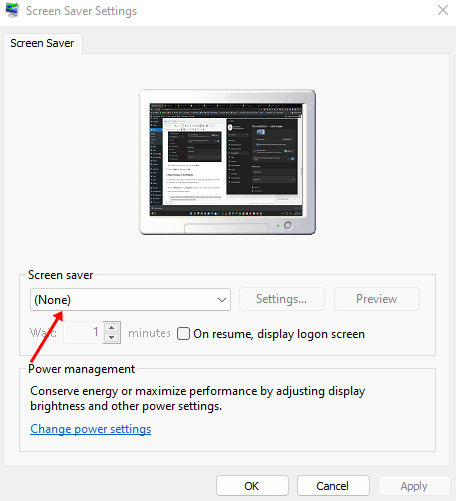
- Now, click on the drop-down menu and select None.

- Click on Apply and then click on OK.
7. Make Changes to the Registry
You should follow this method if you start facing this issue after upgrading from Windows 10 to Windows 11. Given below are the steps to do so-
- Press the Windows key, type Regedit, and click on the very first option that appears.

- Here, head to the following address-
-
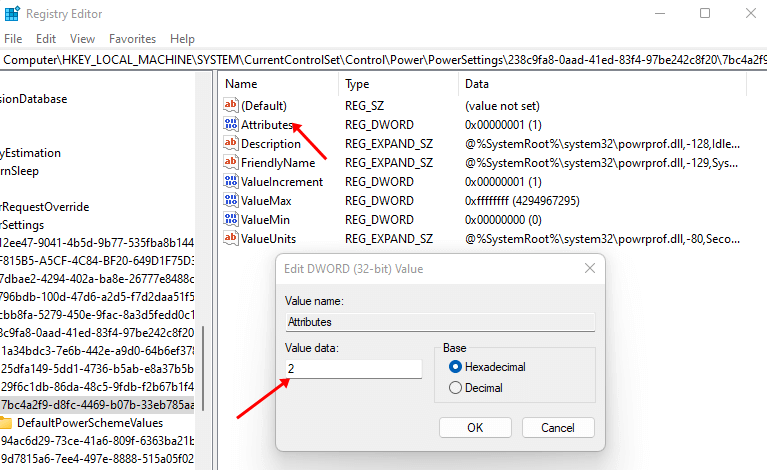
Computer\HKEY_LOCAL_MACHINE\SYSTEM\CurrentControlSet\Control\Power\PowerSettings\238c9fa8-0aad-41ed-83f4-97be242c8f20\7bc4a2f9-d8fc-4469-b07b-33eb785aaca0
-
- On the right side, double-click on Attributes to edit it.
- Set the Value Data to 2 and then click on OK.

- Close the Registry Editor and restart your PC.

Final Words
The above steps should help fix Windows 11 going to sleep randomly. In case you are still facing this issue on your laptop, then we suggest you keep magnetic devices away from your laptop.
Laptops have a magnetic sensor to detect if you have closed the lid and put your PC to sleep. When a magnetic device comes closer to your laptop, it can have fault detection and put your laptop to sleep.


