We all know that every update comes with some improvements and some new bugs. A yellow tint issue on Windows 11 is also one of the most common problems that most of us have faced. If you are facing this problem and came here for the solution, you are at the right place.
Last night, I was using my computer and suddenly noticed a yellowish effect on the screen, which is very weird for someone who doesn’t know about it. To solve this problem, I will provide you with some best methods that you can use to fix it.
All the methods mentioned in this article are 100% working and effective. There are some reasons behind this yellow screen, which we will discuss and also give their solutions. So, without any further delay, let’s check out the list of best ways to fix yellow issues on Windows 11 screen.
How to Fix Yellow Tint Issue on Windows 11 Screen
In this article, we have provided ways to fix the yellowing issue. All of the methods mentioned are proven to work, so be sure to read each method properly.
1. Restart Windows 11
Restart your Windows 11 because sometimes, due to glitches and bugs, there may be issues with the graphic driver, which causes a yellow tint on the screen.
This can also happen after updating a graphics driver and requires a restart for the changes to be properly applied. To restart the device, press Ctrl + F4, select the Restart option, and then press Enter.
2. Hardware Issues
If restarting the device doesn’t work, check for any hardware issues before moving on to the solution. yellow tint on the screen may appear due to a damaged screen or defective display cable. Check your monitor or laptop screen for any damage or cracks. If you find any, consider replacing the screen.
You can also detect this during the Windows startup process, if the yellow color is present at the beginning of the Windows booting process, it may be caused by screen damage or a faulty display cable.
In that case, consider replacing the display cable with the new one. If the yellow color appears only after Windows 11 starts properly, move on to the solutions below.
3. Turn Off the Night Light in Windows 11
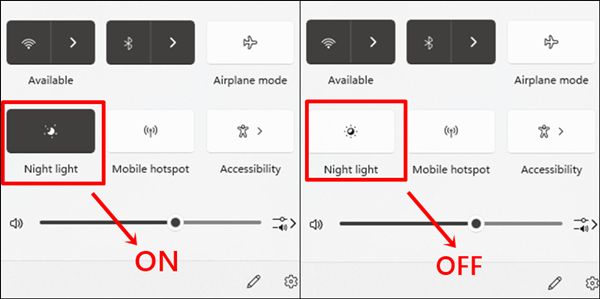
If there is no physical damage to your screen, the first thing you need to do is check the Night Light feature. There is a possibility that you have accidentally turned on the Night Light feature, causing a yellow tint on the screen. Follow the steps below to disable Night Light mode.
Turn Off the Night Light via Quick Settings
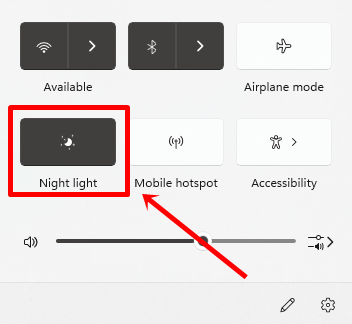
- Press Windows + A, and you will see the quick settings window on the bottom left side of the screen.
- Locate the Night Light option and check if it is turned on or off.
- If it is active, click on it to turn it off.
Turn Off the Night Light via Settings
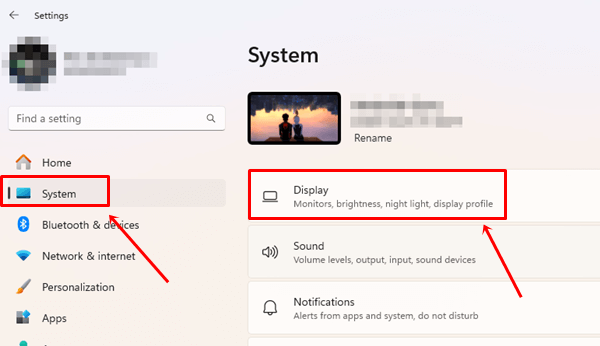
- Press the Windows + I buttons to open the Settings app.
- Navigate to System > Display.
- Click on the Night Light toggle button to turn it off.
4. Change the Color Profile of Your Display
There is a possibility that the problem is related to the Windows color profile. To resolve this issue, follow the steps below to set up a new sRGB profile.
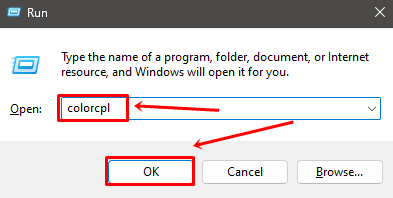
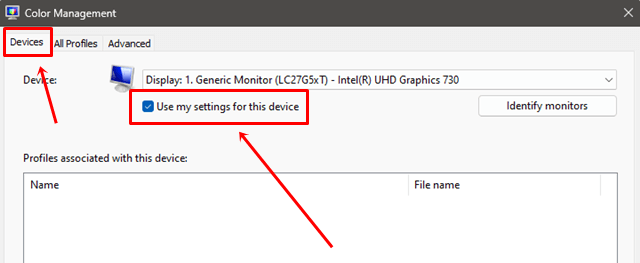
- Press Windows + R to open the Run dialog box, type COLORCPL, and click on the OK button.
- Go to the Device tab, then check the Use My settings for this device option.
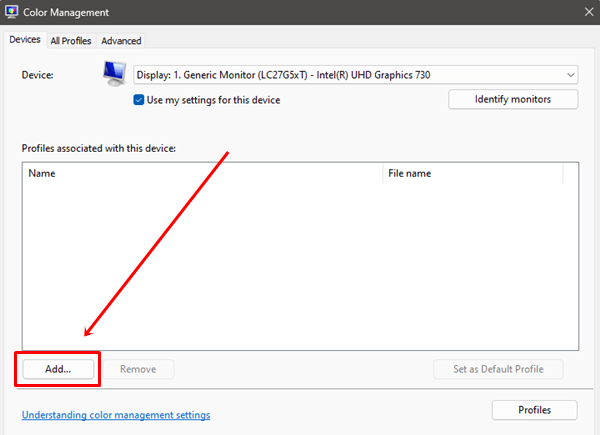
- Now the Add button will be open, simply click on it.
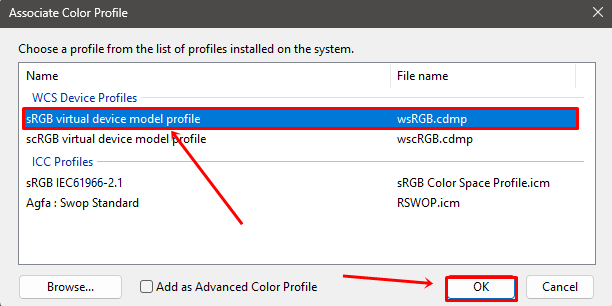
- In the list, select the sRGB virtual device model profile option and click on OK.
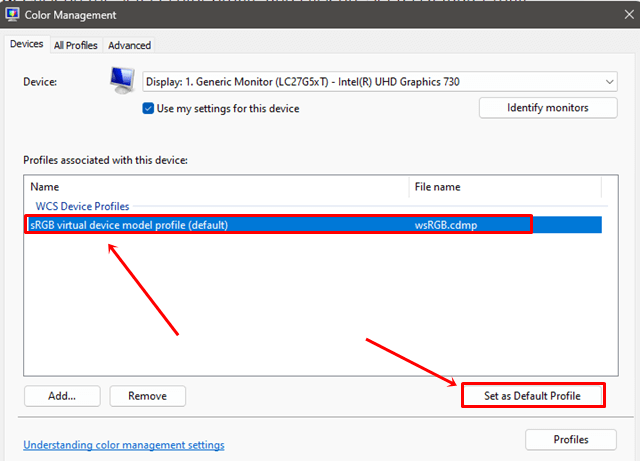
- Now select the sRGB virtual device model profile and tap on the Set default profile button.
Close the color management window and check if this solves the problem. If not, try the methods below.
5. Calibrate the Display Color
Calibrating display color ensures that the colors displayed on a monitor are accurate and consistent. If you are still facing a yellow tint issue, this method may resolve the problem by improving color accuracy.
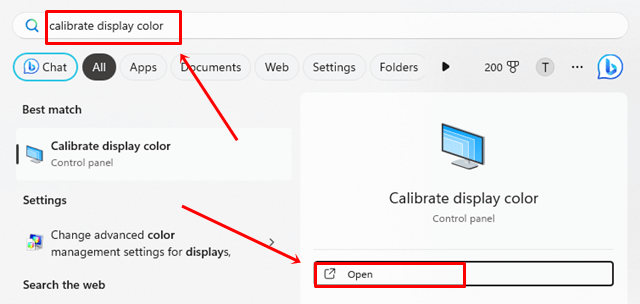
- Press the Windows key and search for calibrate display color in the search bar, then click to open.
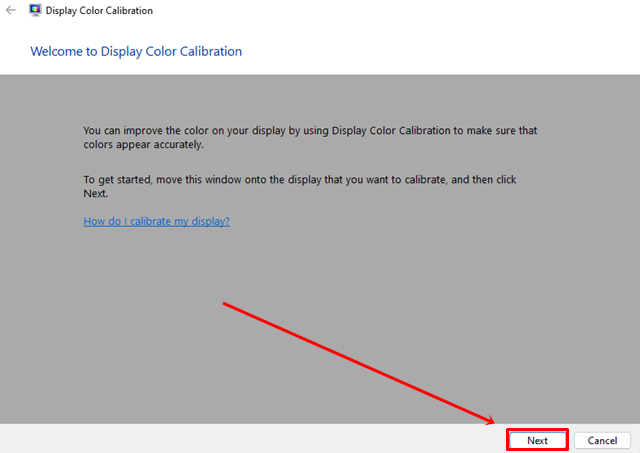
- Click the NEXT button.
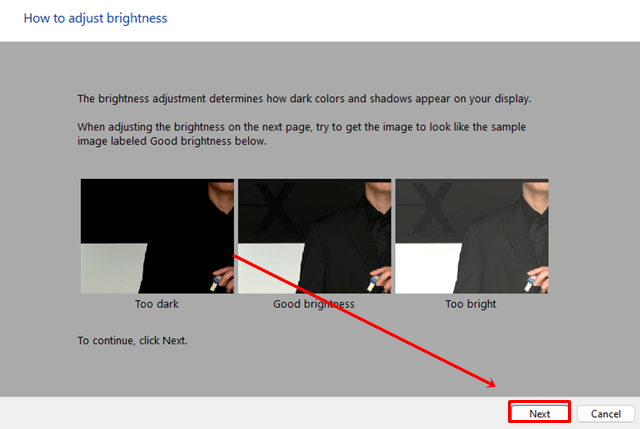
- Follow all on-screen instructions to set the display colors.
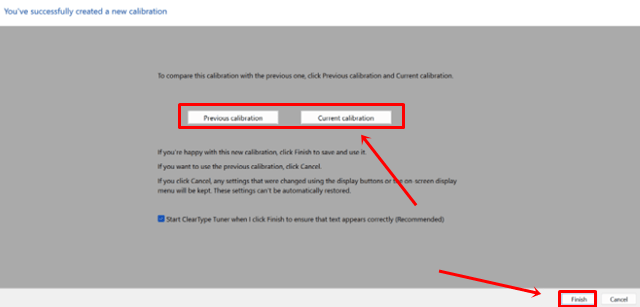
- In the end, compare the changes between your current calibration and the previous one, then click the finish button.
6. Update Graphic Driver
Outdated graphics drivers can also cause the screen to turn yellow. Check if your graphics driver is up to date. If not, it might be the reason you are seeing a yellow tint on your screen.
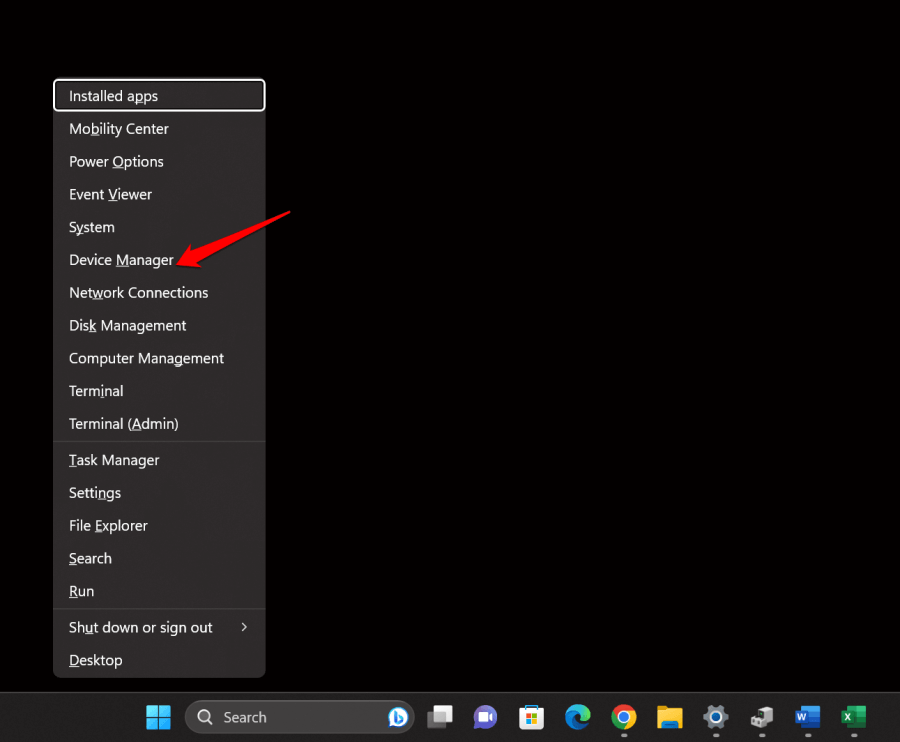
- Press Windows + X and click on Device Manager.
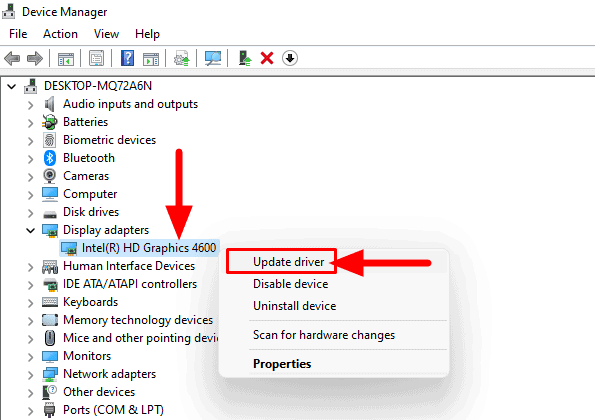
- Open the Display adapters option then right-click on the graphic driver and click on Update driver option.
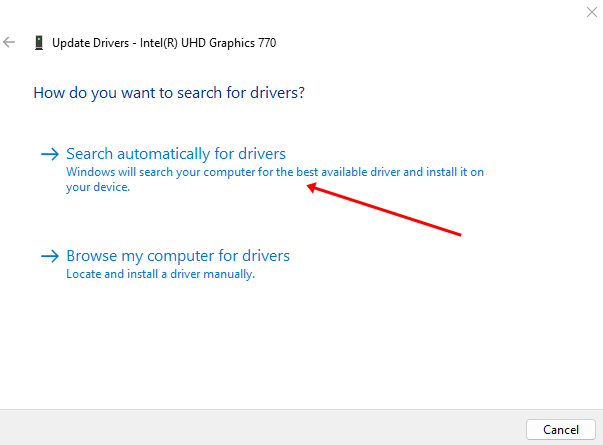
- Click on Search automatically for drivers. Make sure that your computer is connected to the internet.
Now, it will automatically find the best driver and install it on your computer. Once the process is complete, restart your computer.
7. Connect Another Monitor
If none of the methods works, try connecting to another monitor. If you have not noticed any damage on your monitor, it does not mean that your monitor is working perfectly. Sometimes problems occur from internal parts.
To confirm, connect a second monitor. If you are facing this issue on your laptop screen, consider visiting a service center or consult a local technician.
Conclusion
That’s all for this guide. I hope you have successfully fixed the yellow tint issue on Windows 11. We have tested all the methods before creating this informative guide. If you found this article useful and informative, please share it with others so that they can also solve the problem or know what to do in that situation. If you have any questions, feel free to ask in the comments section, and we will surely help you out.

