However, as we are in such a situation right now, locked in our homes where the internet has become a necessity in our daily lives. Moreover, somehow, we all come across such a situation in our life in which, at some point, we fail to connect with the internet world because of stored DNS cache. So, if at some point you are wondering how to flush the DNS cache or settings on your Windows 11 PC, this means that you are not familiar with this term before.
If this is the case, you came across the right article. Yes, in this article, we are going to discuss what is DNS Cache and What does flushing DNS cache does? Moreover, We Share some amazing methods using which you can easily able to flush DNS cache on your Windows 11 system. So, let’s see them.
What Is DNS?
 The DNS is an index that matches all domain names on the internet with their respective IP address, much like a phone book matching people to phone numbers. Domain Name Server (DNS) cache flushing might appear to be a complex process, but in reality, it requires little to no technical experience.
There are several situations in which clearing your DNS cache can be useful to remove the connectivity issue on your device. But, not many users are used to this. So, if you are one of those, then check out the methods we have discussed below. But, before that, let’s know a little bit more about DNS.
Also Read- Windows Networking Commands You Should Know
Why Flushing DNS Is a Very Crucial Thing?
There is no harm with the DNS as it won’t store any information, but at the same time, it does contain all the information of the websites you visited last time. So, if anyone entered into your DNS cache, I don’t think it a much tough task to do, then your privacy might be in danger. Also, this may give cybercriminals an invitation. So, it is very important to Flush DNS regularly to ensure your privacy and security.
Methods To Flush DNS In Windows 11 PC
There are many methods using which you can Flush DNS on your Windows 11 PC. But, here, we have mentioned the simplest methods that anyone can perform even without no-technical knowledge. So, let’s check them out:
#1. Use Run Prompt
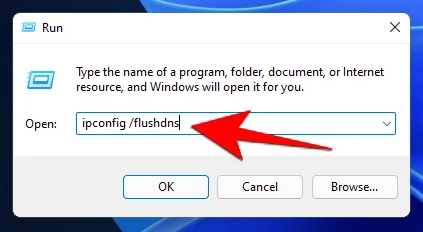
You can use the Windows 11 Run prompt box to flush the DNS on your system. So, here are the steps to use it:
- First of all, open the Run Prompt by pressing the Win+R button altogether.

- After that, use the box and paste the following command:
ipconfig /flushdns
- That’s it. Now, your device’s DNS cache will be flushed.
#2. Use Windows 11 Command Prompt
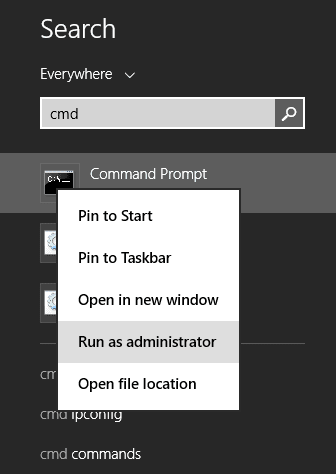
The second Windows 11 utility that you can use to flush the DNS on your system is CMD. So, let’s check out how to utilize it:
- Firstly, run the command prompt using the admin privileges.

- After that, execute the following command:
ipconfig /flushdns
- Once you have performed the above steps, it will give you a confirmation message that Successfully flushed the DNS resolver cache.


#3. Use Windows PowerShell
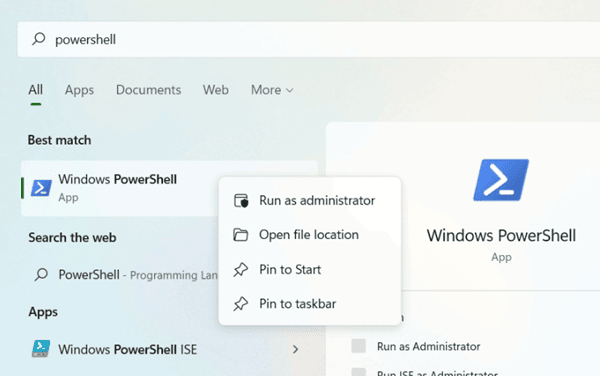
Now, this is our final recommendation. So, in case you won’t get assured that the above two methods worked for you, then you must use PowerShell to flush the DNS. So, let’s see how:
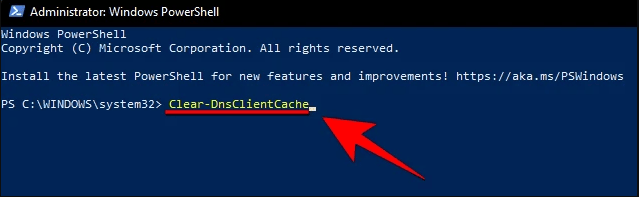
- Initially, search for the PowerShell on your Windows search bar and open the PowerShell with admin privileges.

- After that, execute the command: Clear-DnsClientCache

- That’s it. Now, once you get a confirmation that the DNS cache data has flushed, which means that you have successfully flushed DNS.
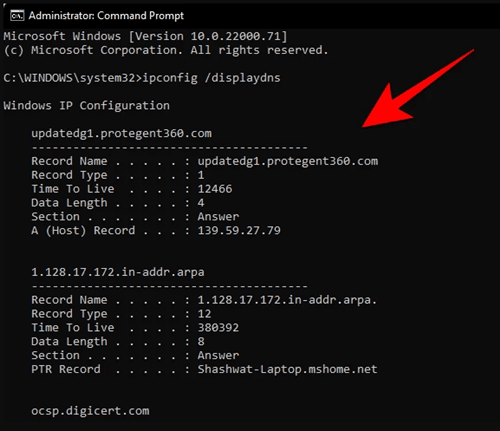
Is There Any Way to Check the Current DNS Cache?
Well, of course, there’s a way using which you can check the current DNS cache on your Windows 11 PC. So, let’s check out the steps for that:
- First of all, open the Command Prompt using admin privileges.
- After that, execute the following command:
ipconfig /displaydns
- Now, this command will show you the current DNS cache data.

So, that’s it for now on how to flush DNS on Windows 11 PC. We hope the above mentioned methods have helped you. However, use our comment section and let us know if you have any suggestions for us.


